Summit
Attack
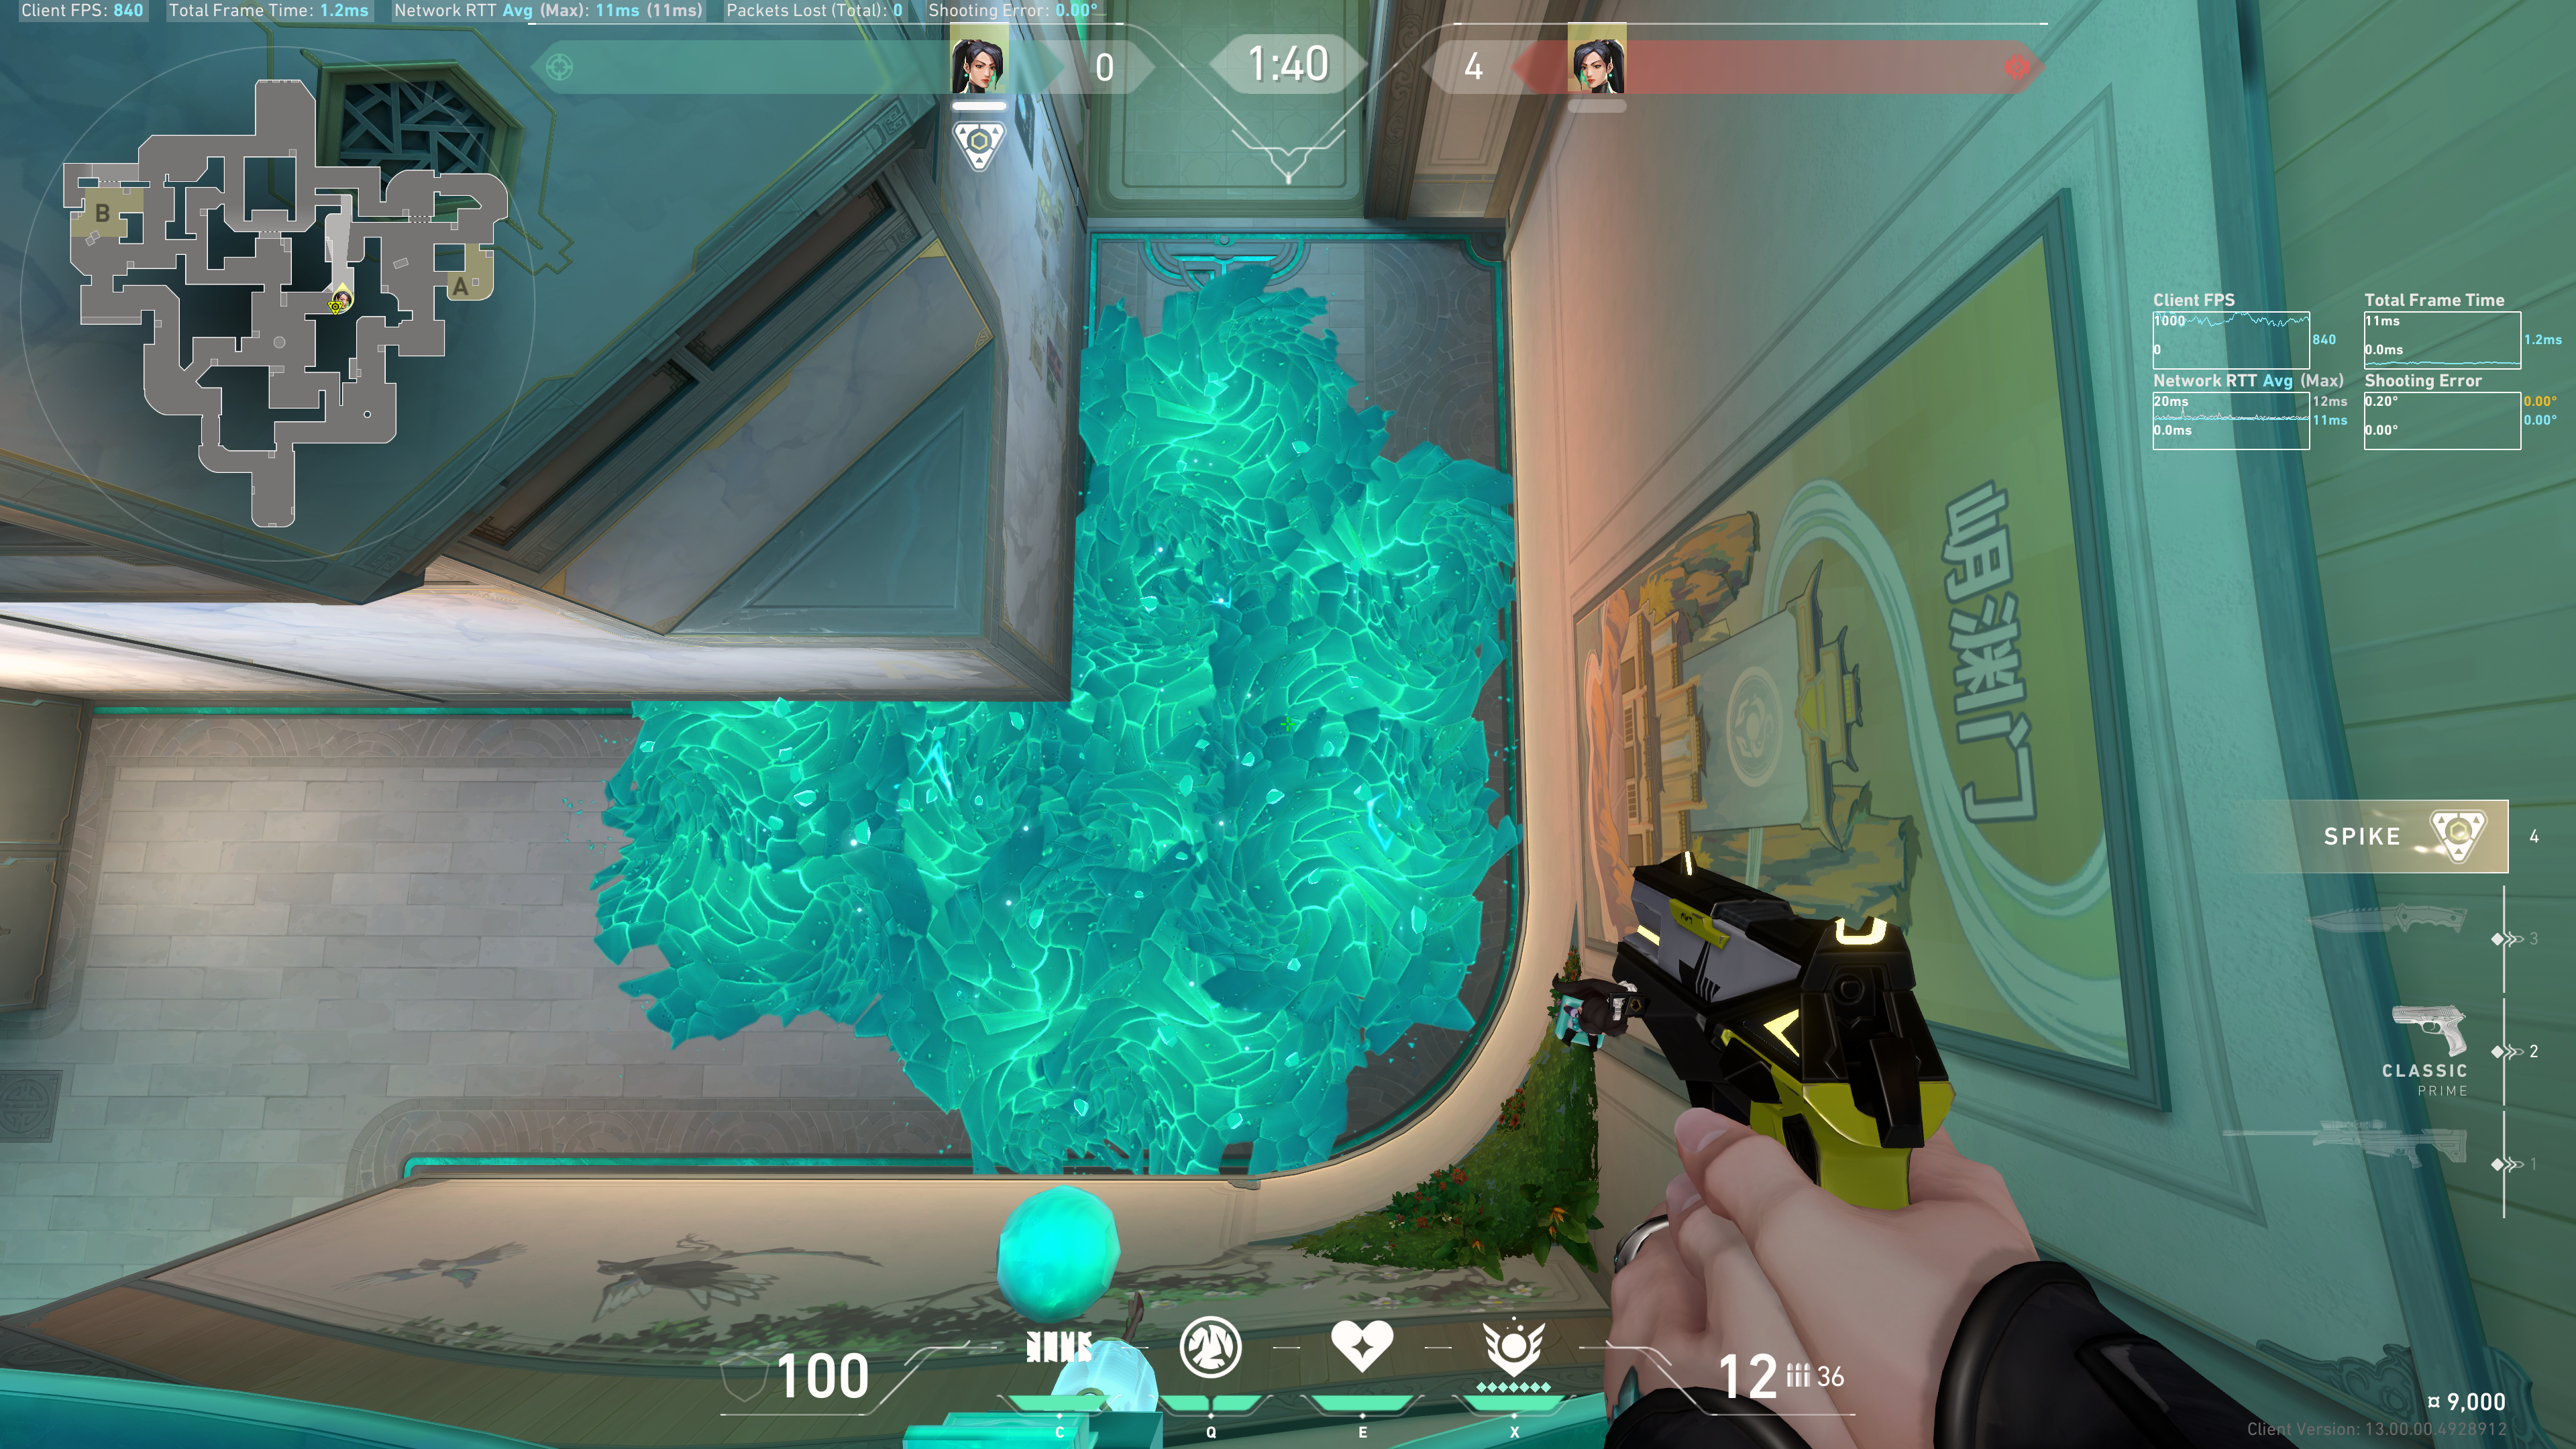
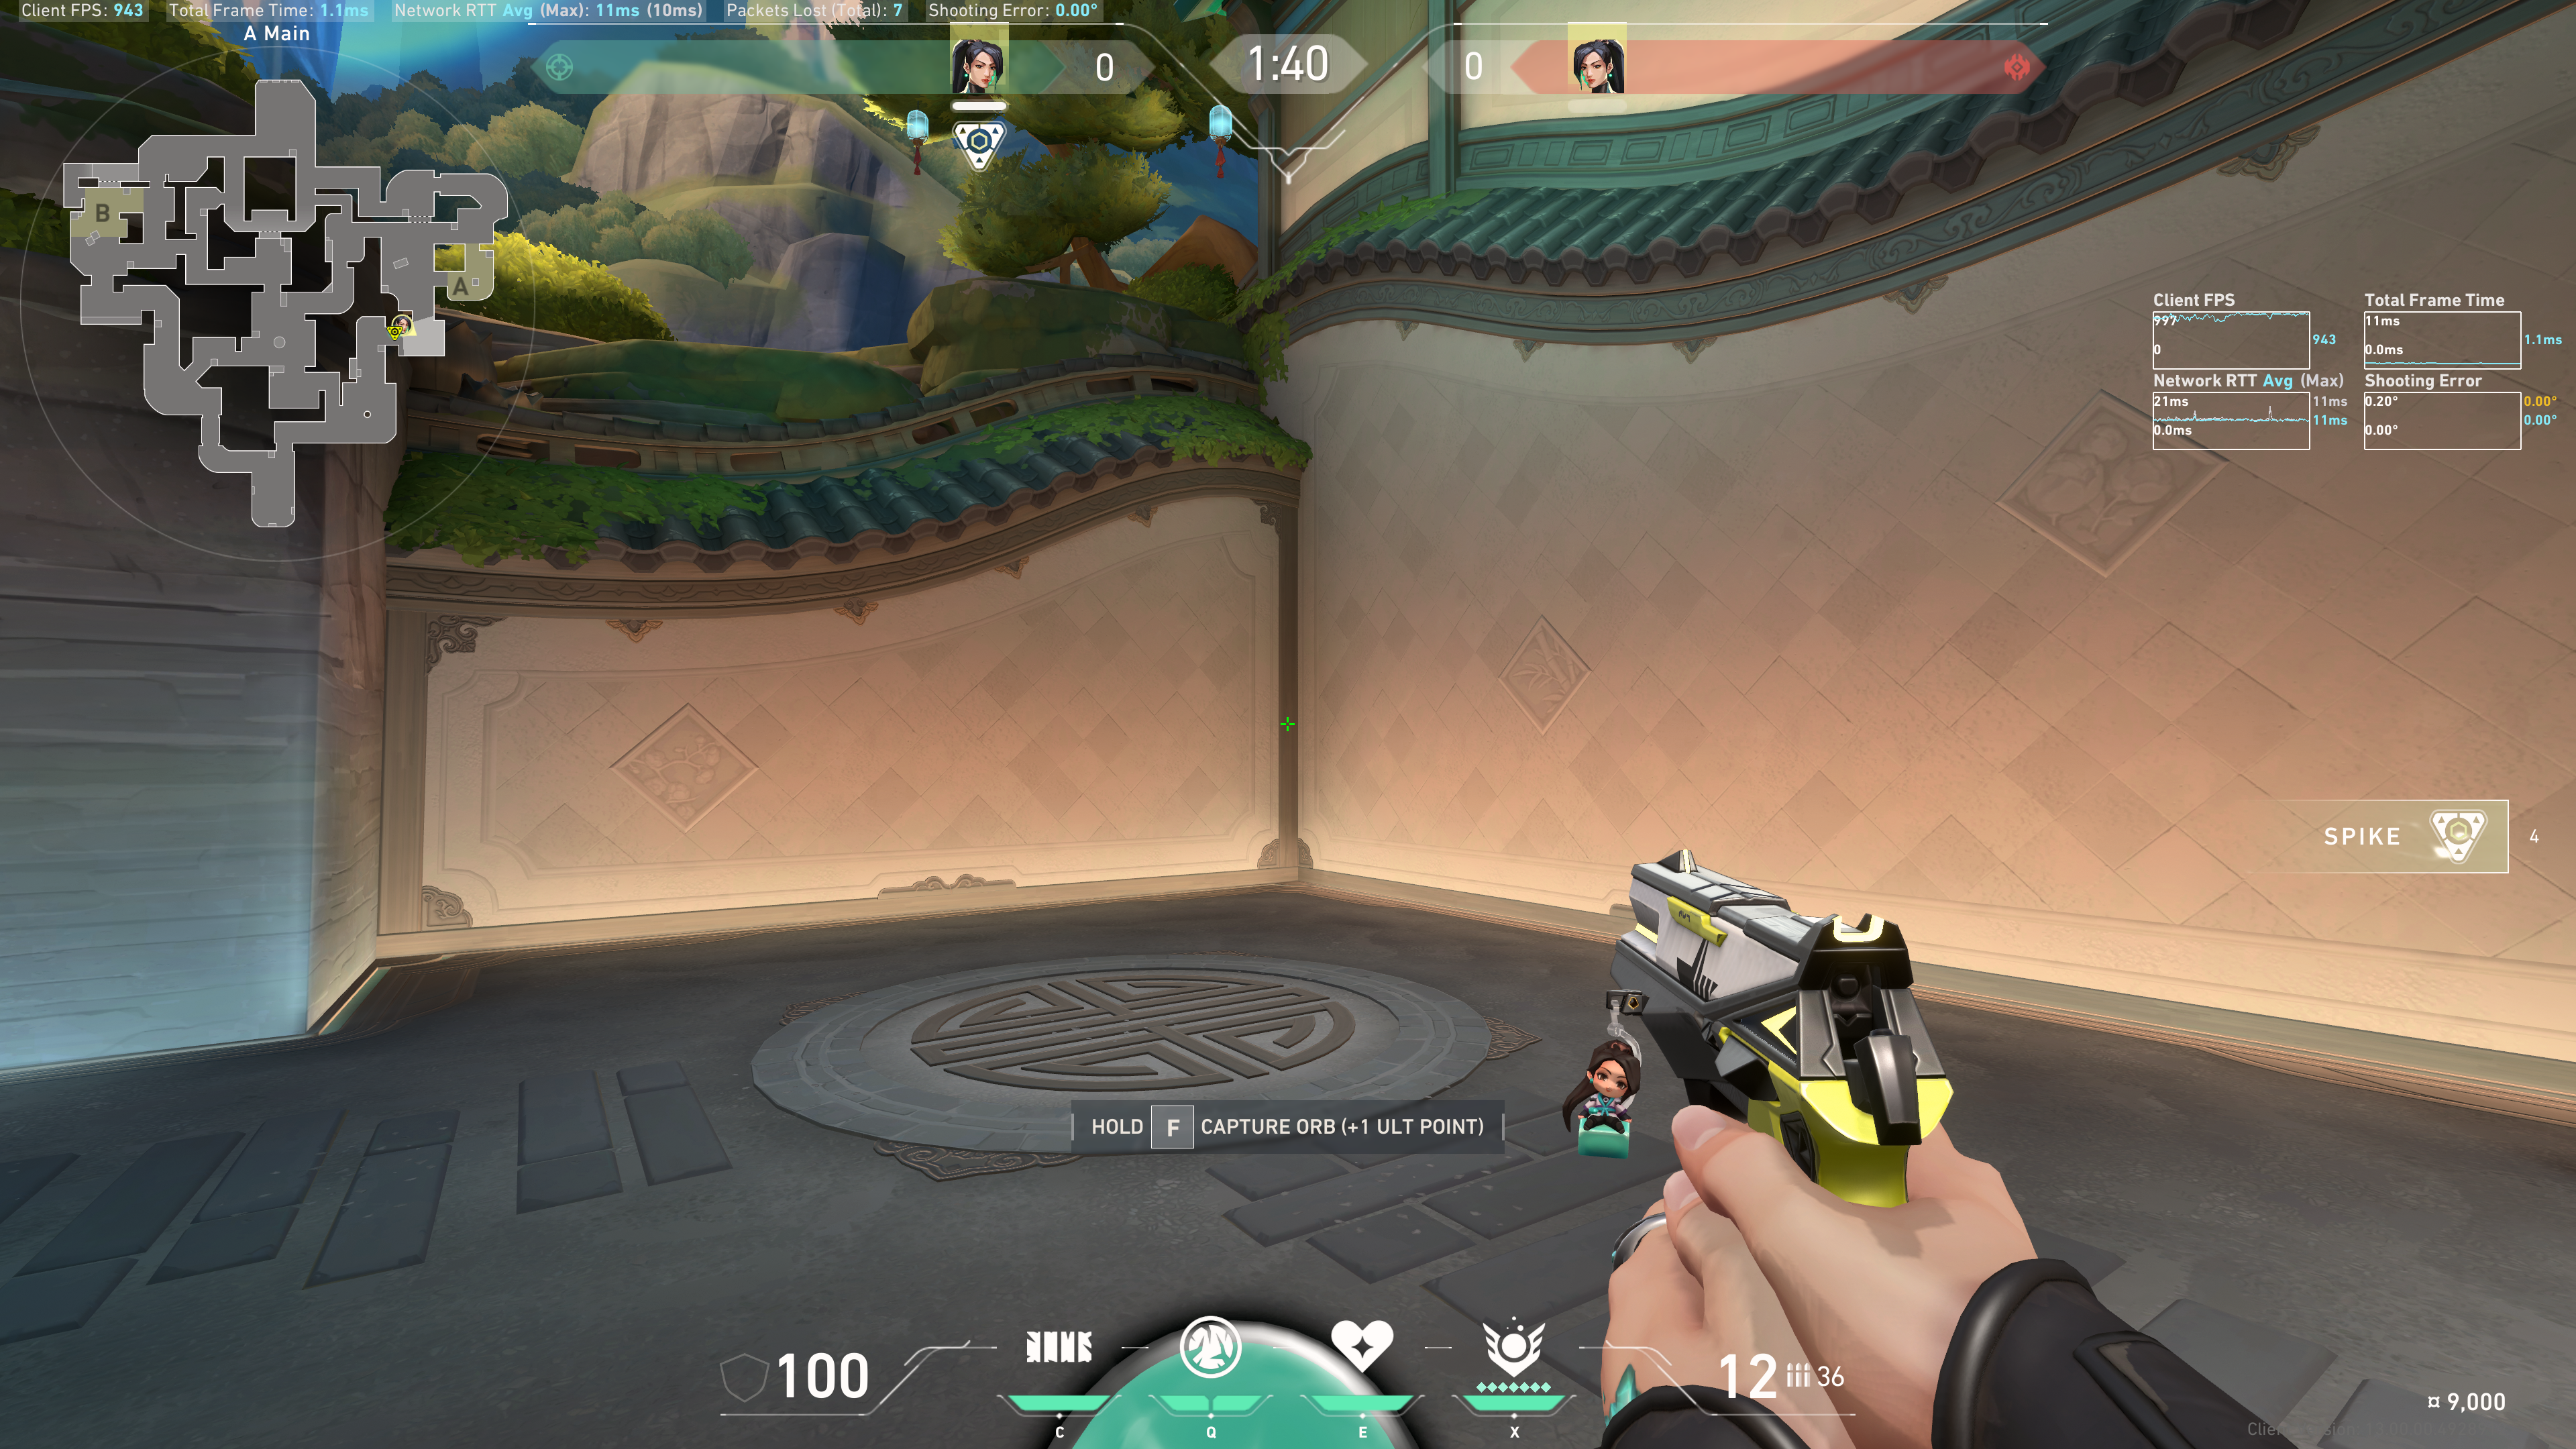
A Site
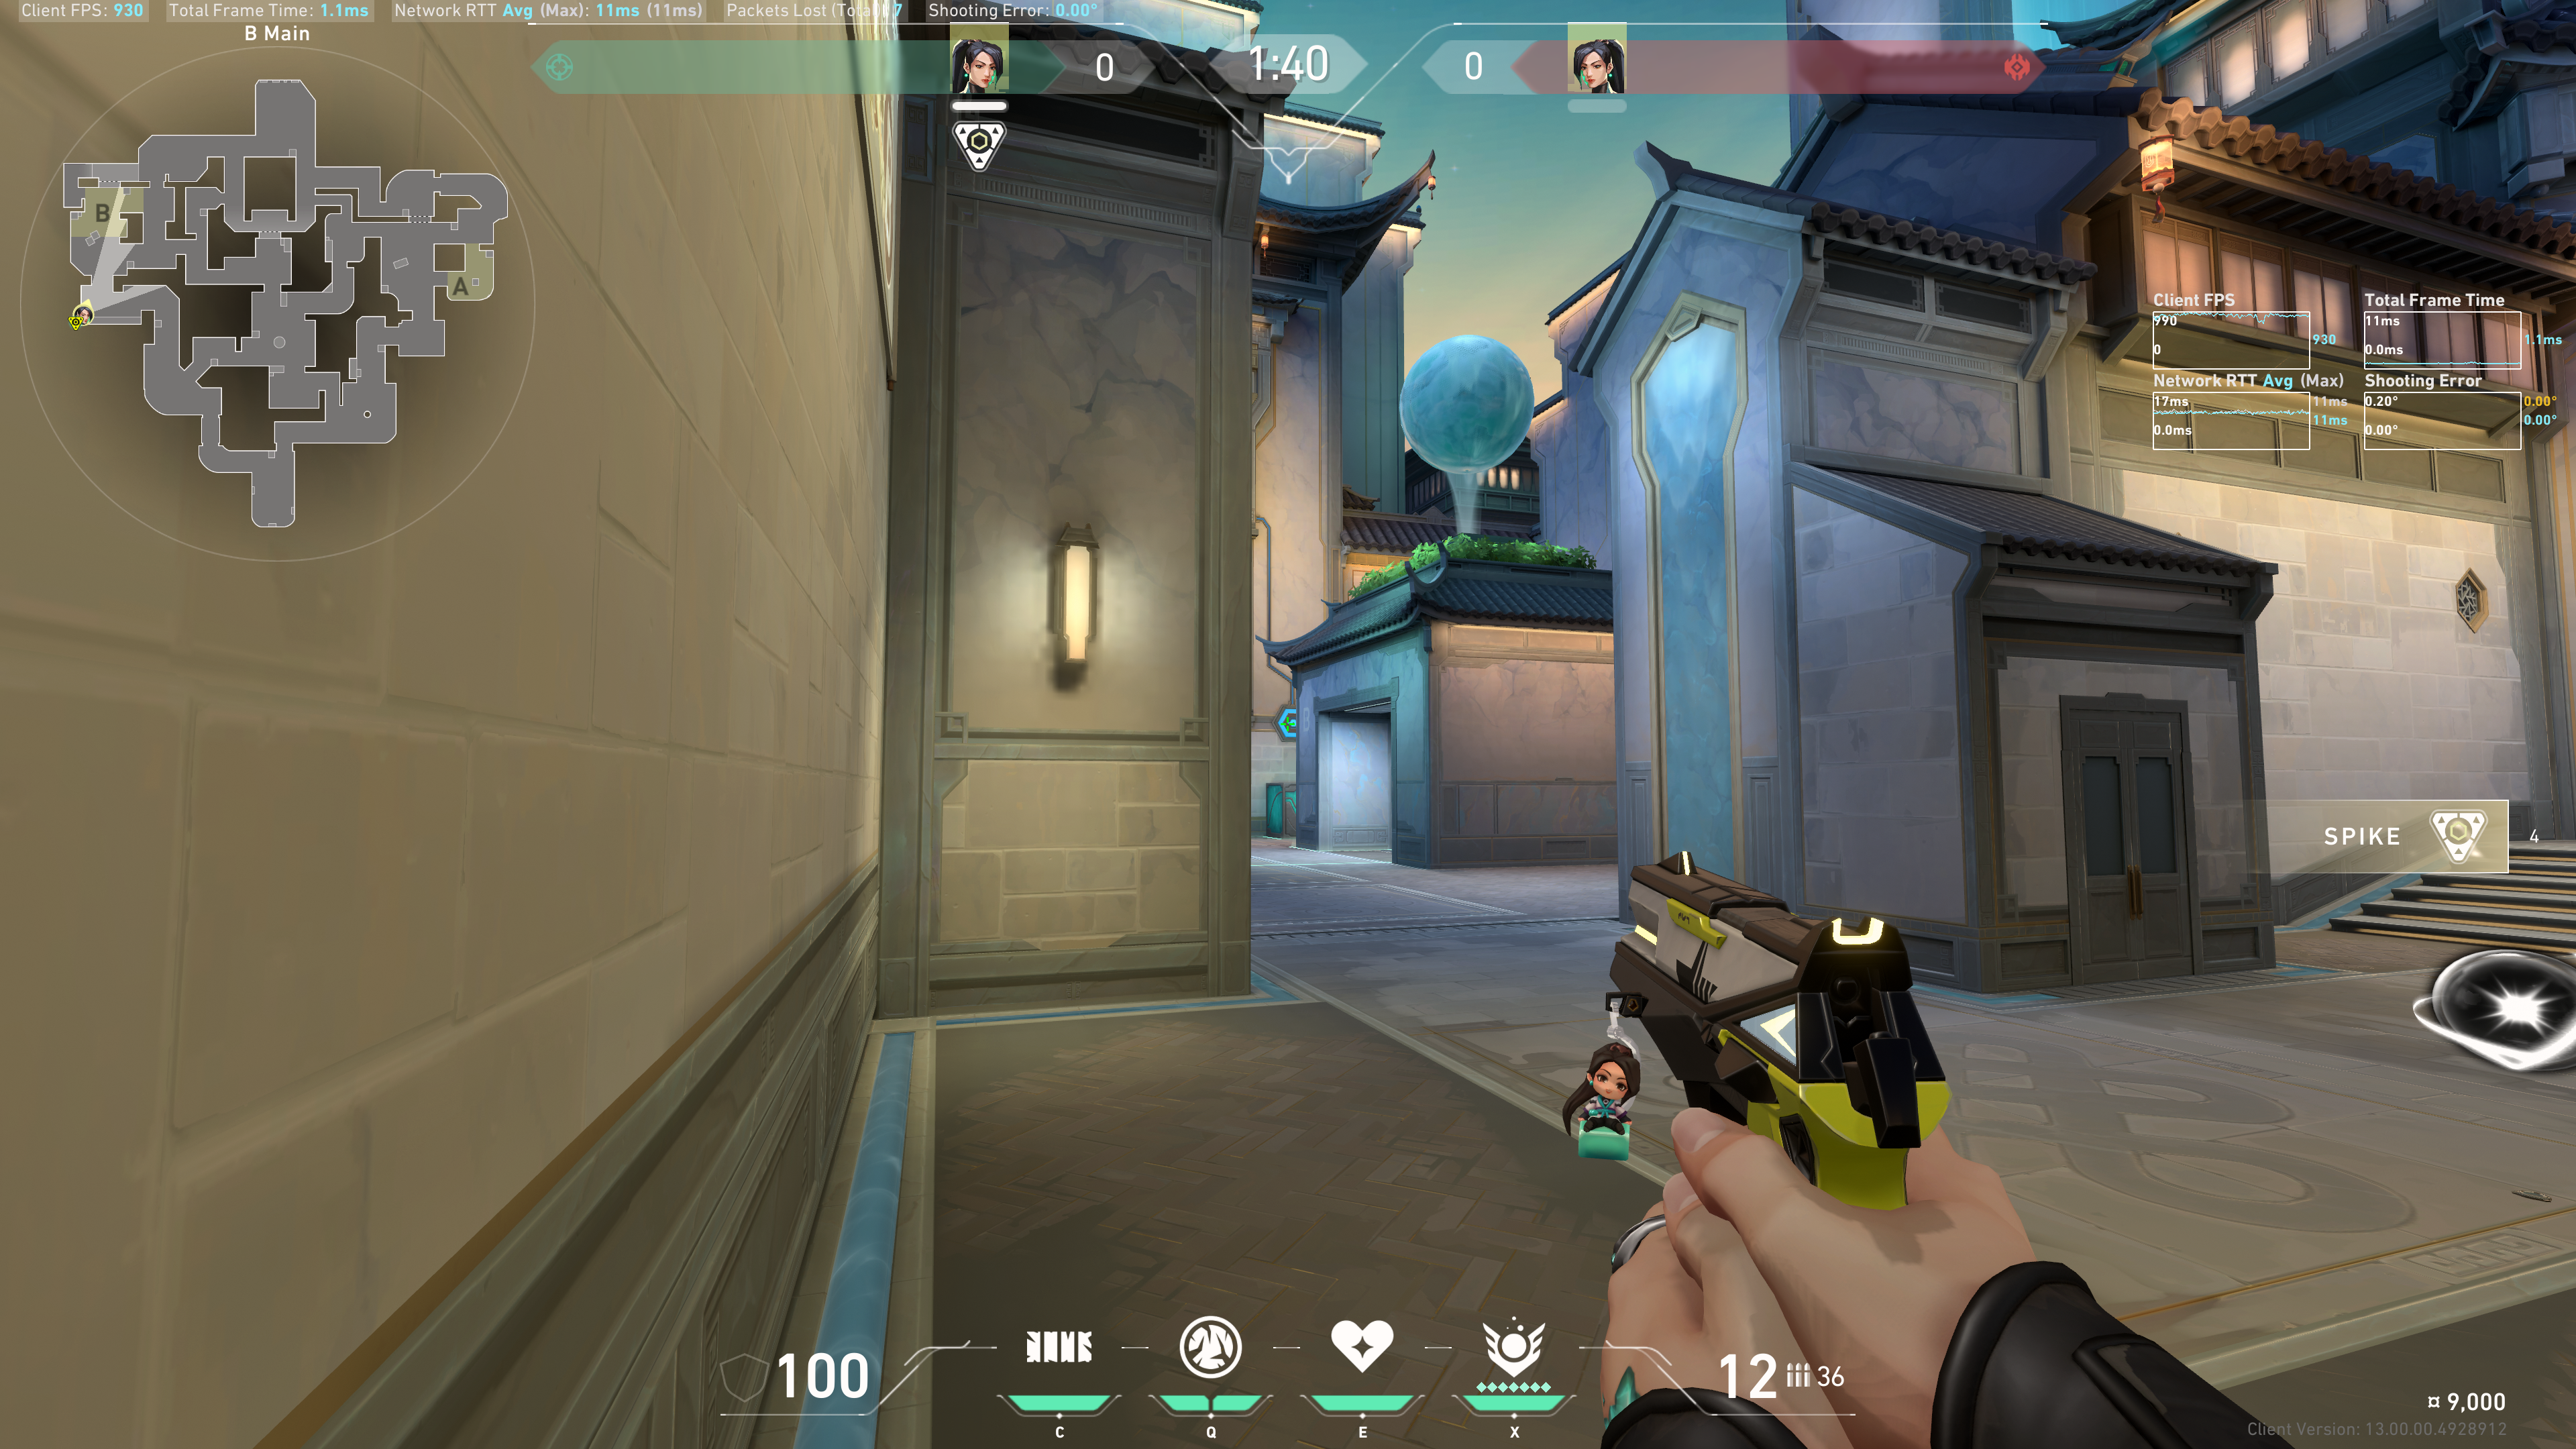
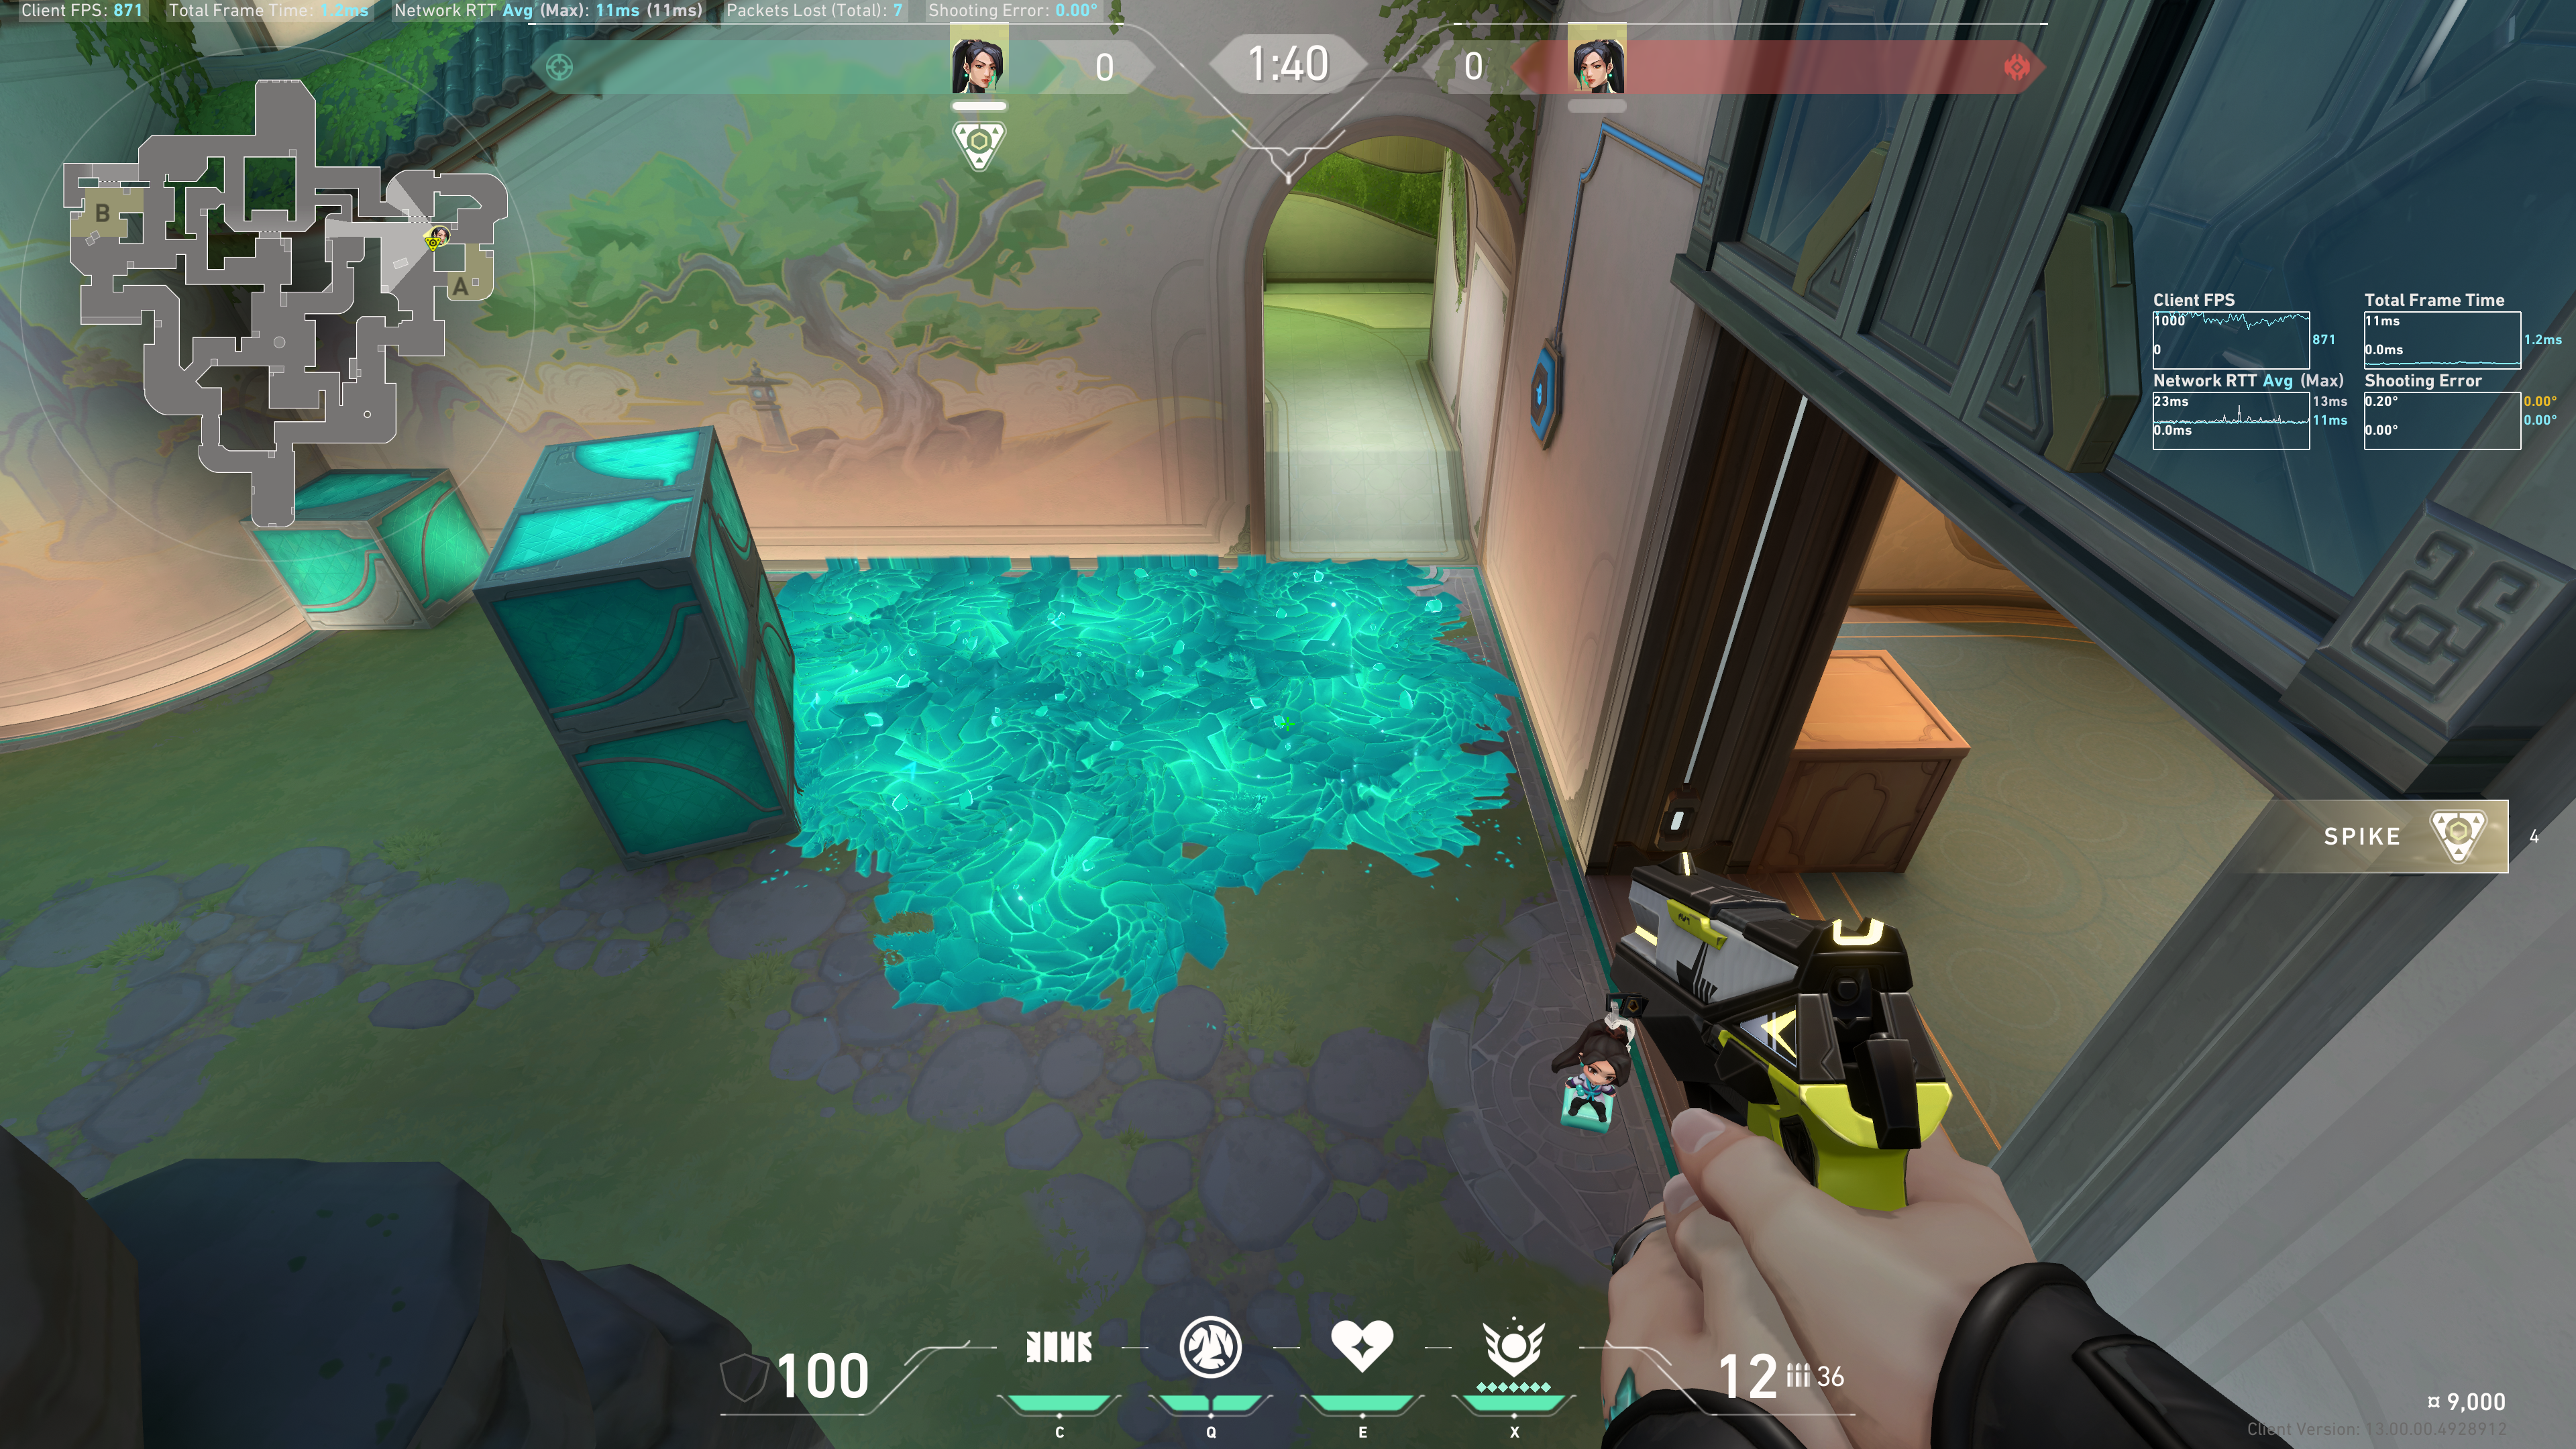
Tuck into the corner of this wall:
A Site Dice
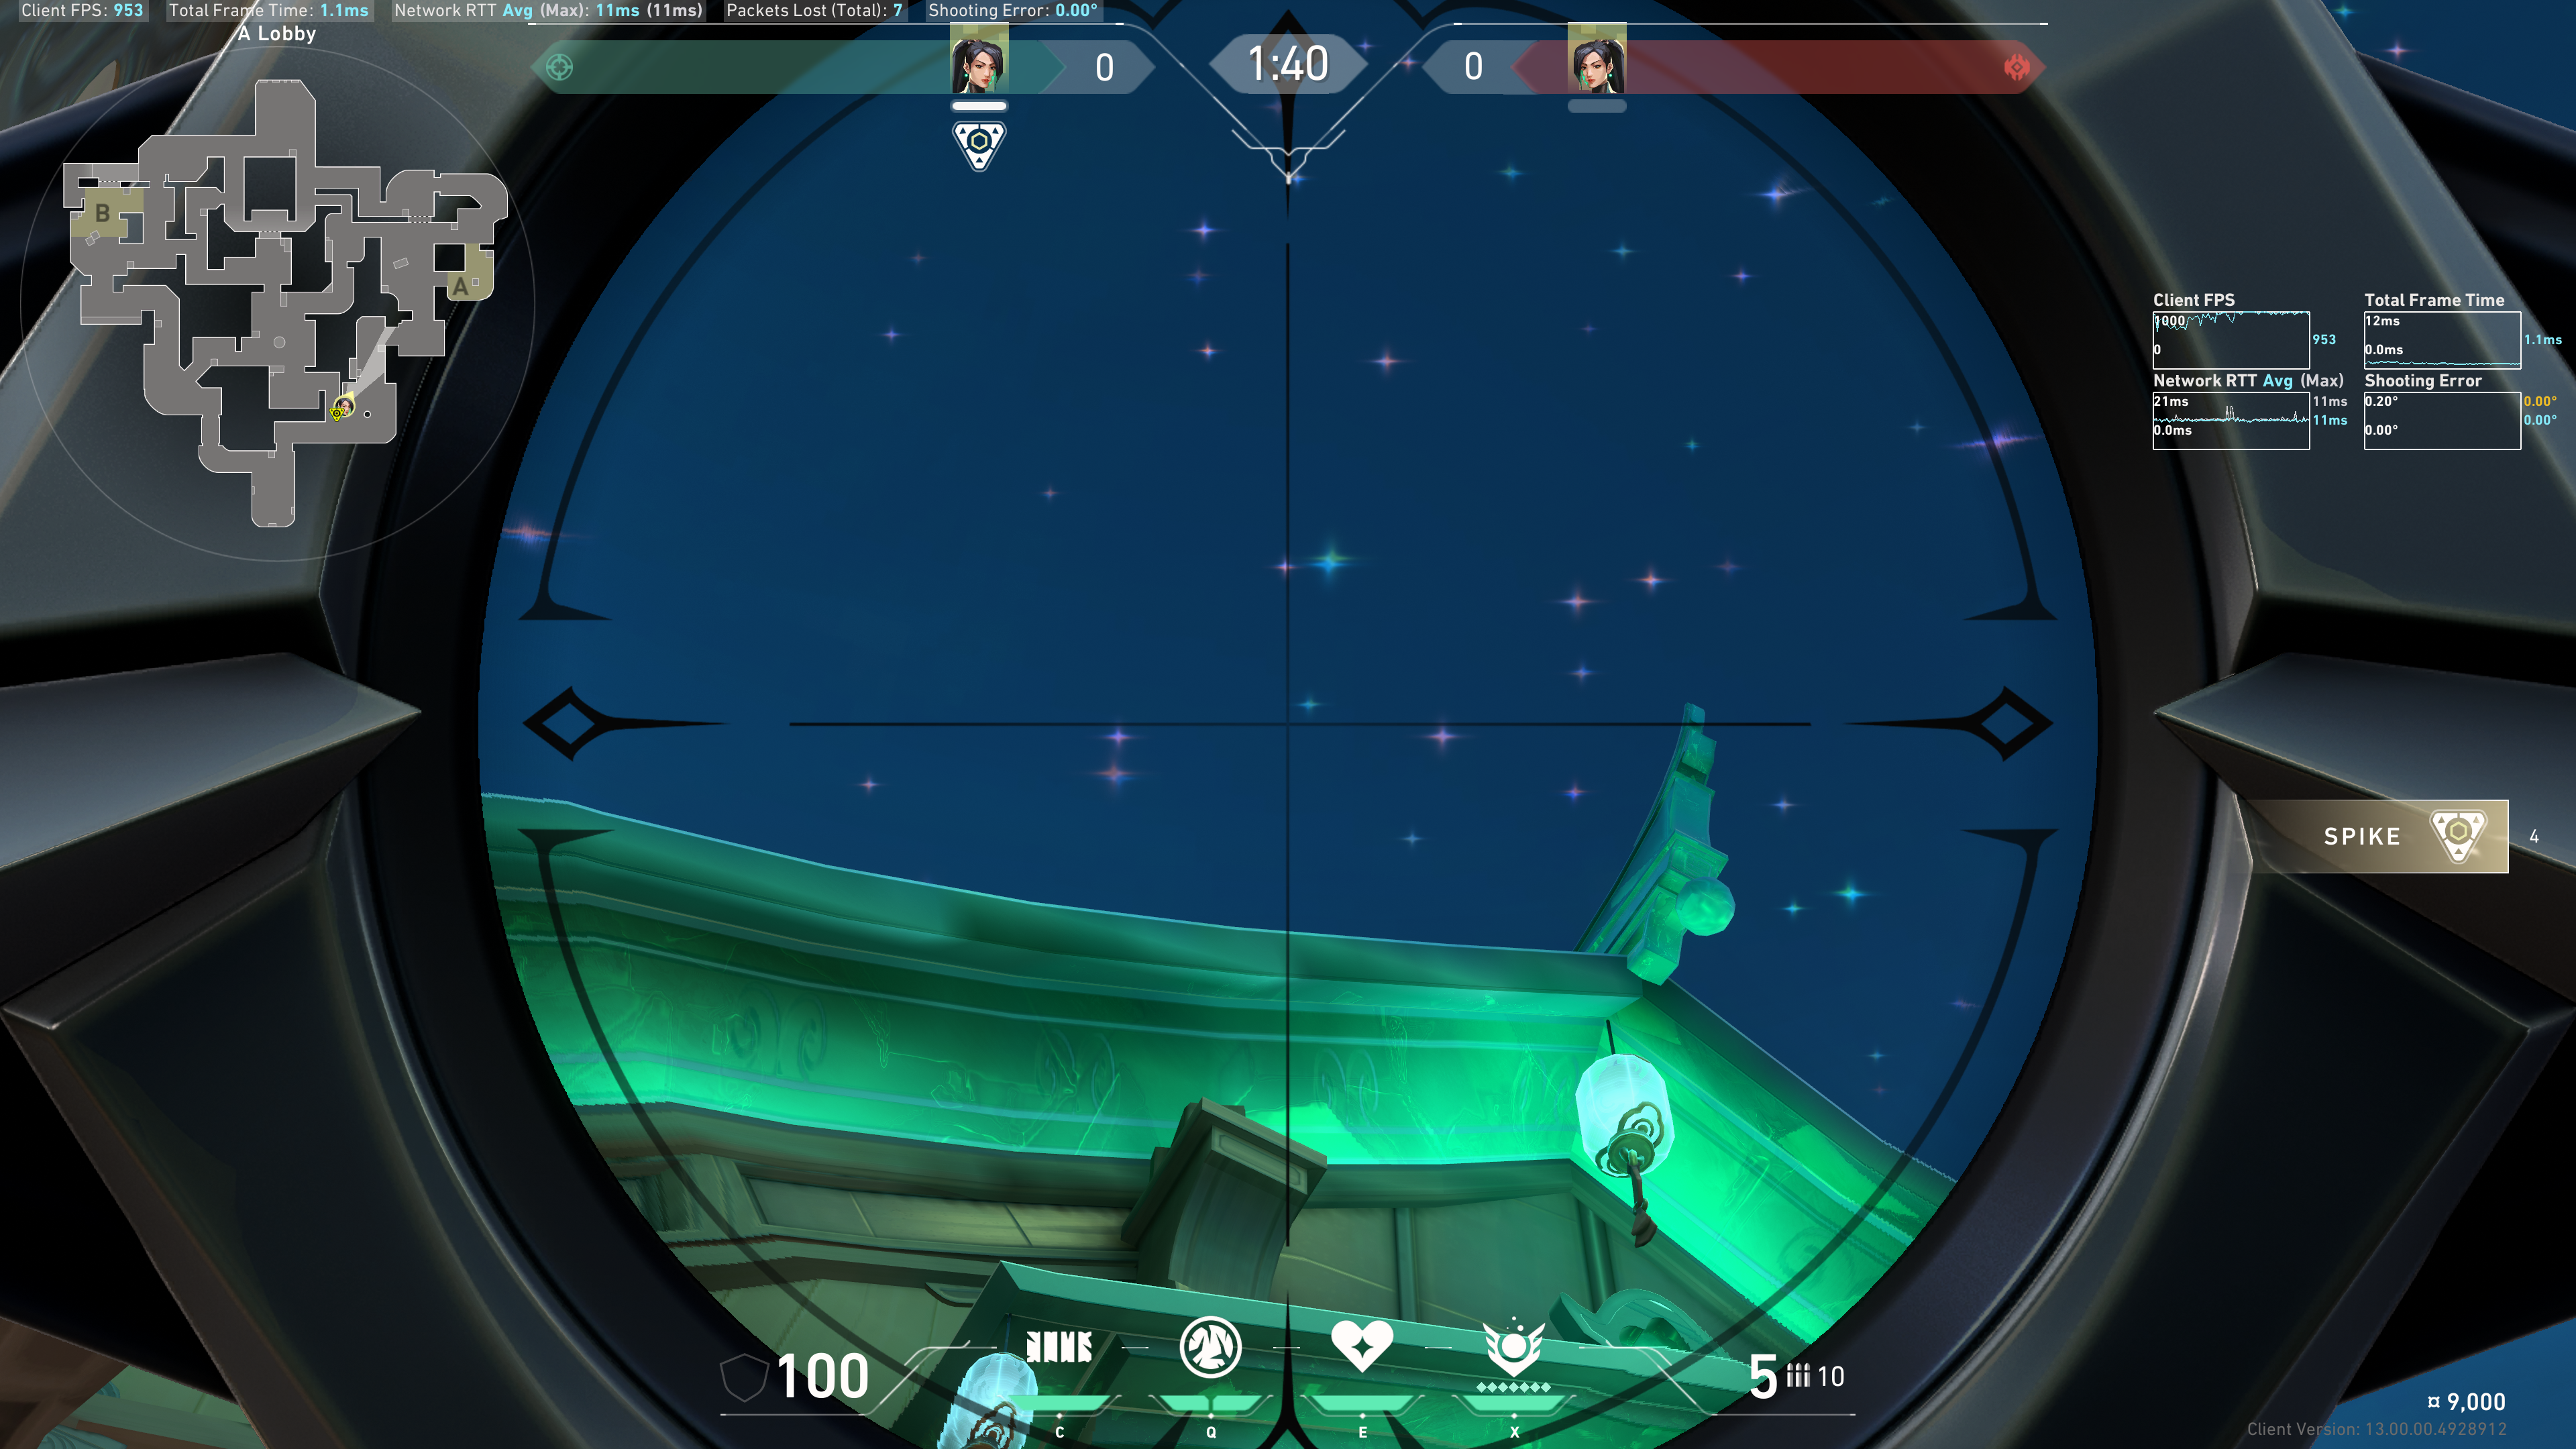
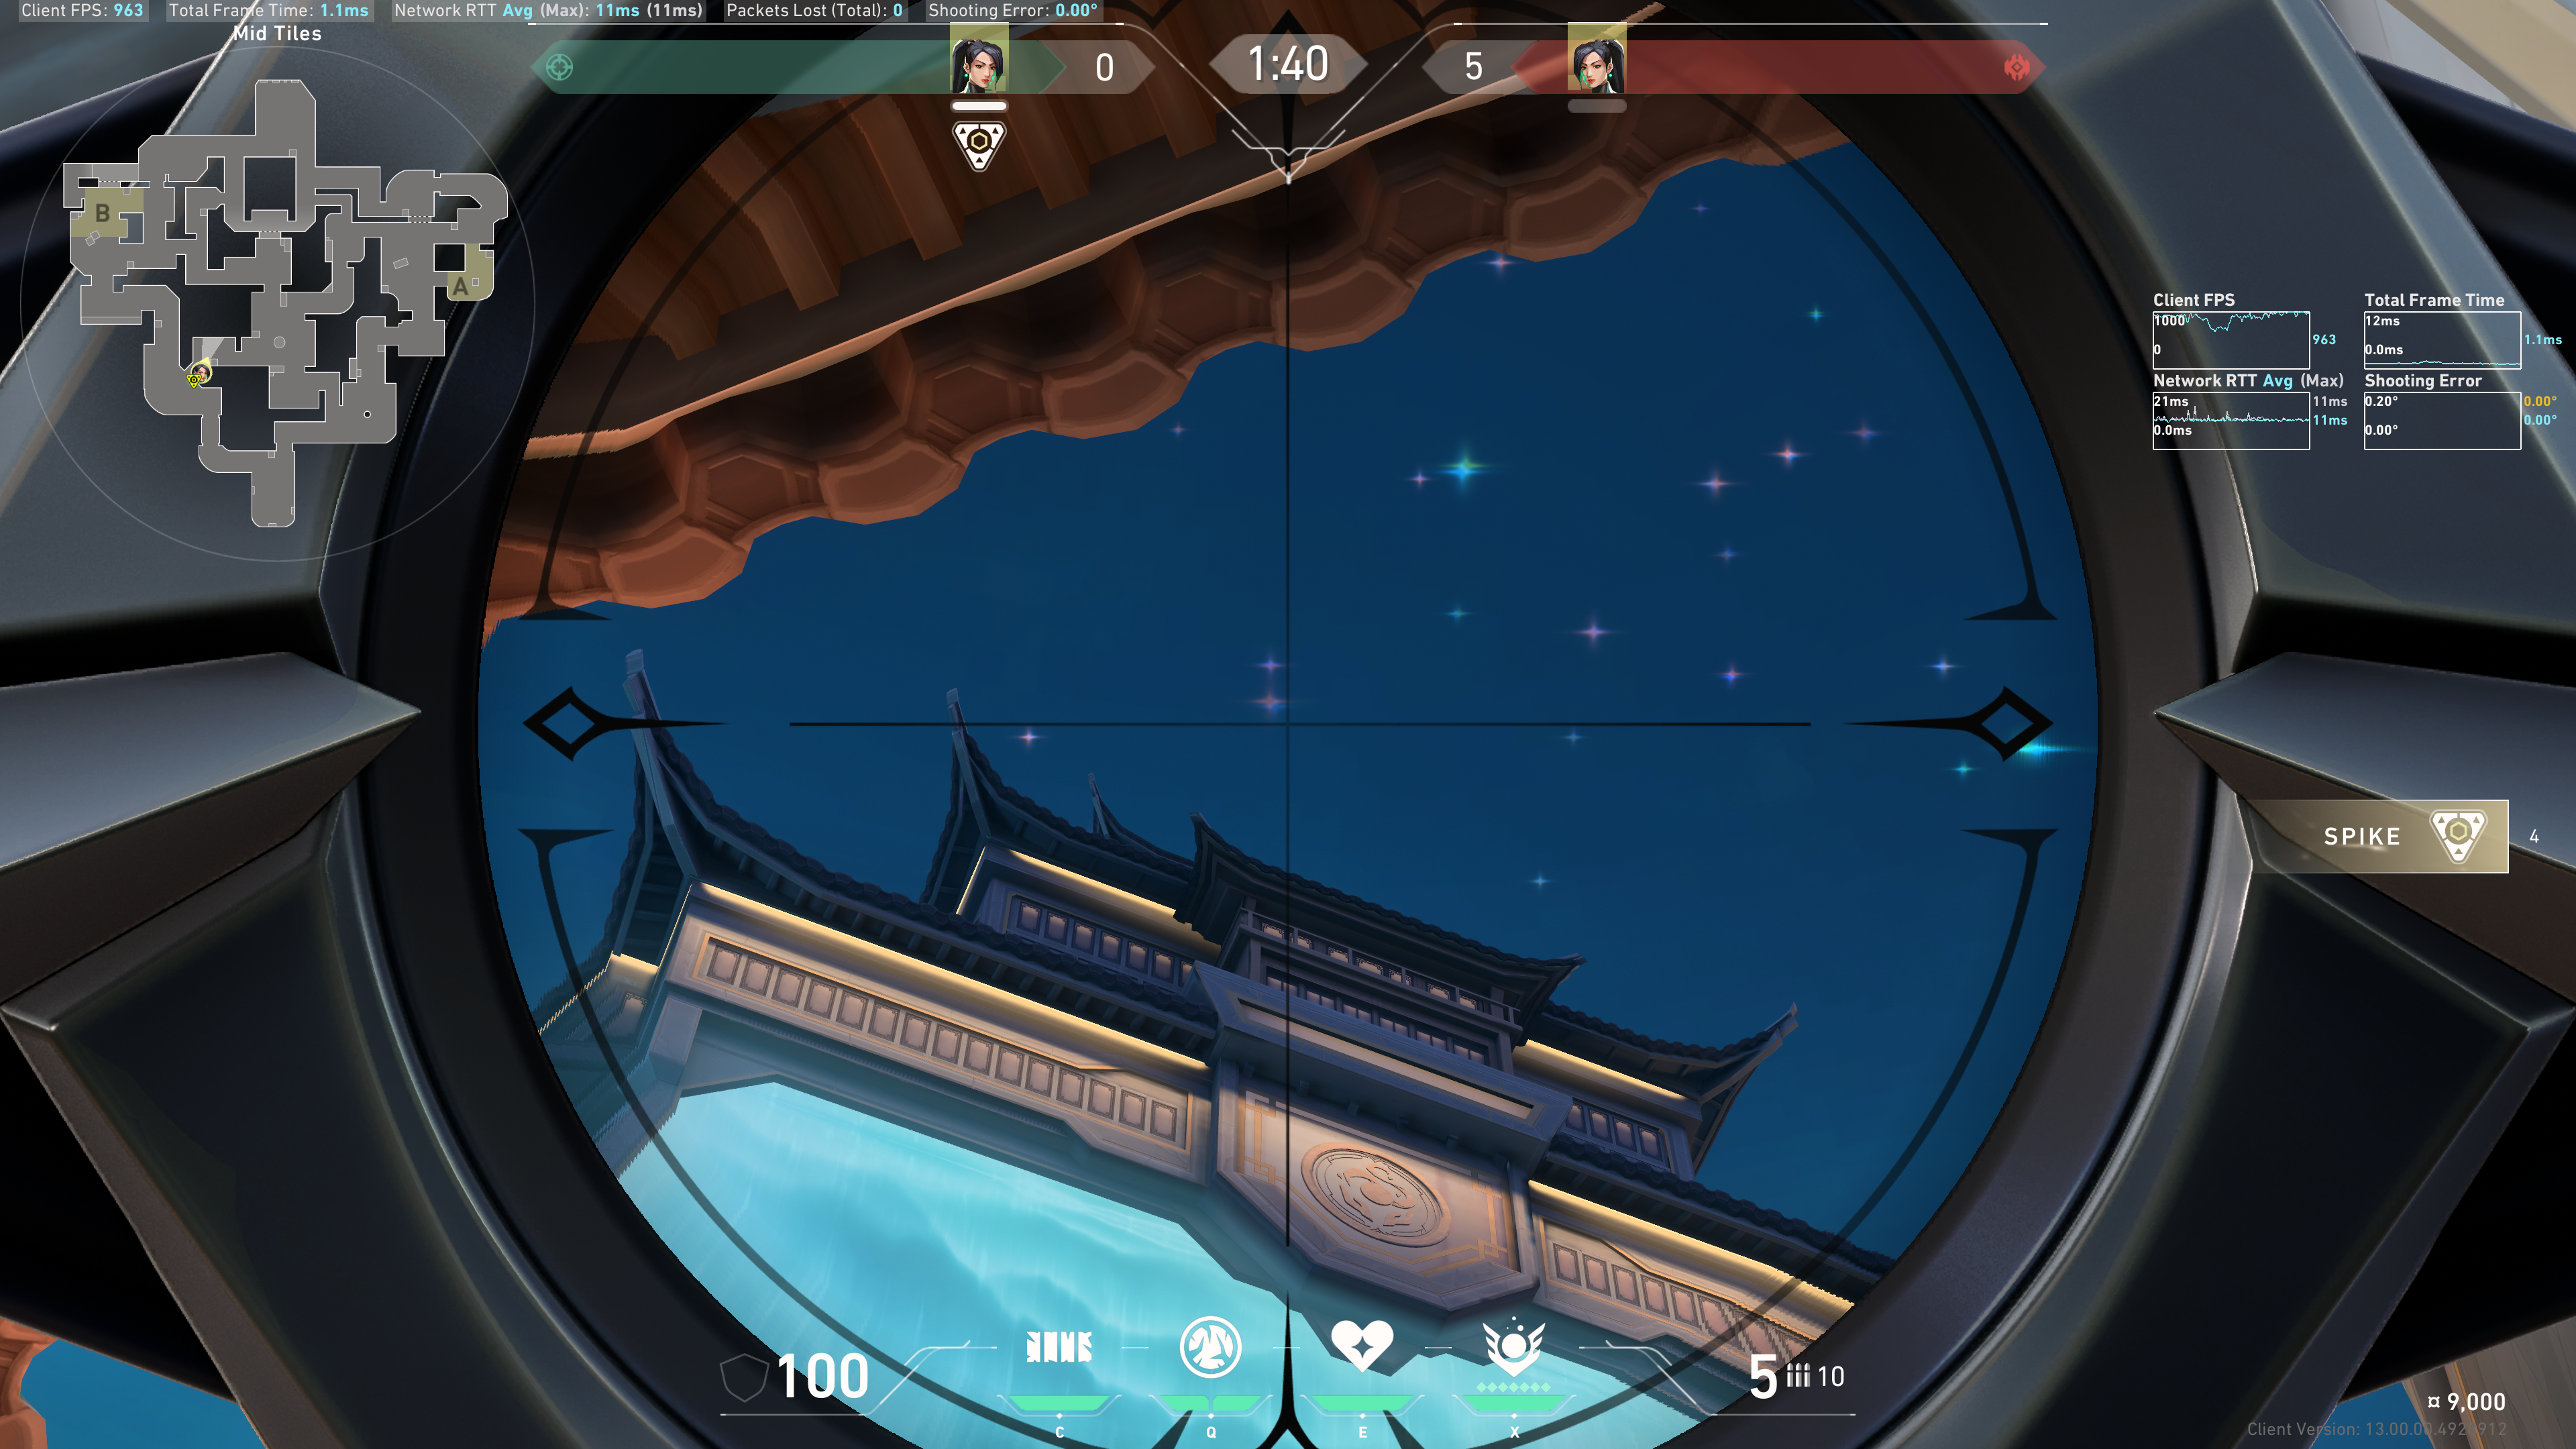
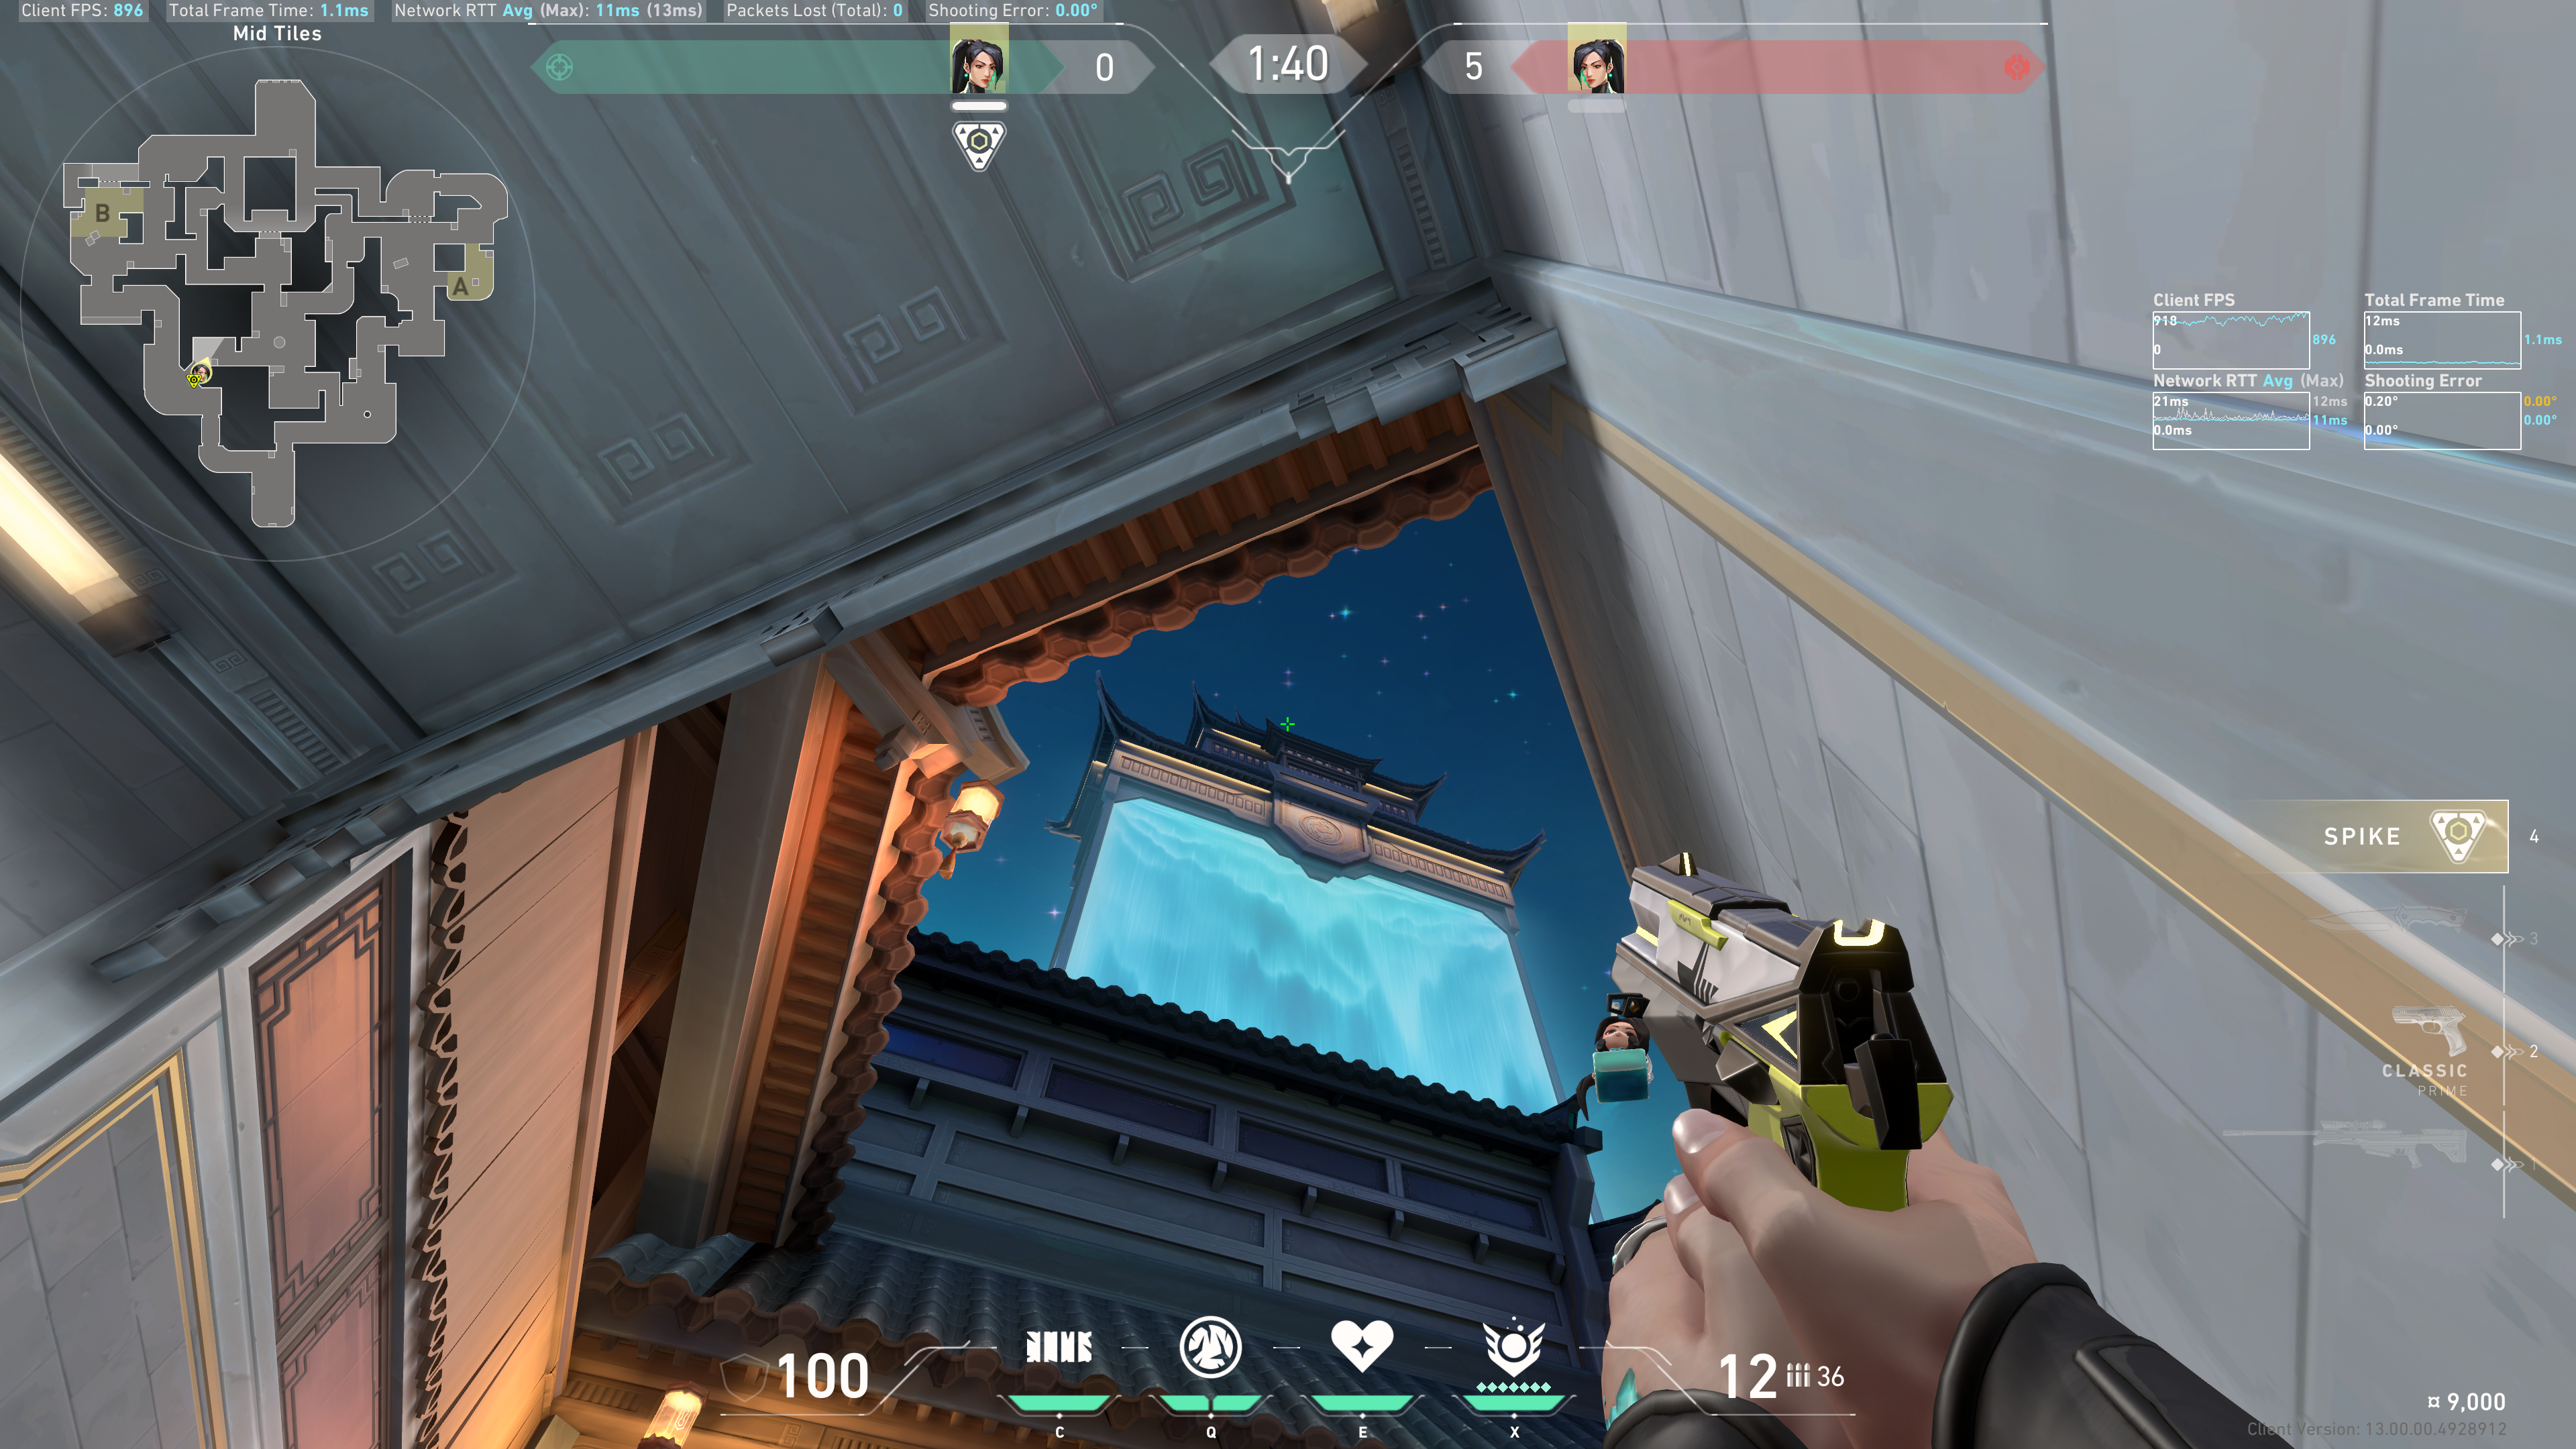
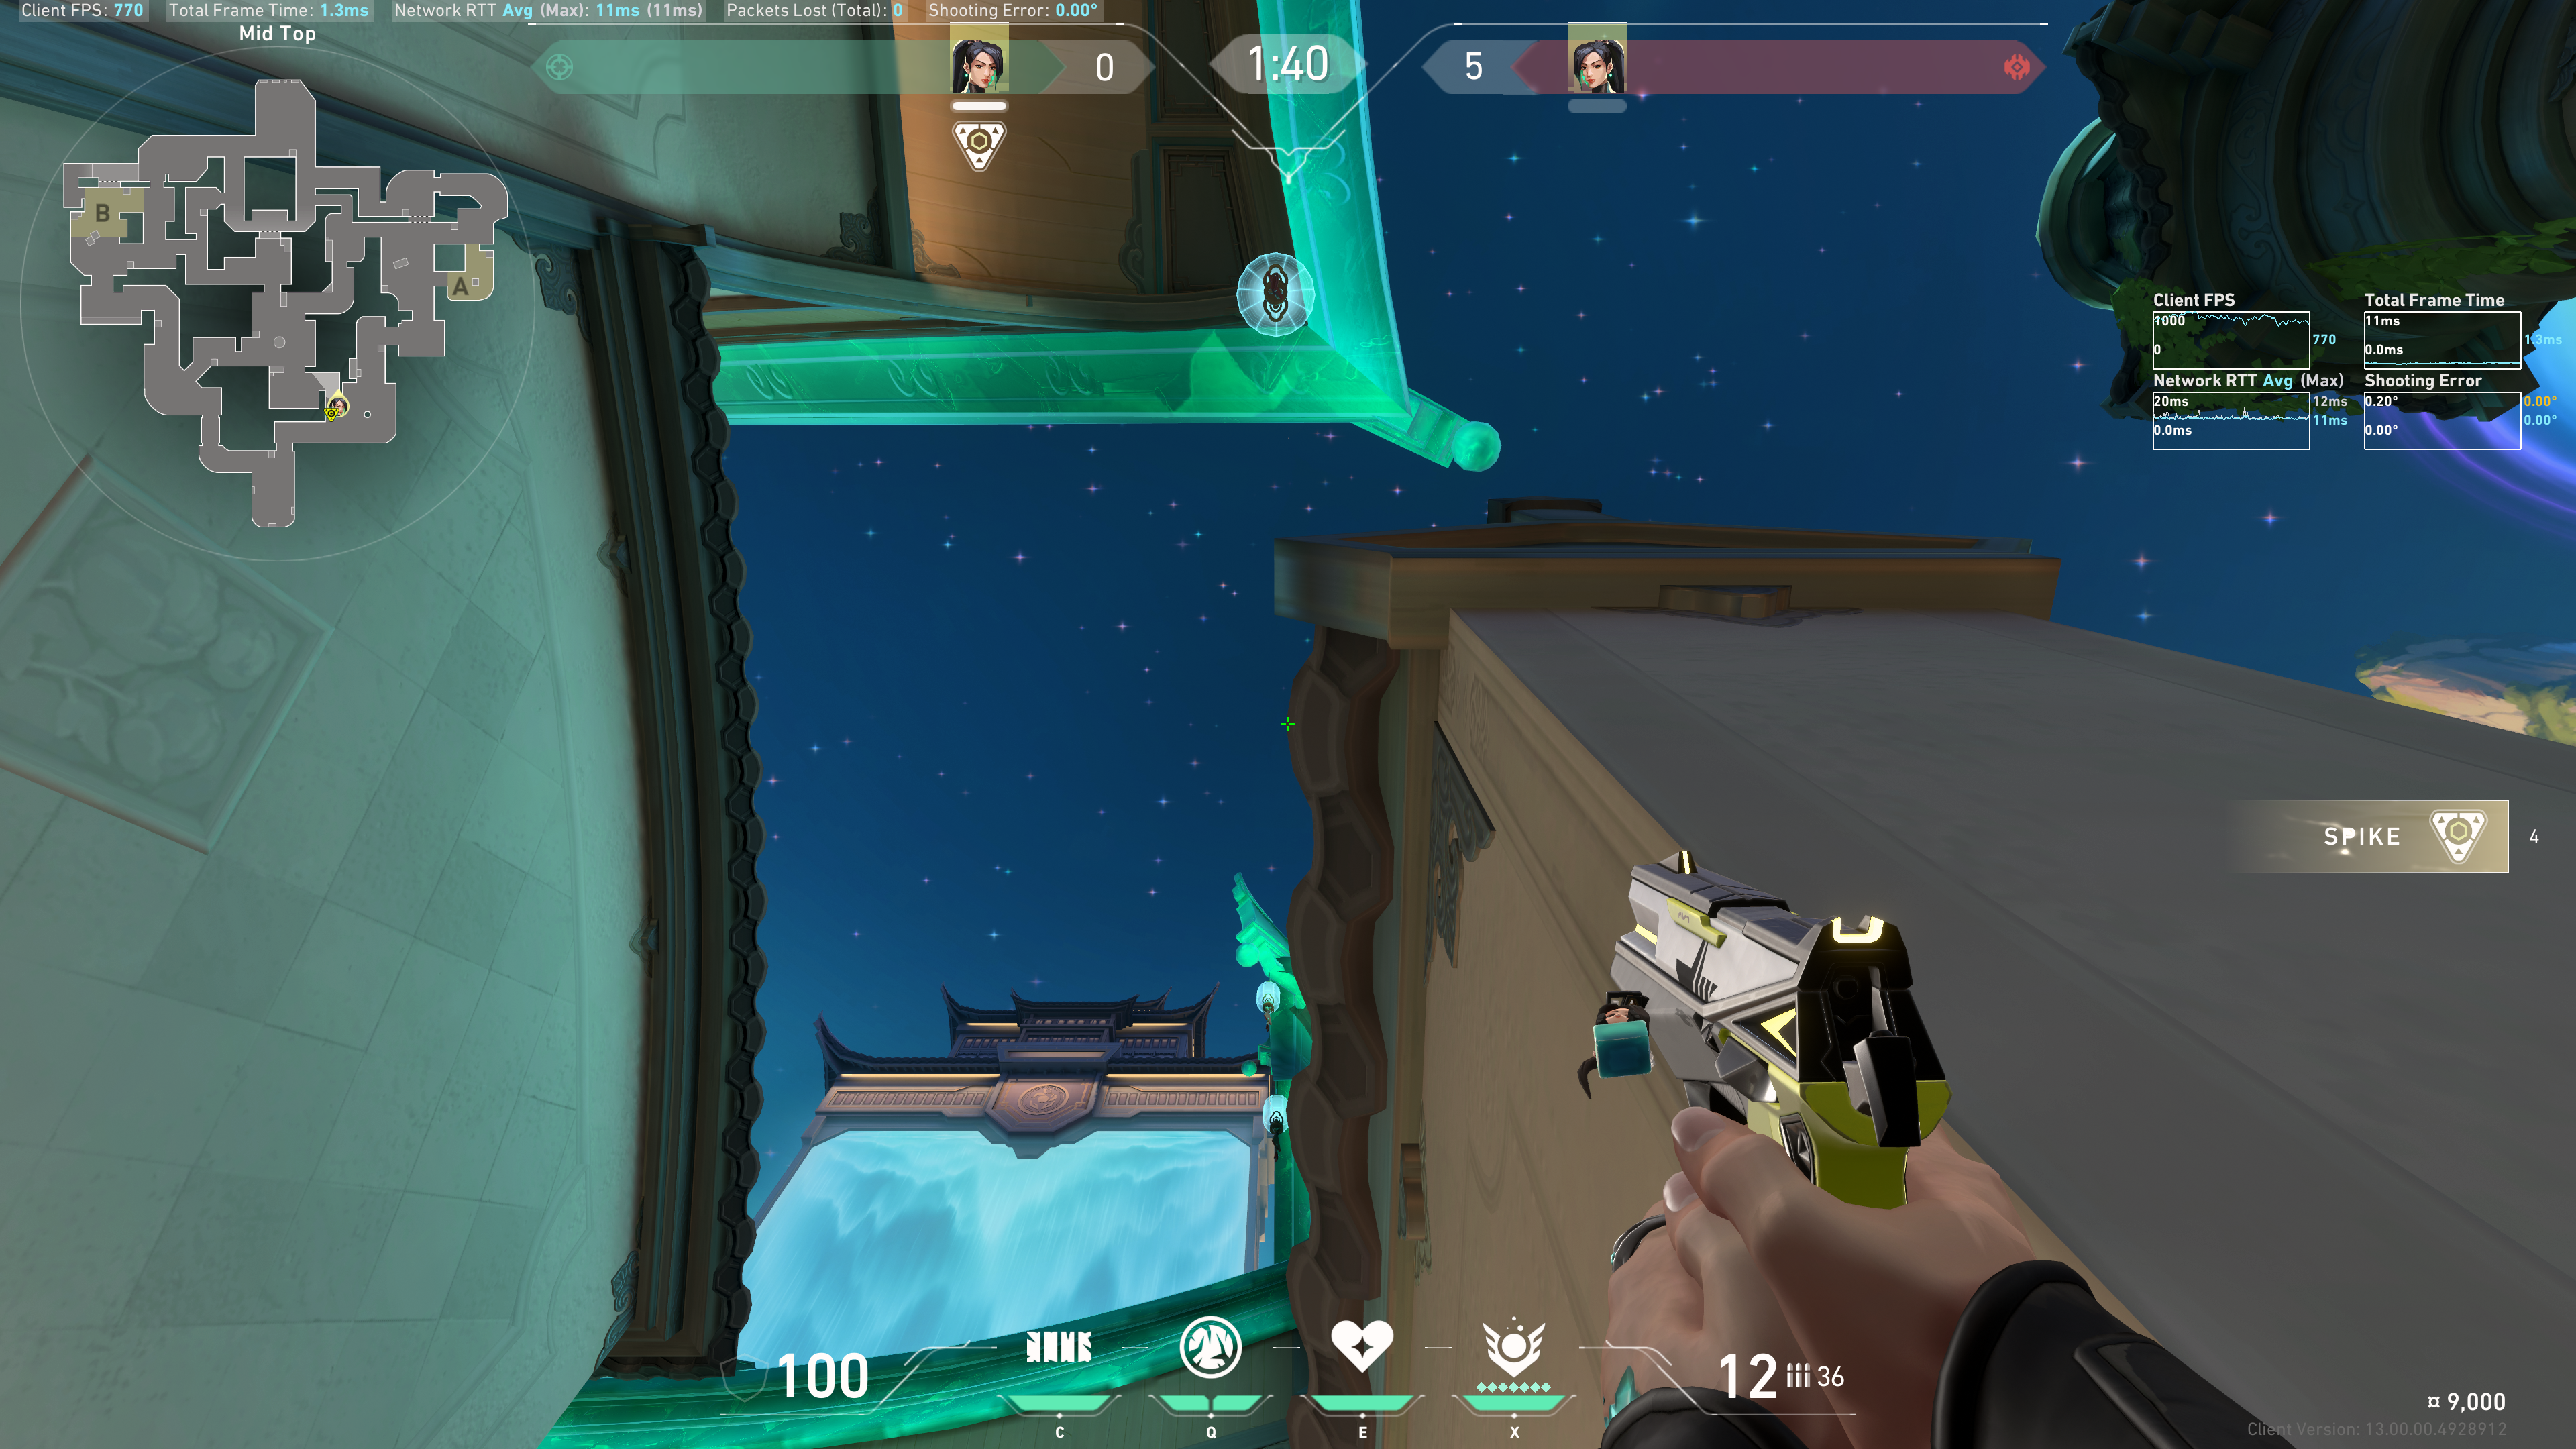
Notice this star in the sky
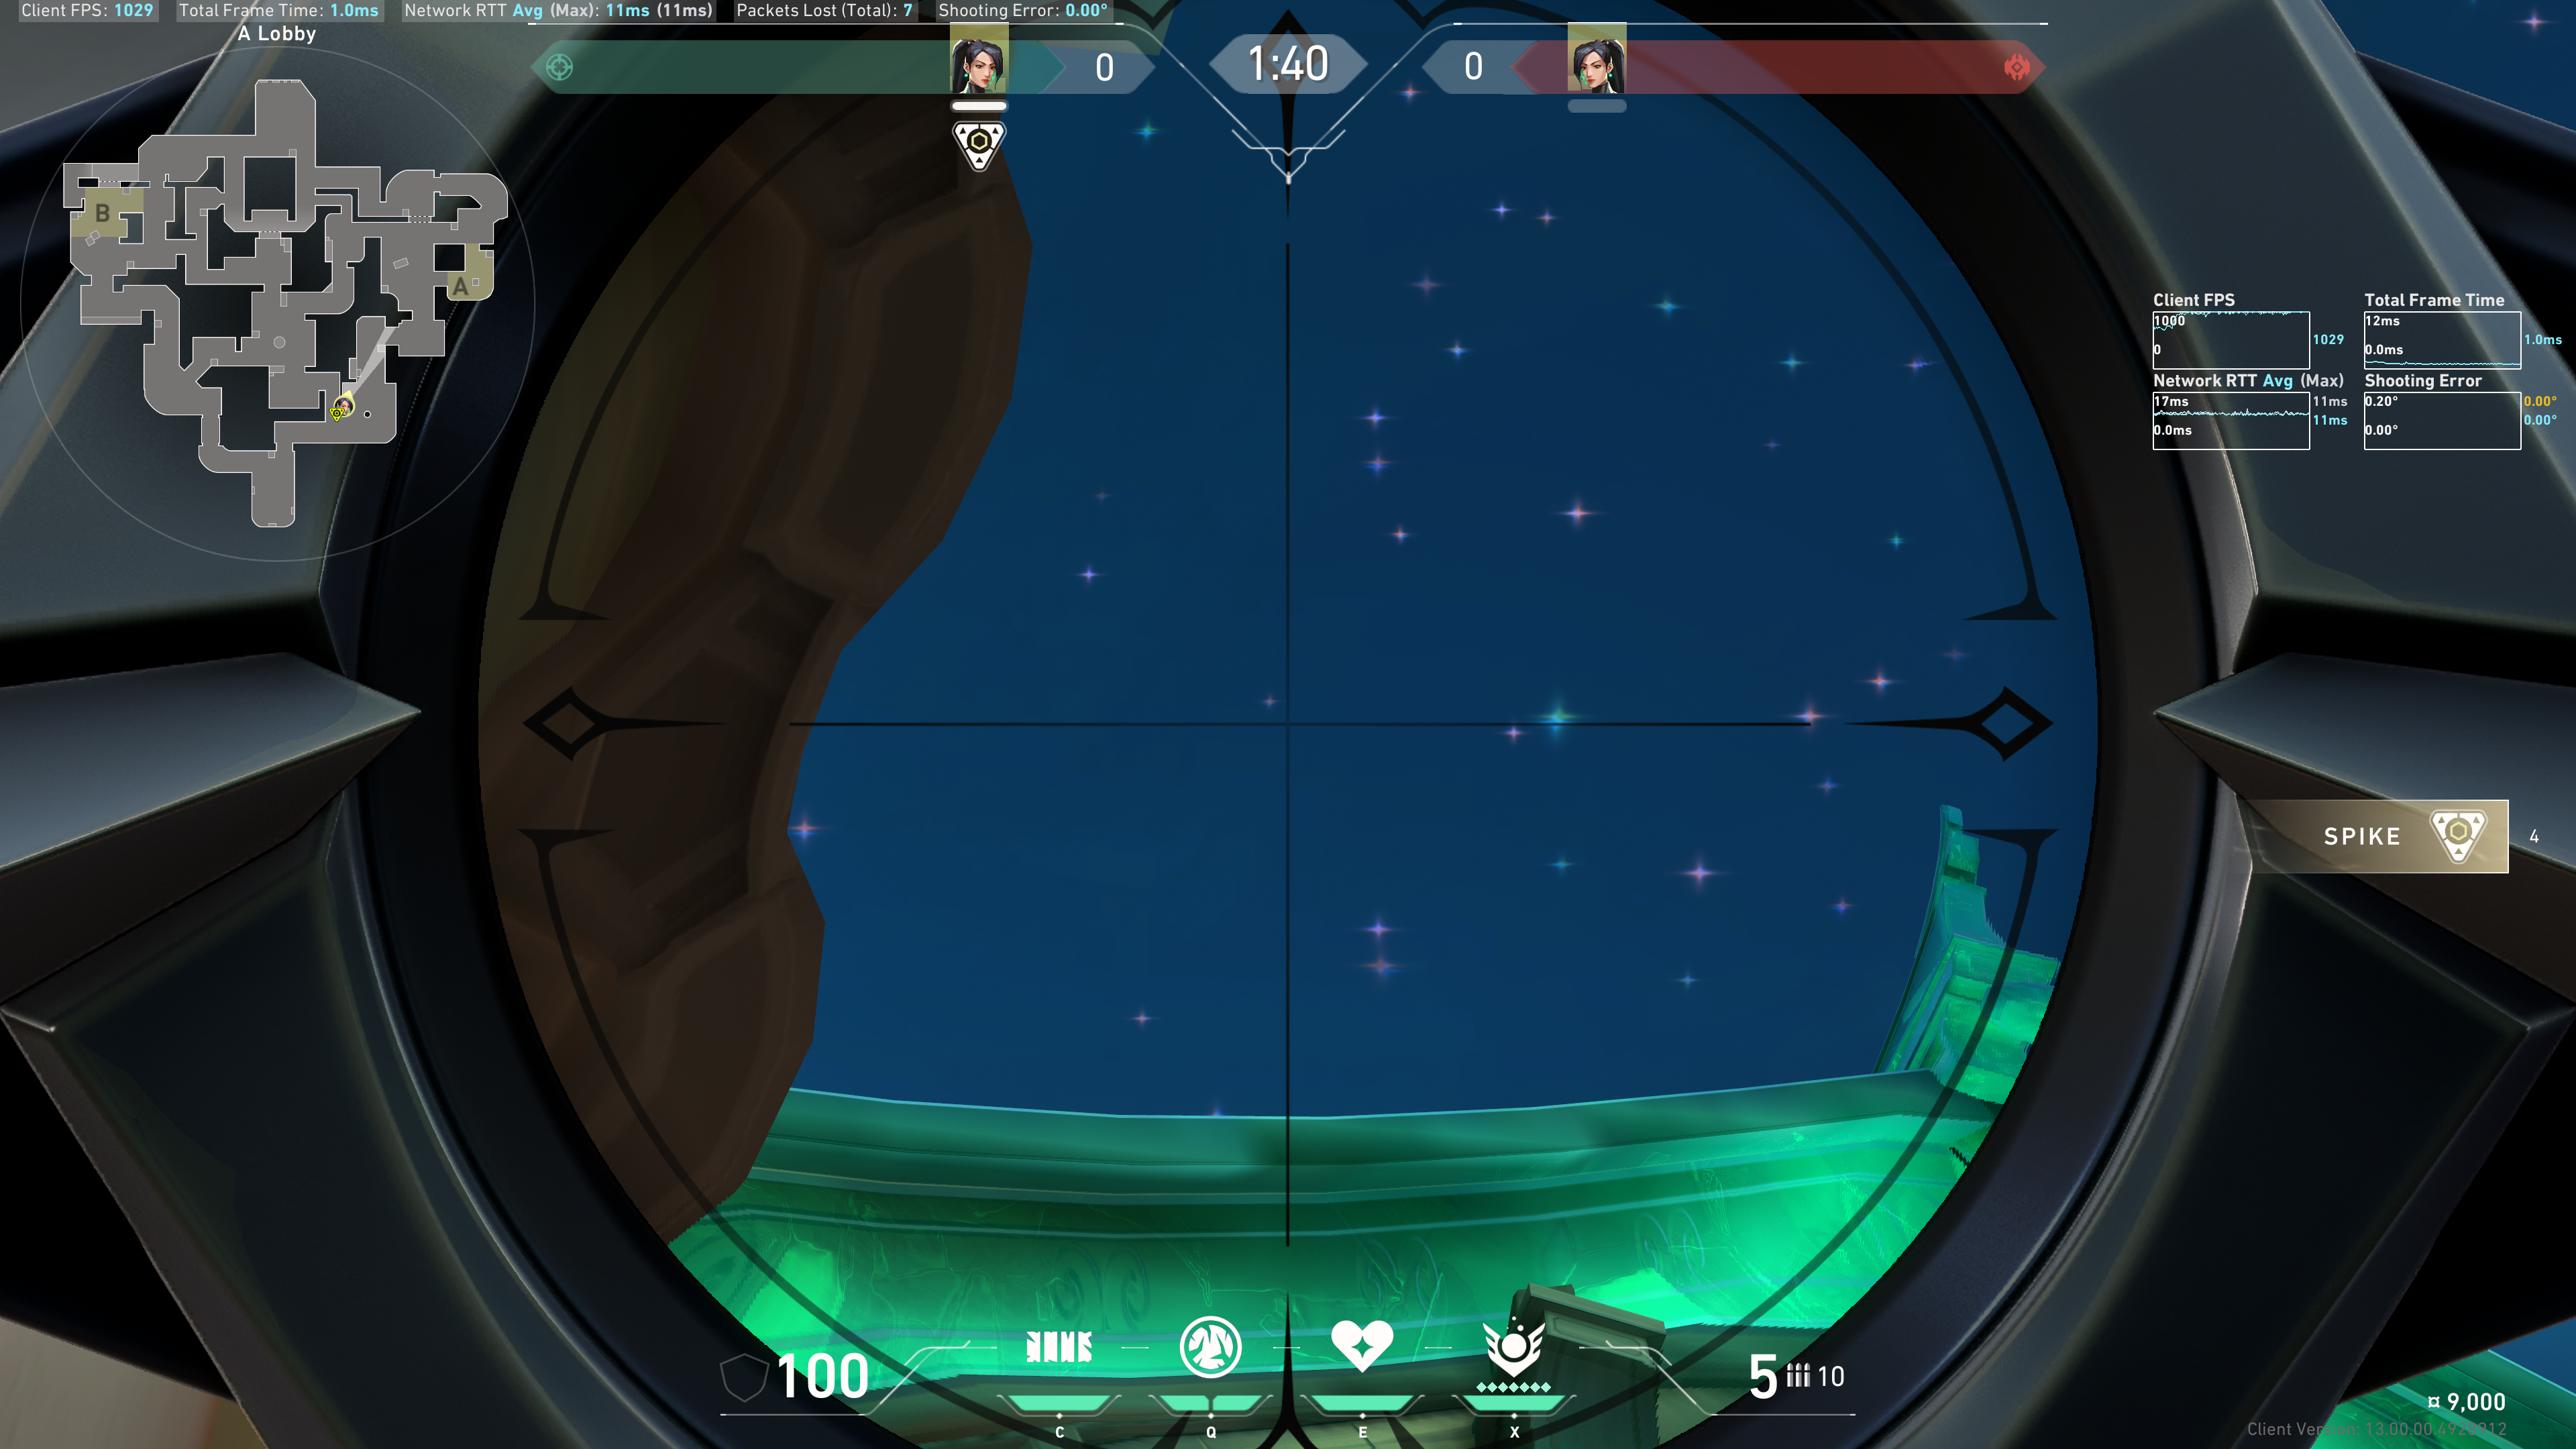
Aim about 2 crosshair lengths below that star:
Note: breakdown of crosshair lengths and results. Ideally aim for 1-2 crosshair lengths.
| Crosshair Lengths | Recommendation | Result |
|---|---|---|
| 1 | Not recommended | Some slow captures in front of Dice which is the space that your team wants to push onto (e.g. duelist using Dice as cover). |
| 2 | Optimal | The entire space behind Dice is Slowed. |
| 3 | Acceptable | Slightly less space behind Dice is Slowed, in exchange for more Ice toward A Link. Use this if you're worried about enemy floods. |
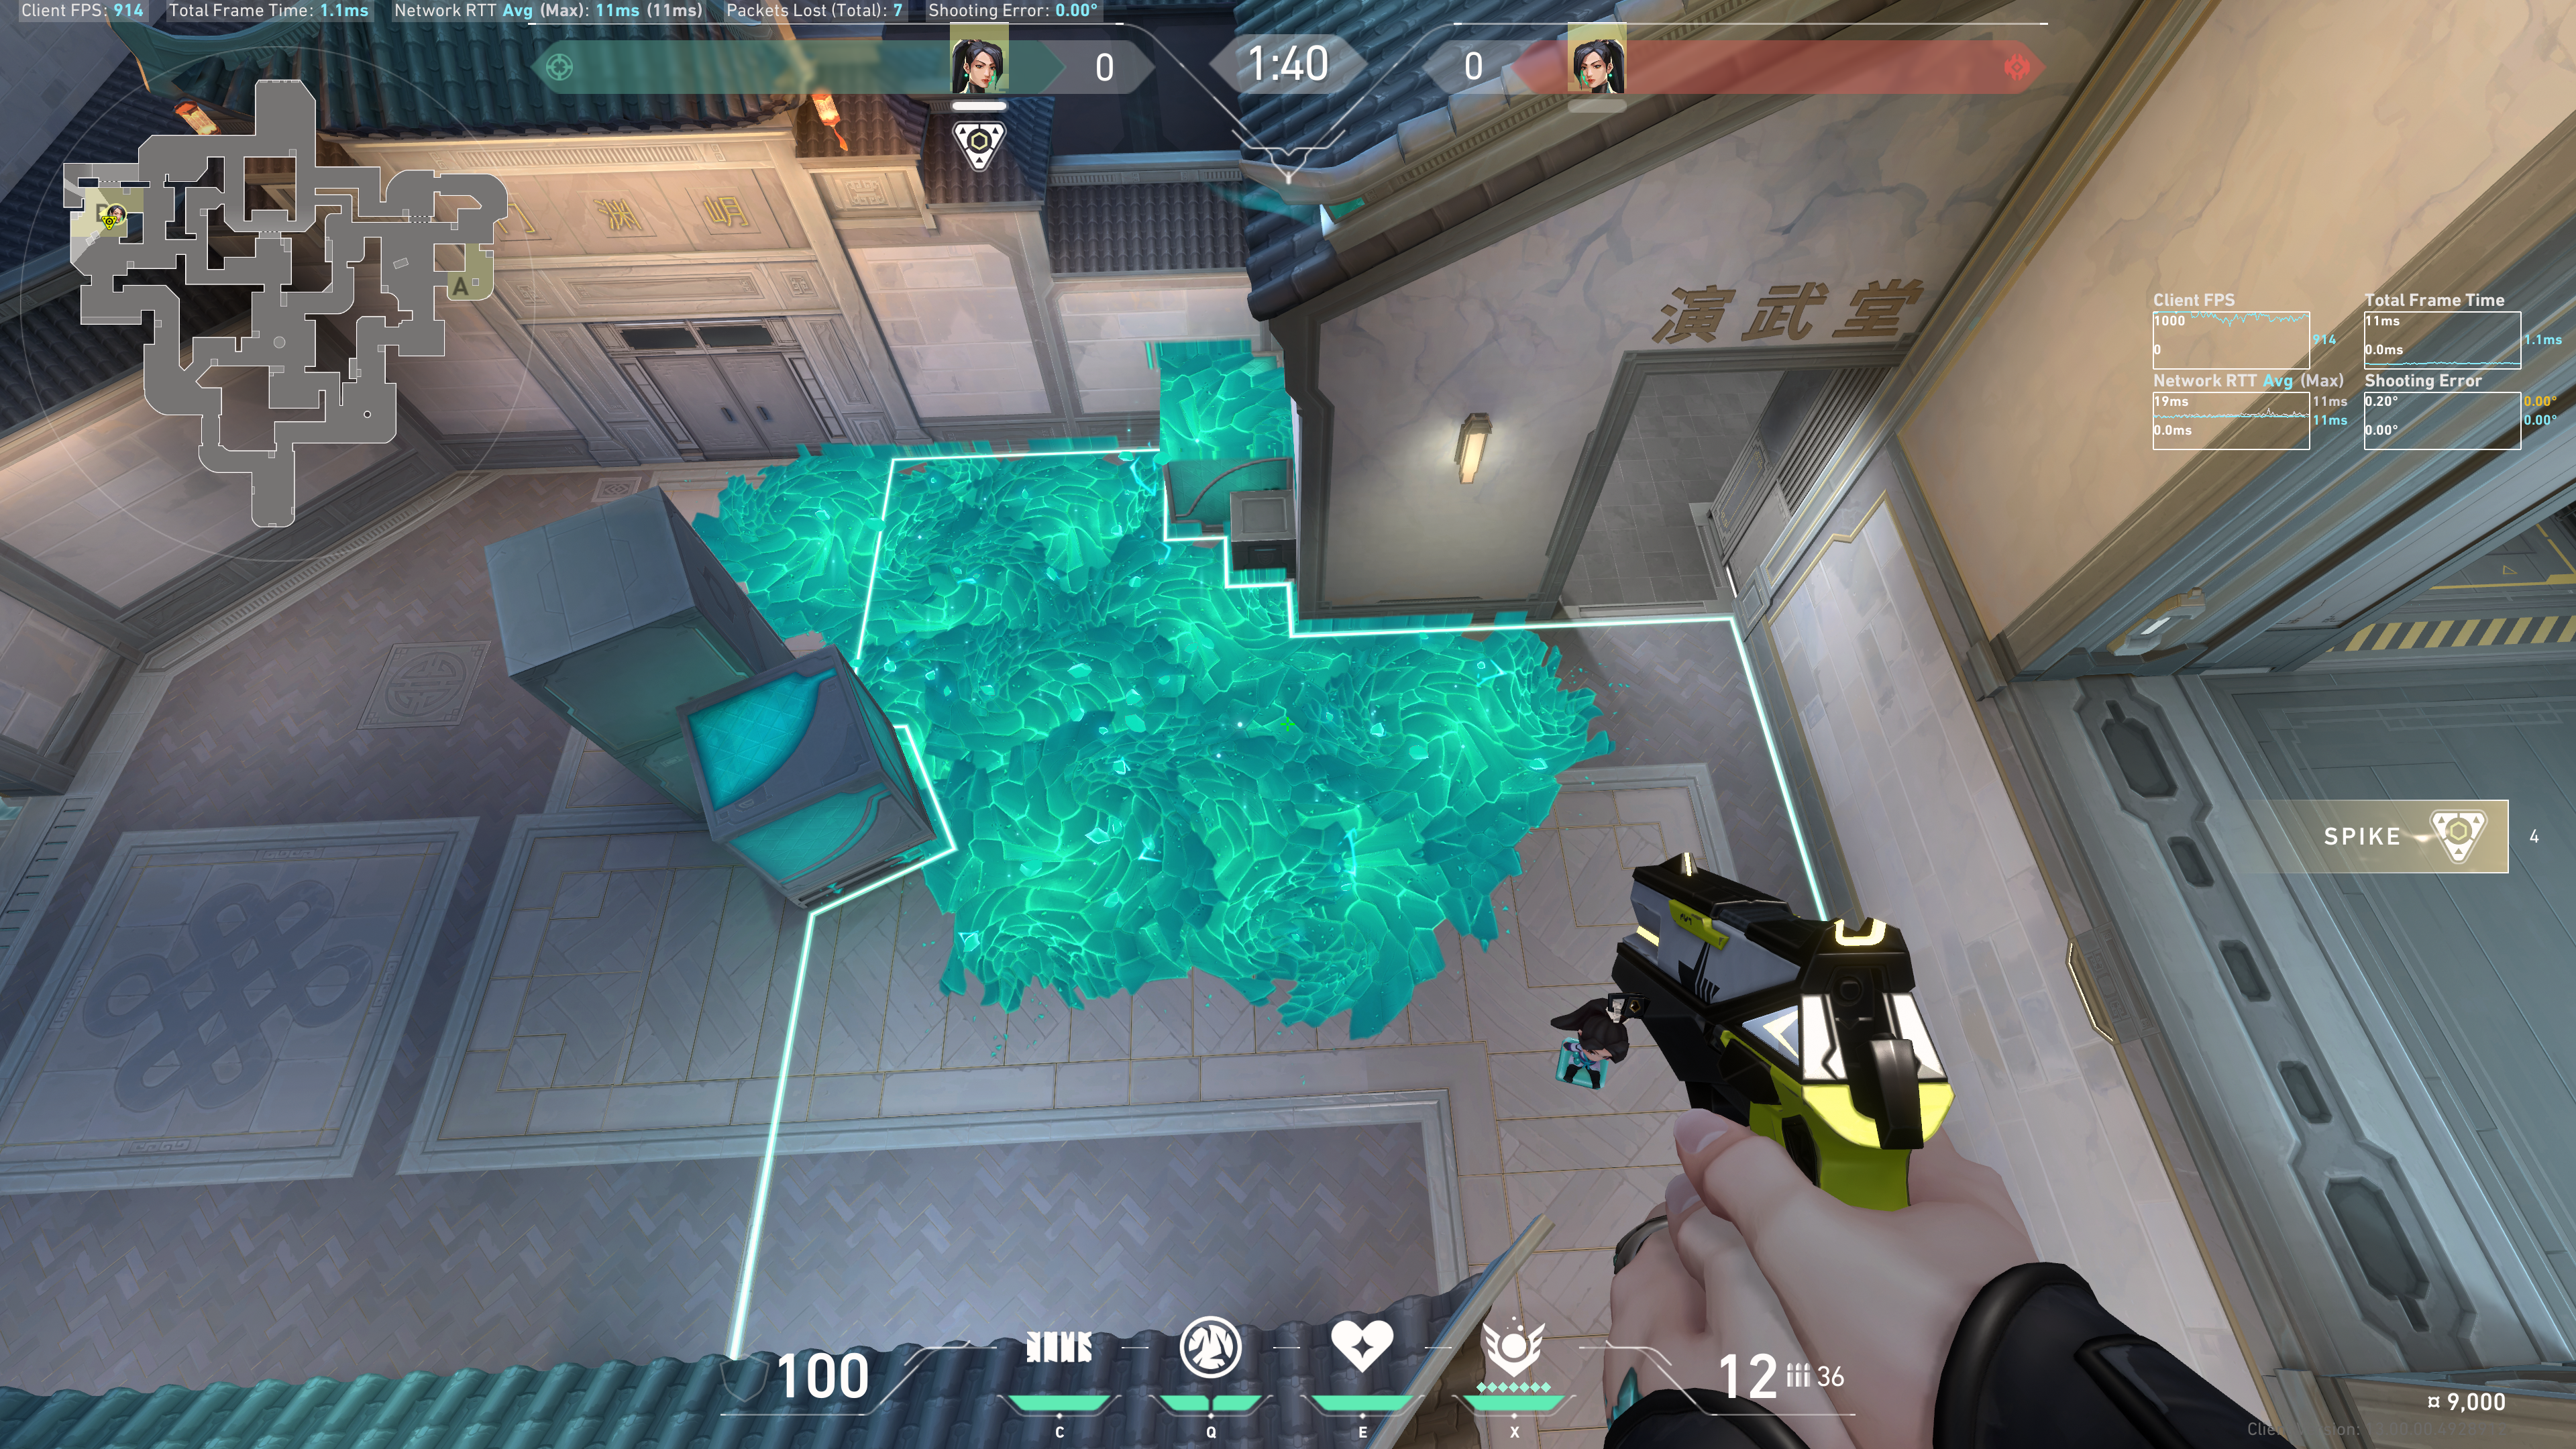
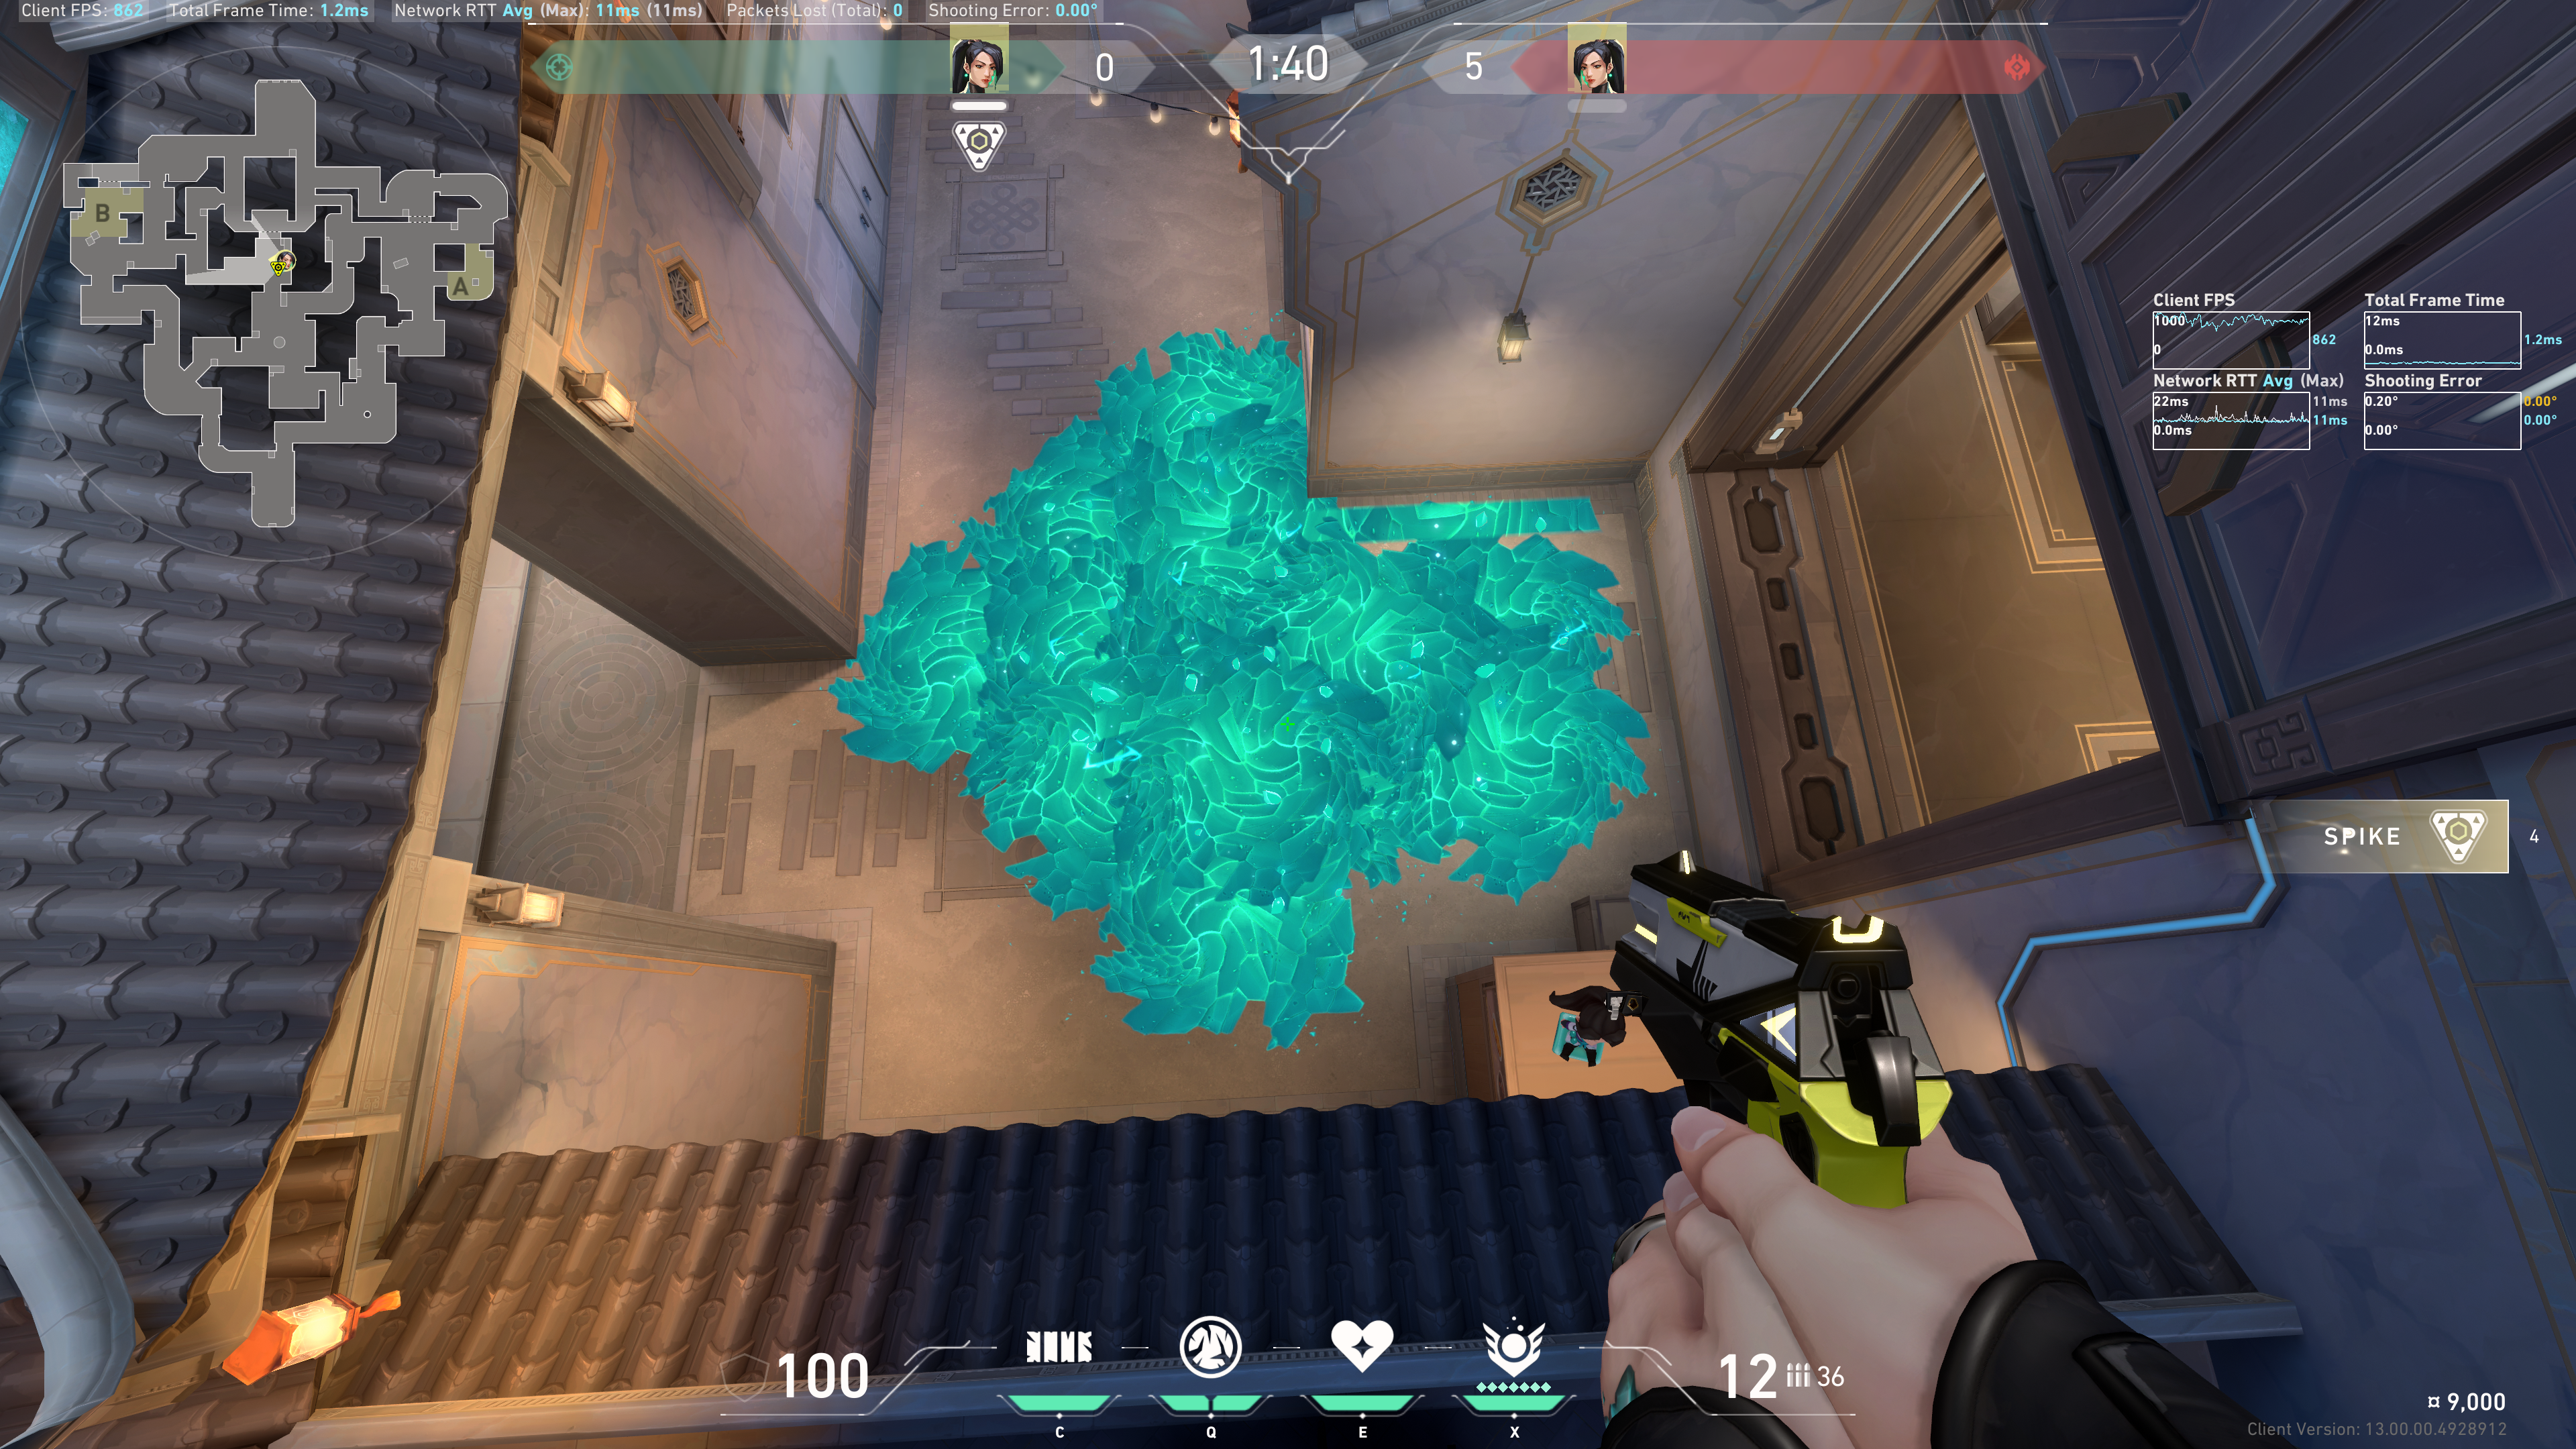
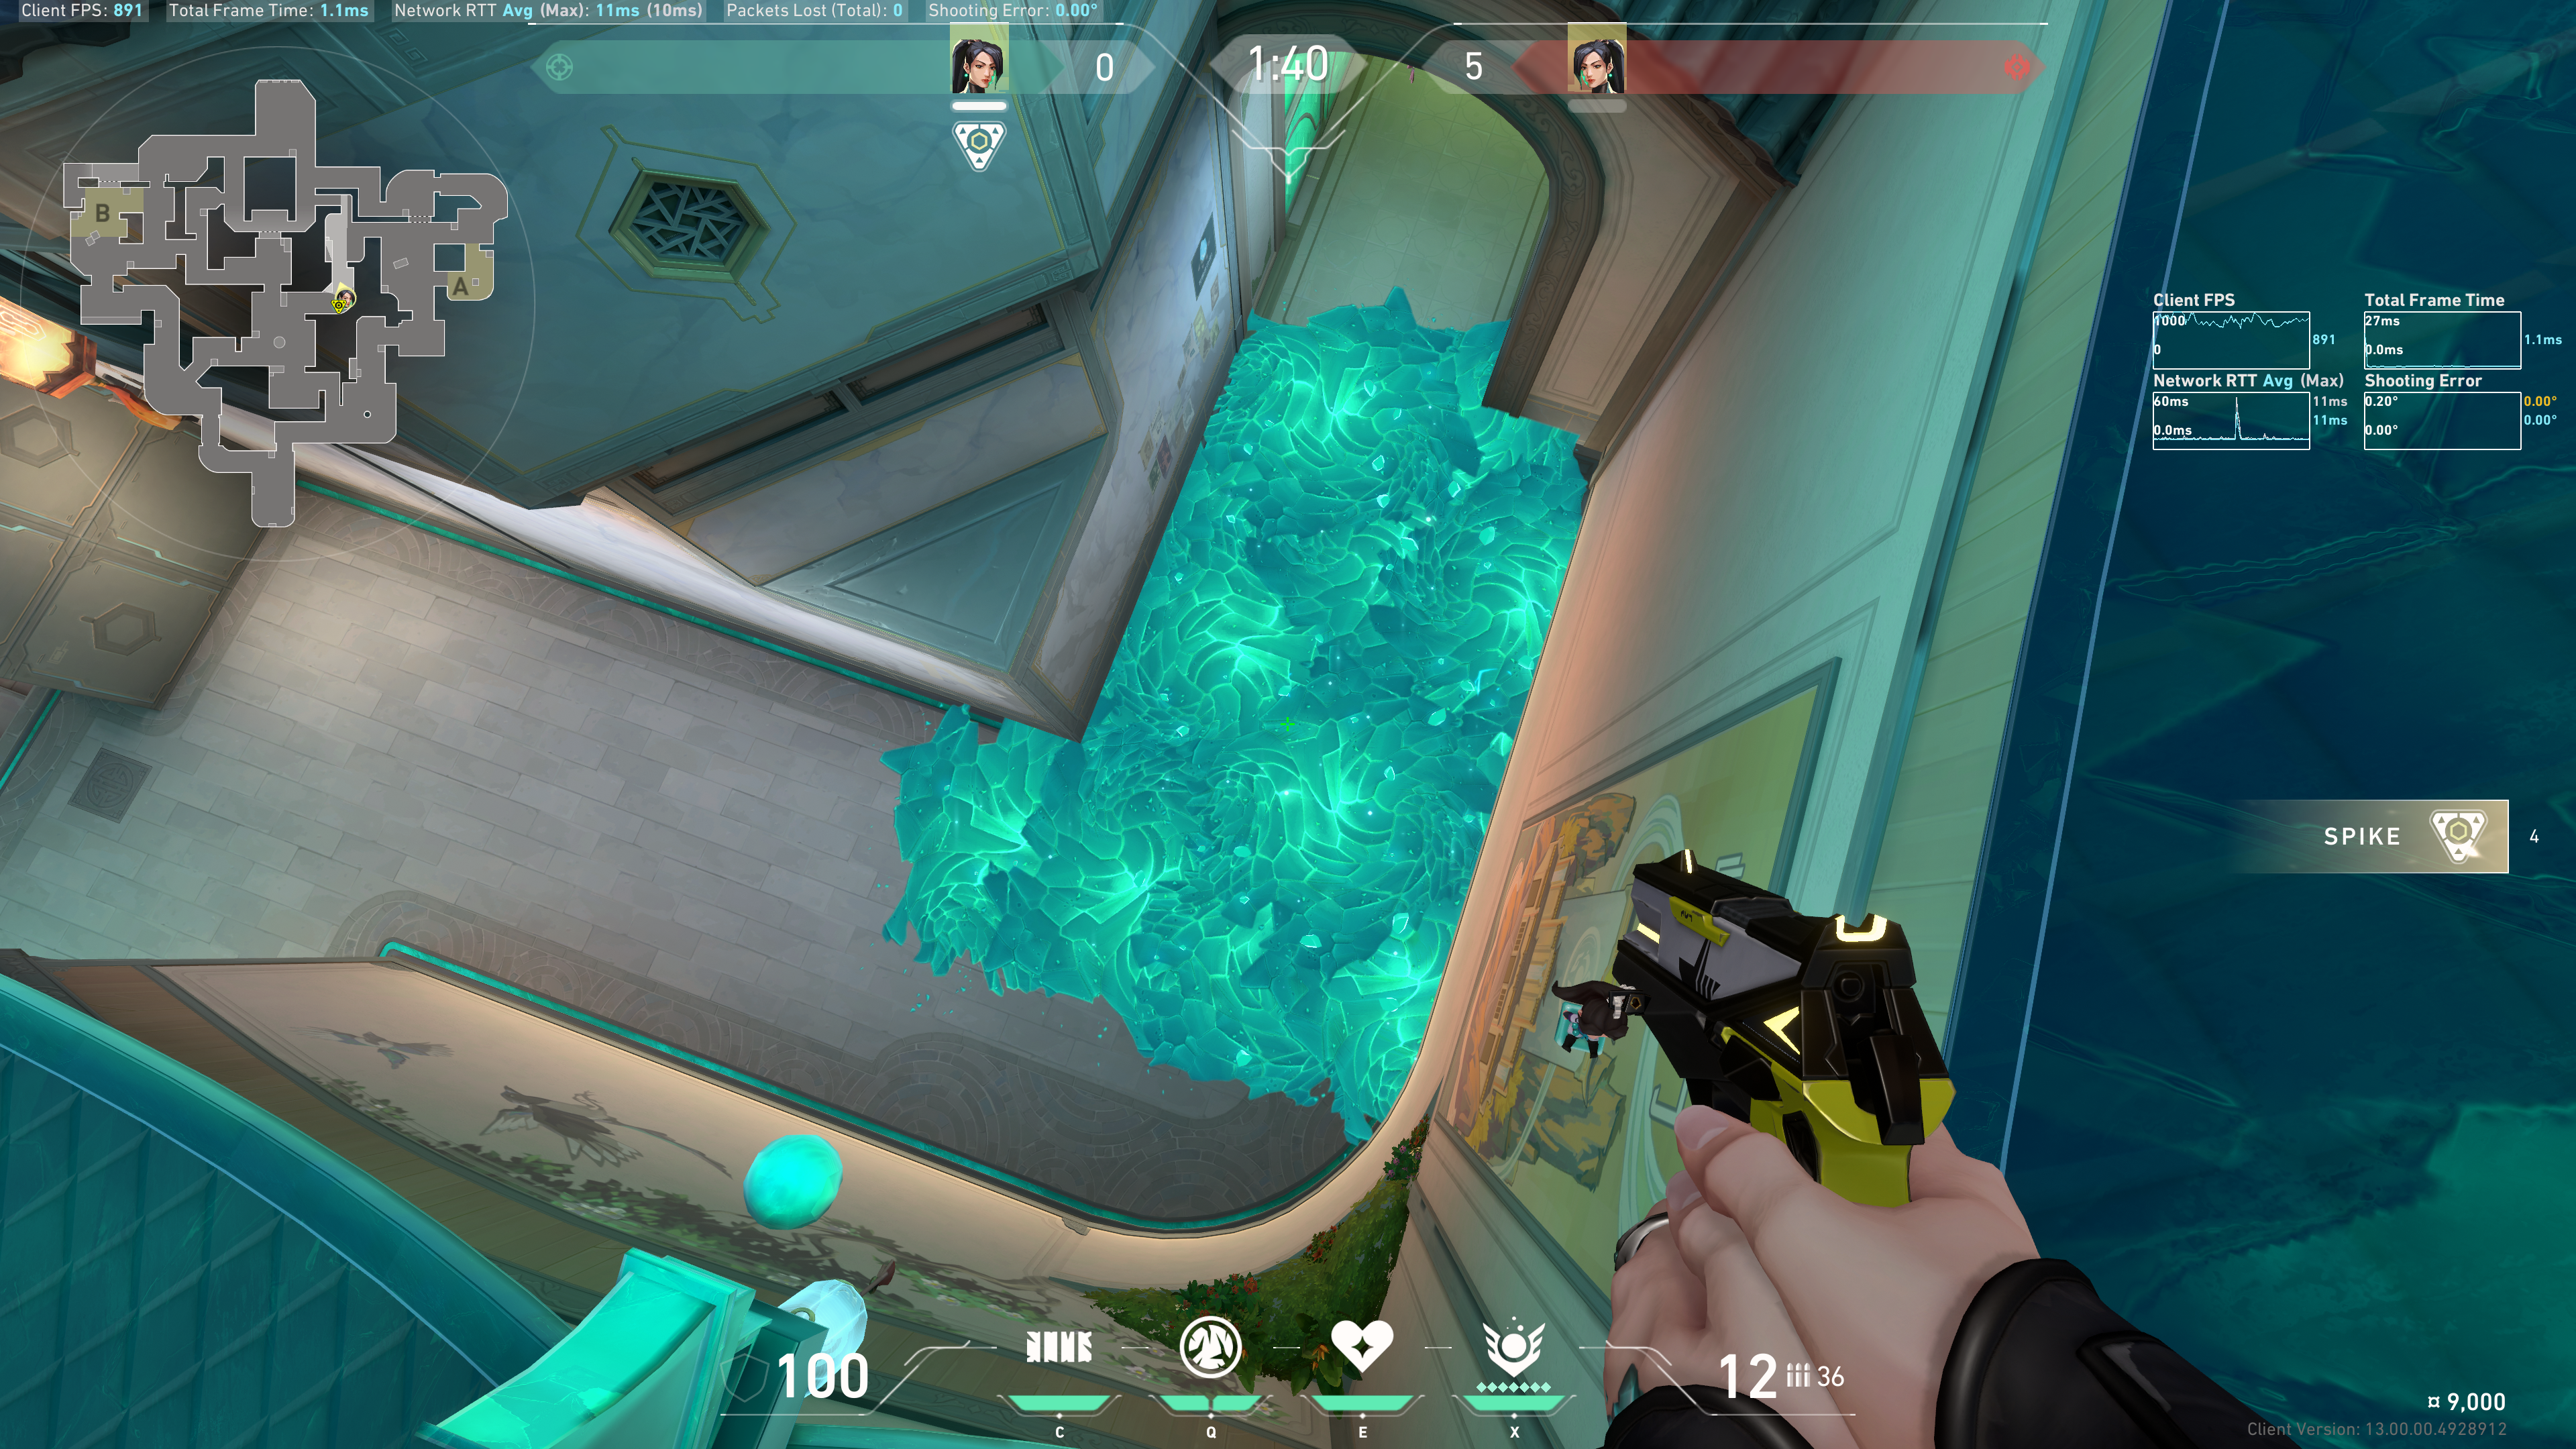
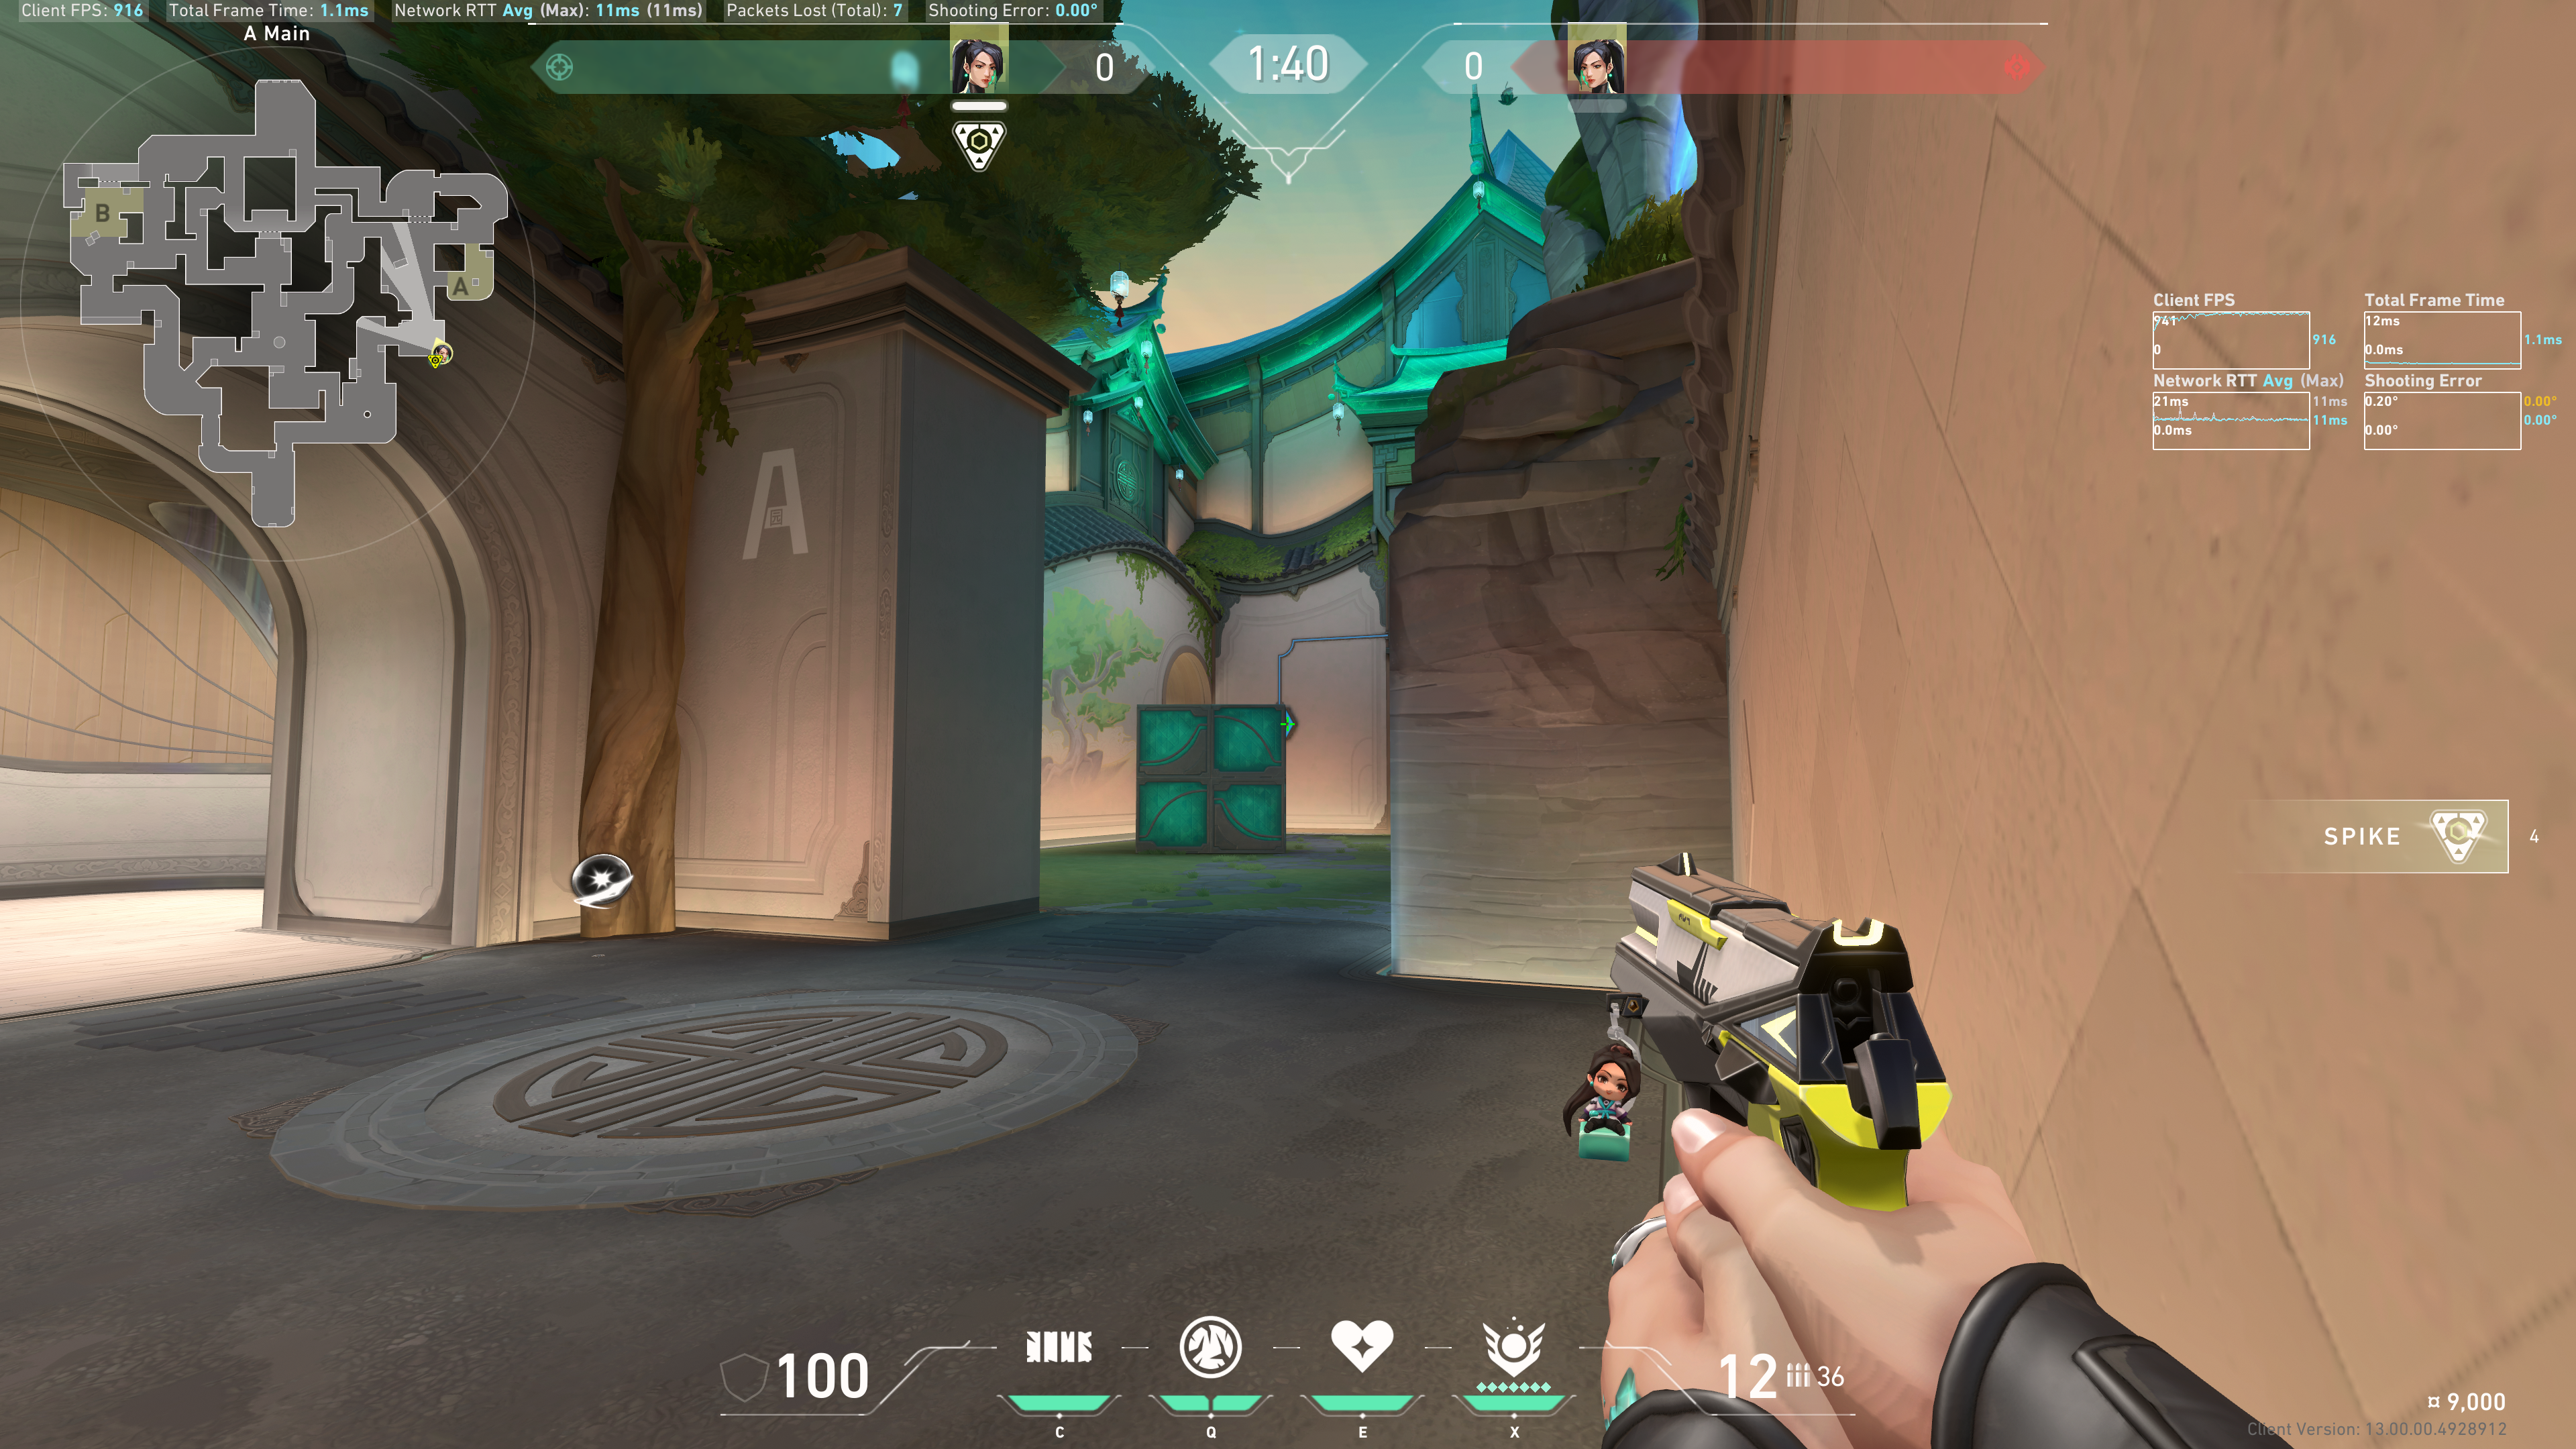
Example result:
Right Side and Art
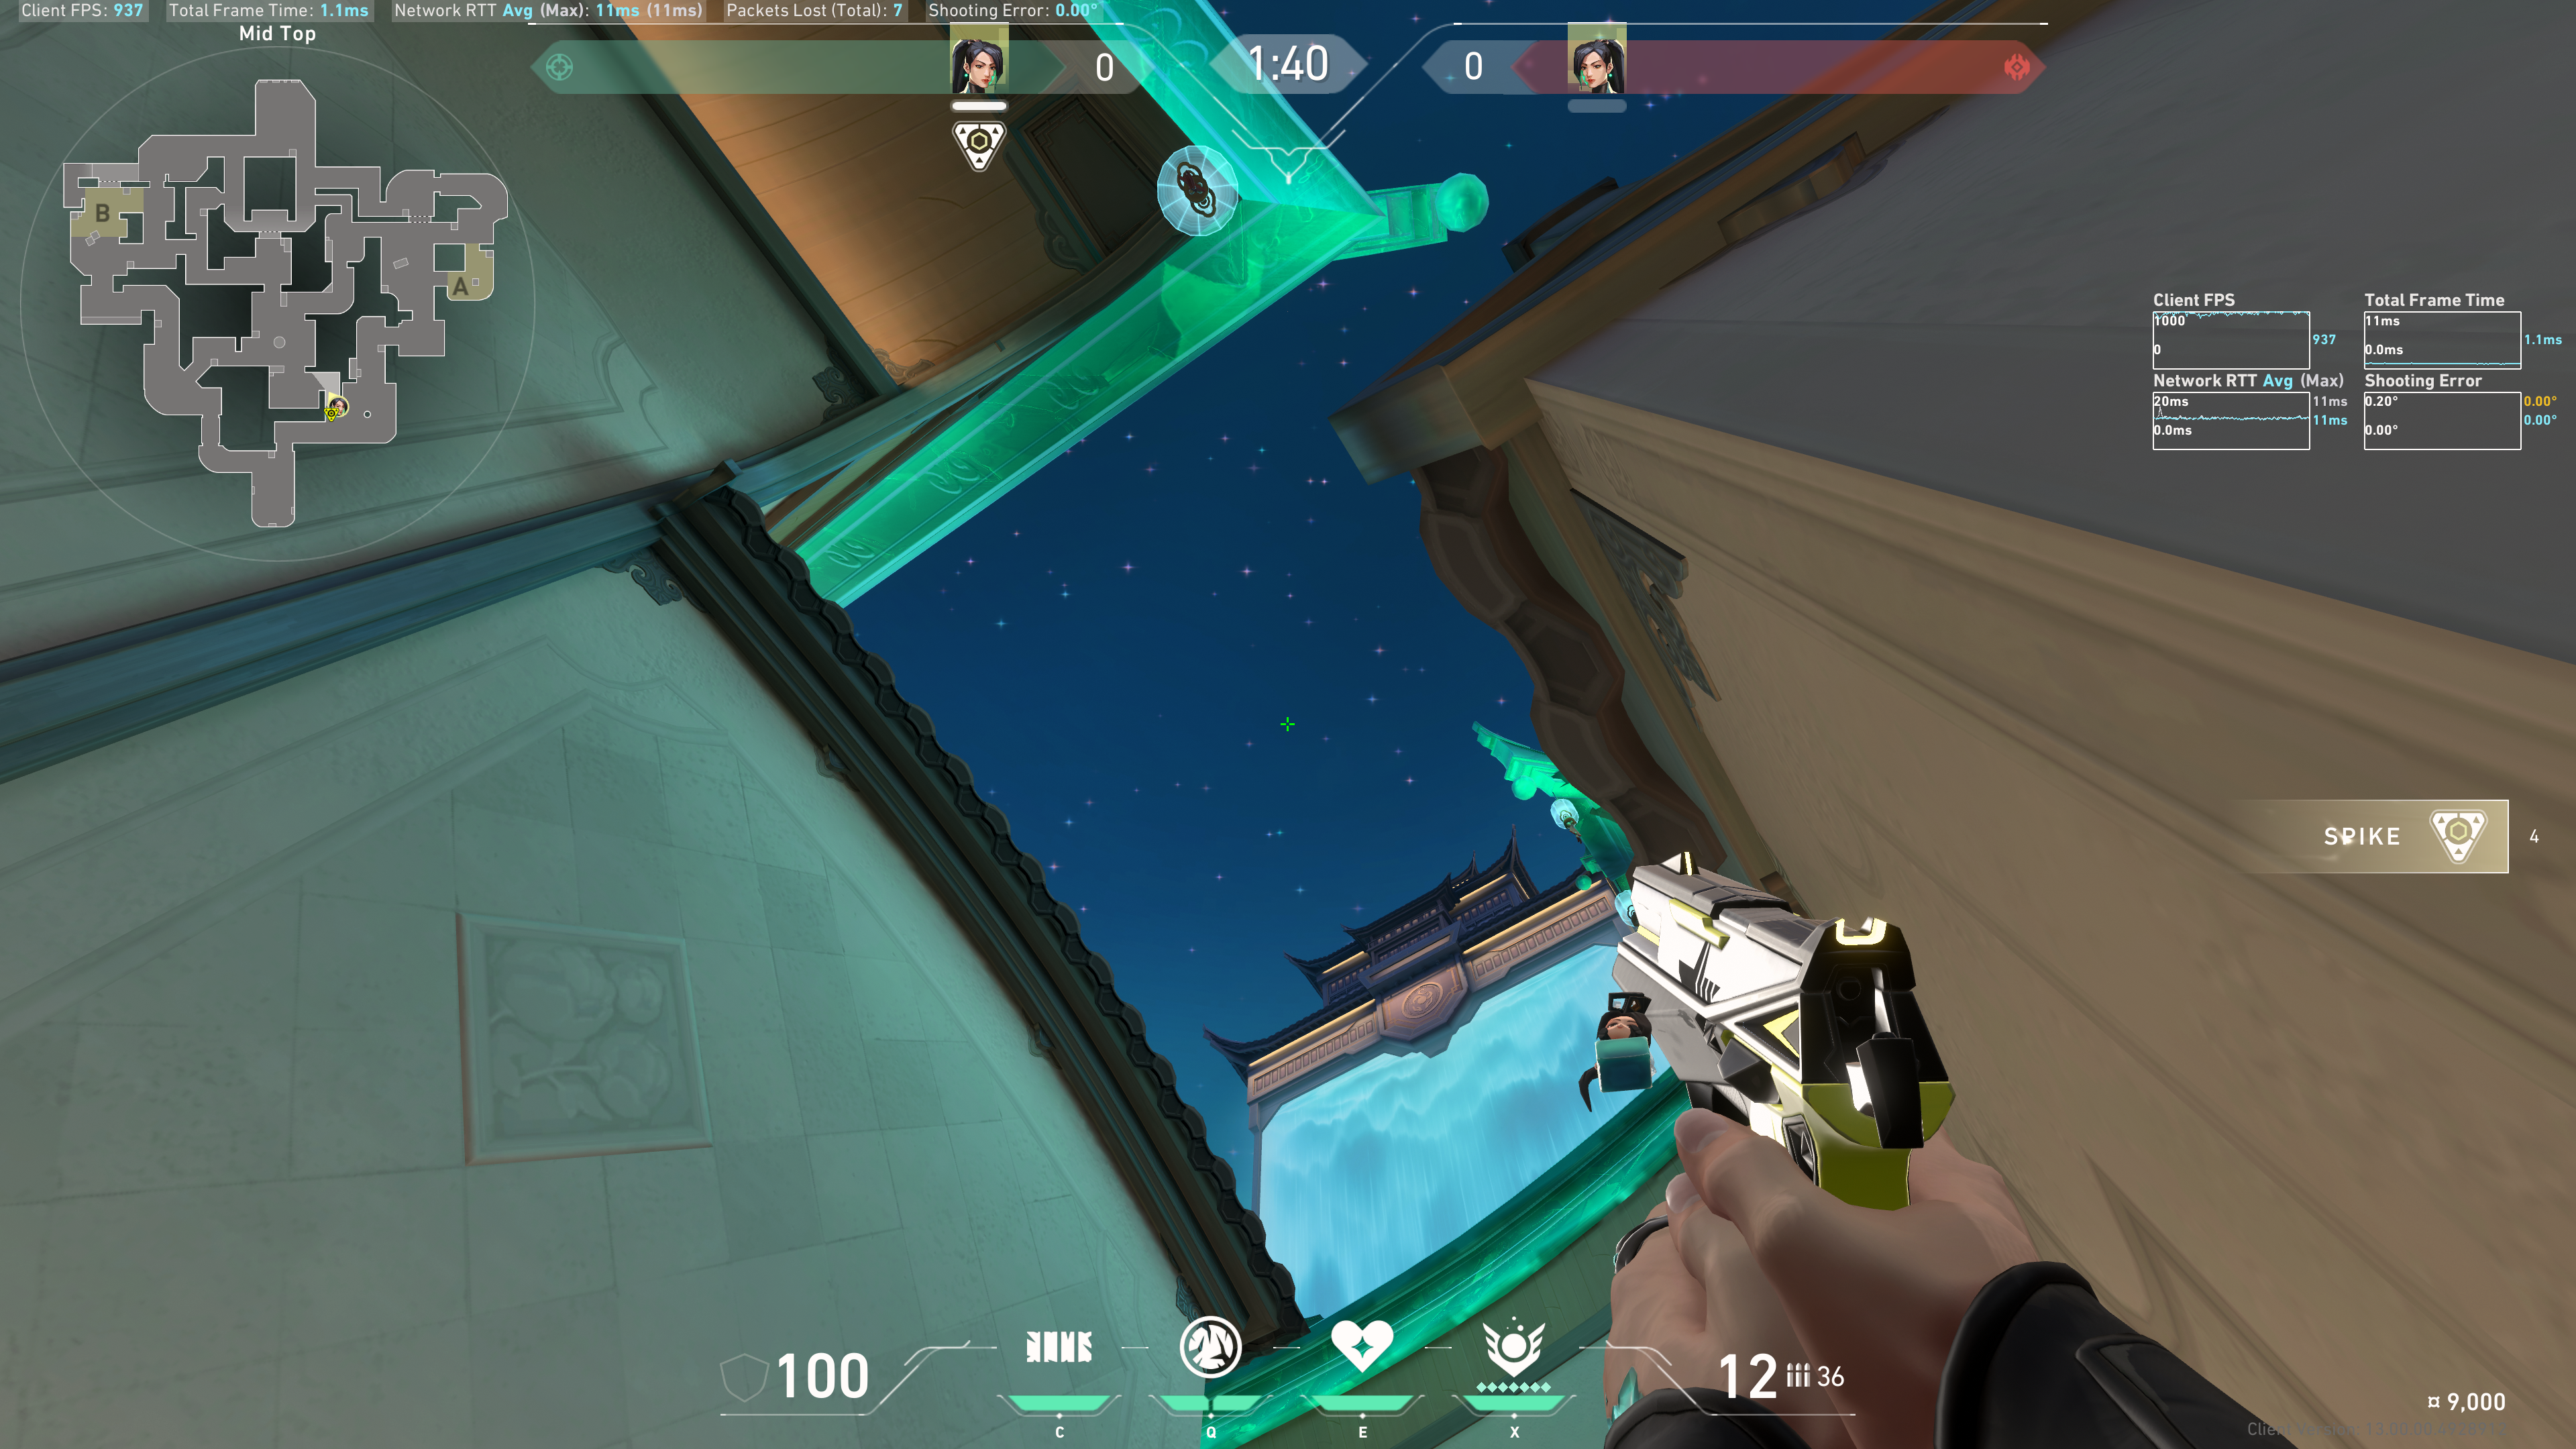
Notice this star:
Aim about 2 crosshair lengths to the left of that star. Jump and throw at the same time:

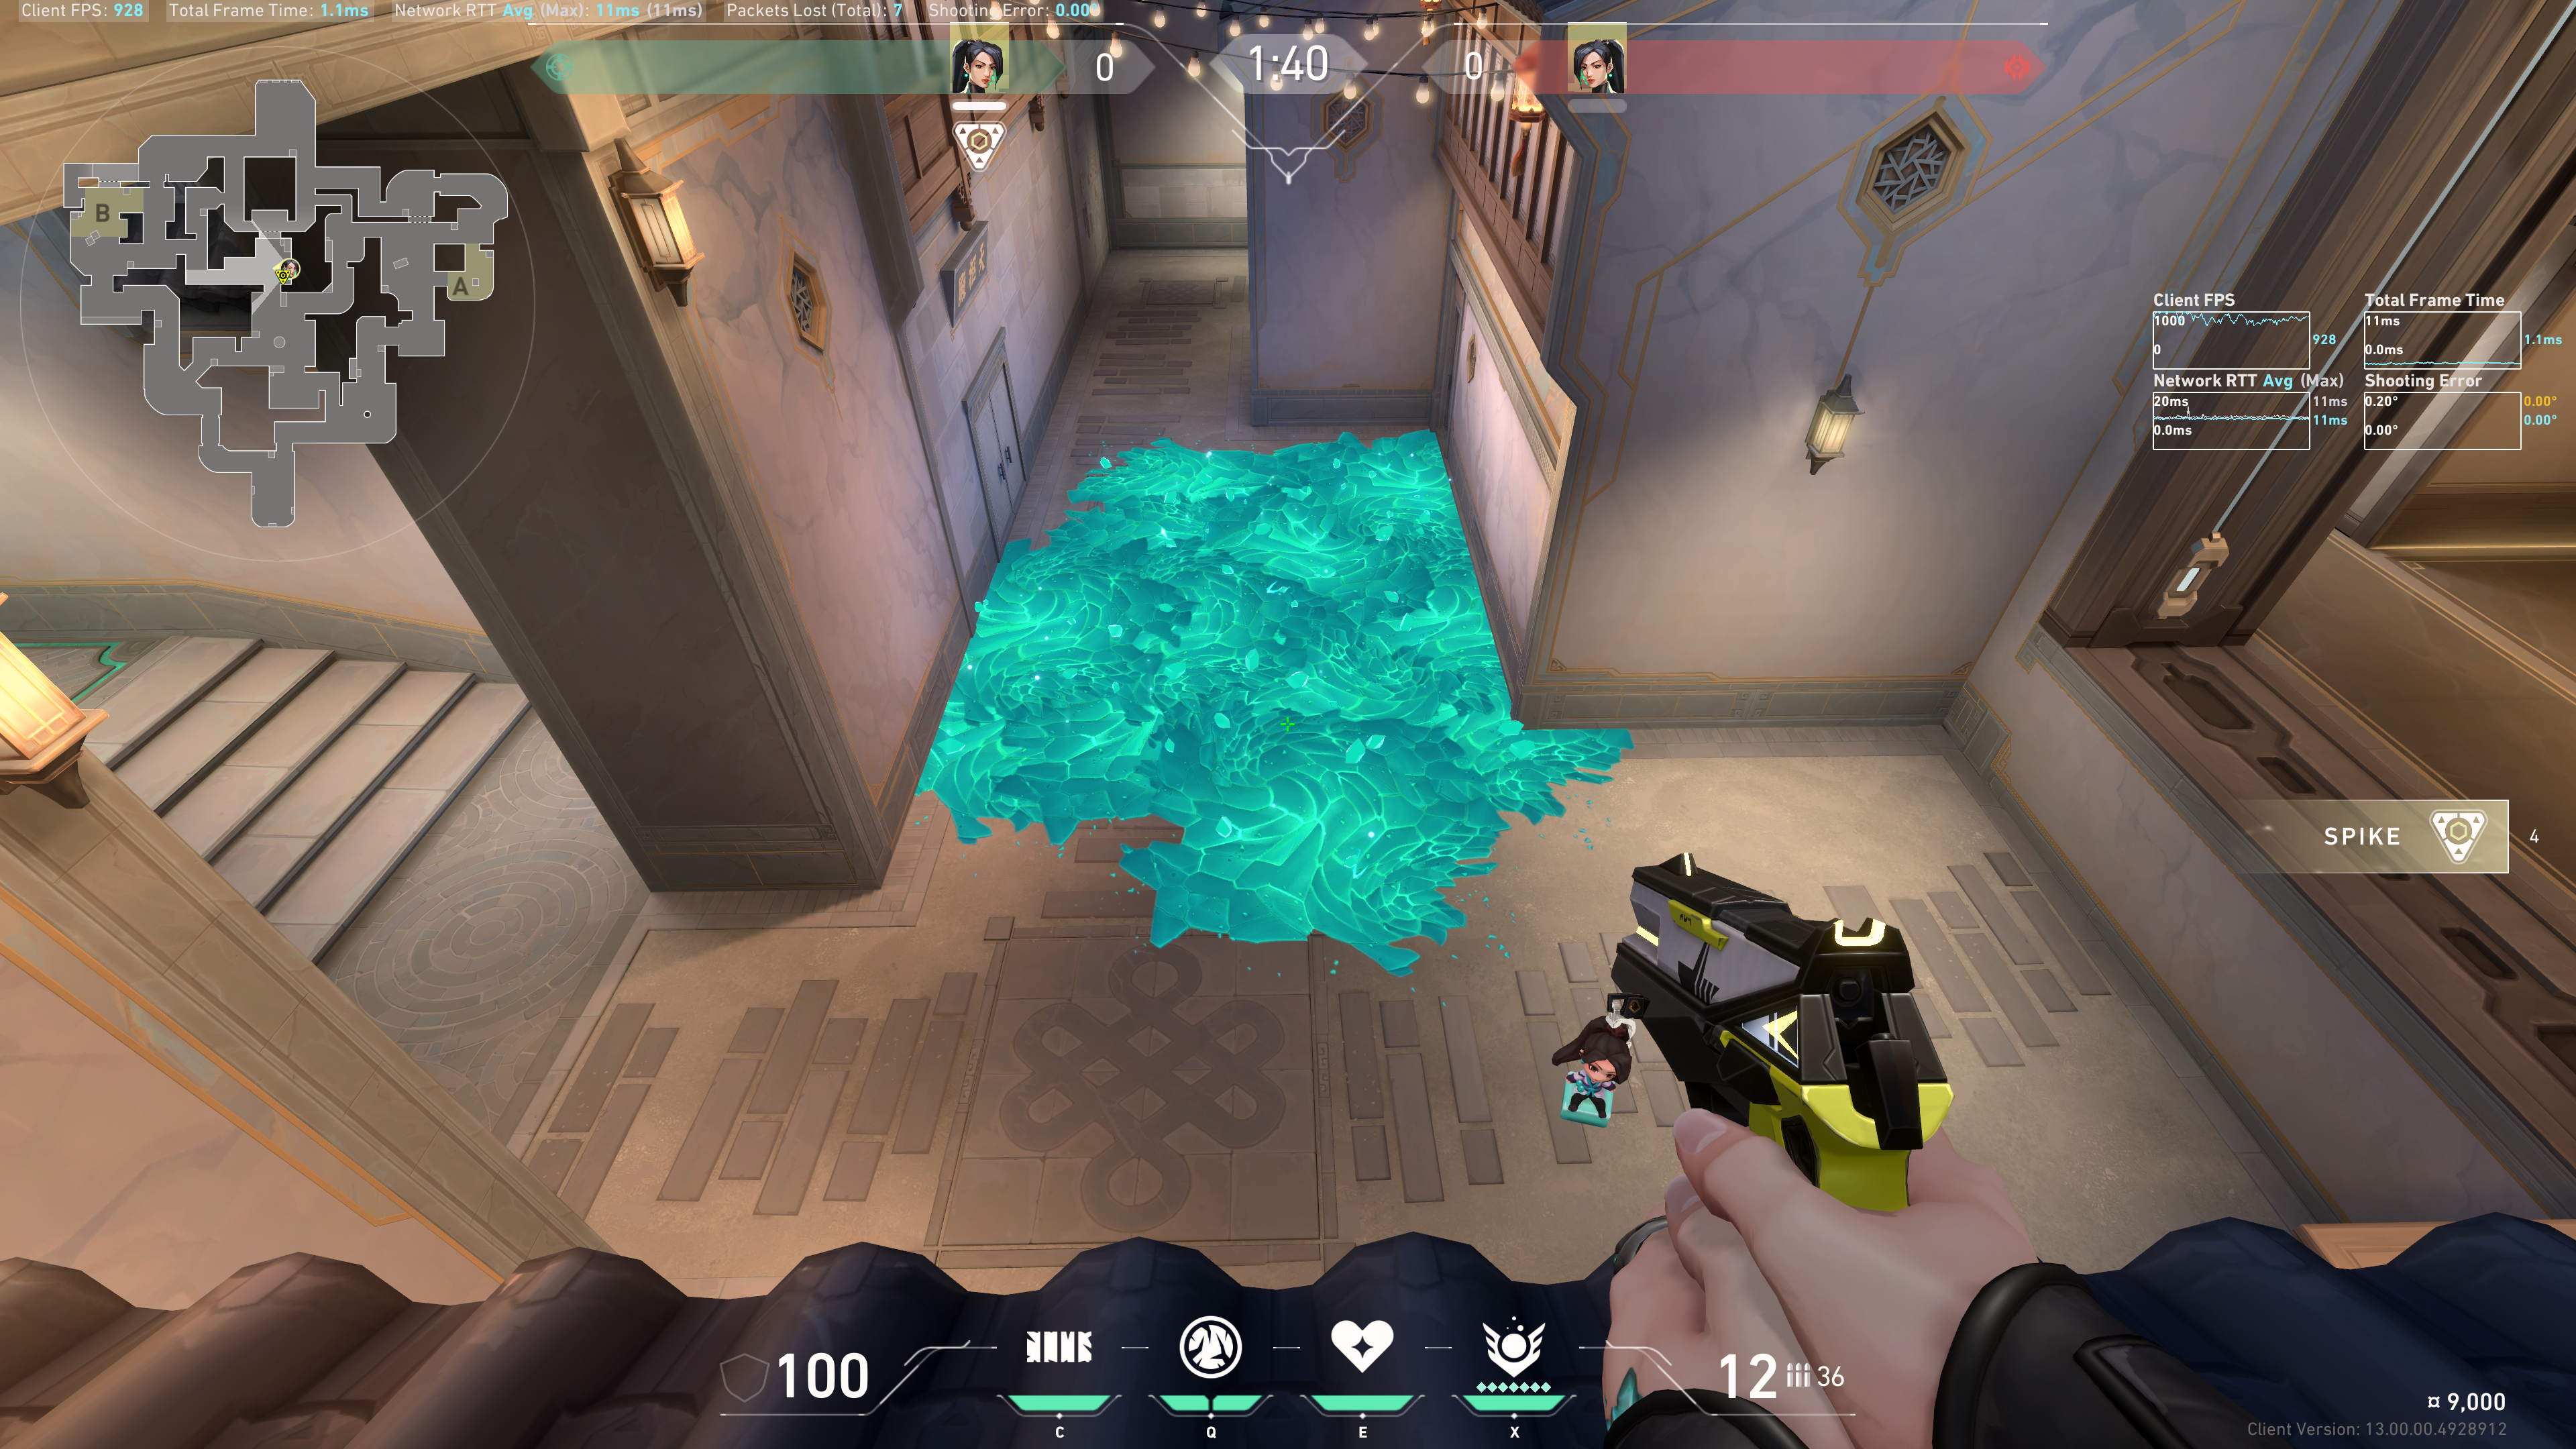
Example result:

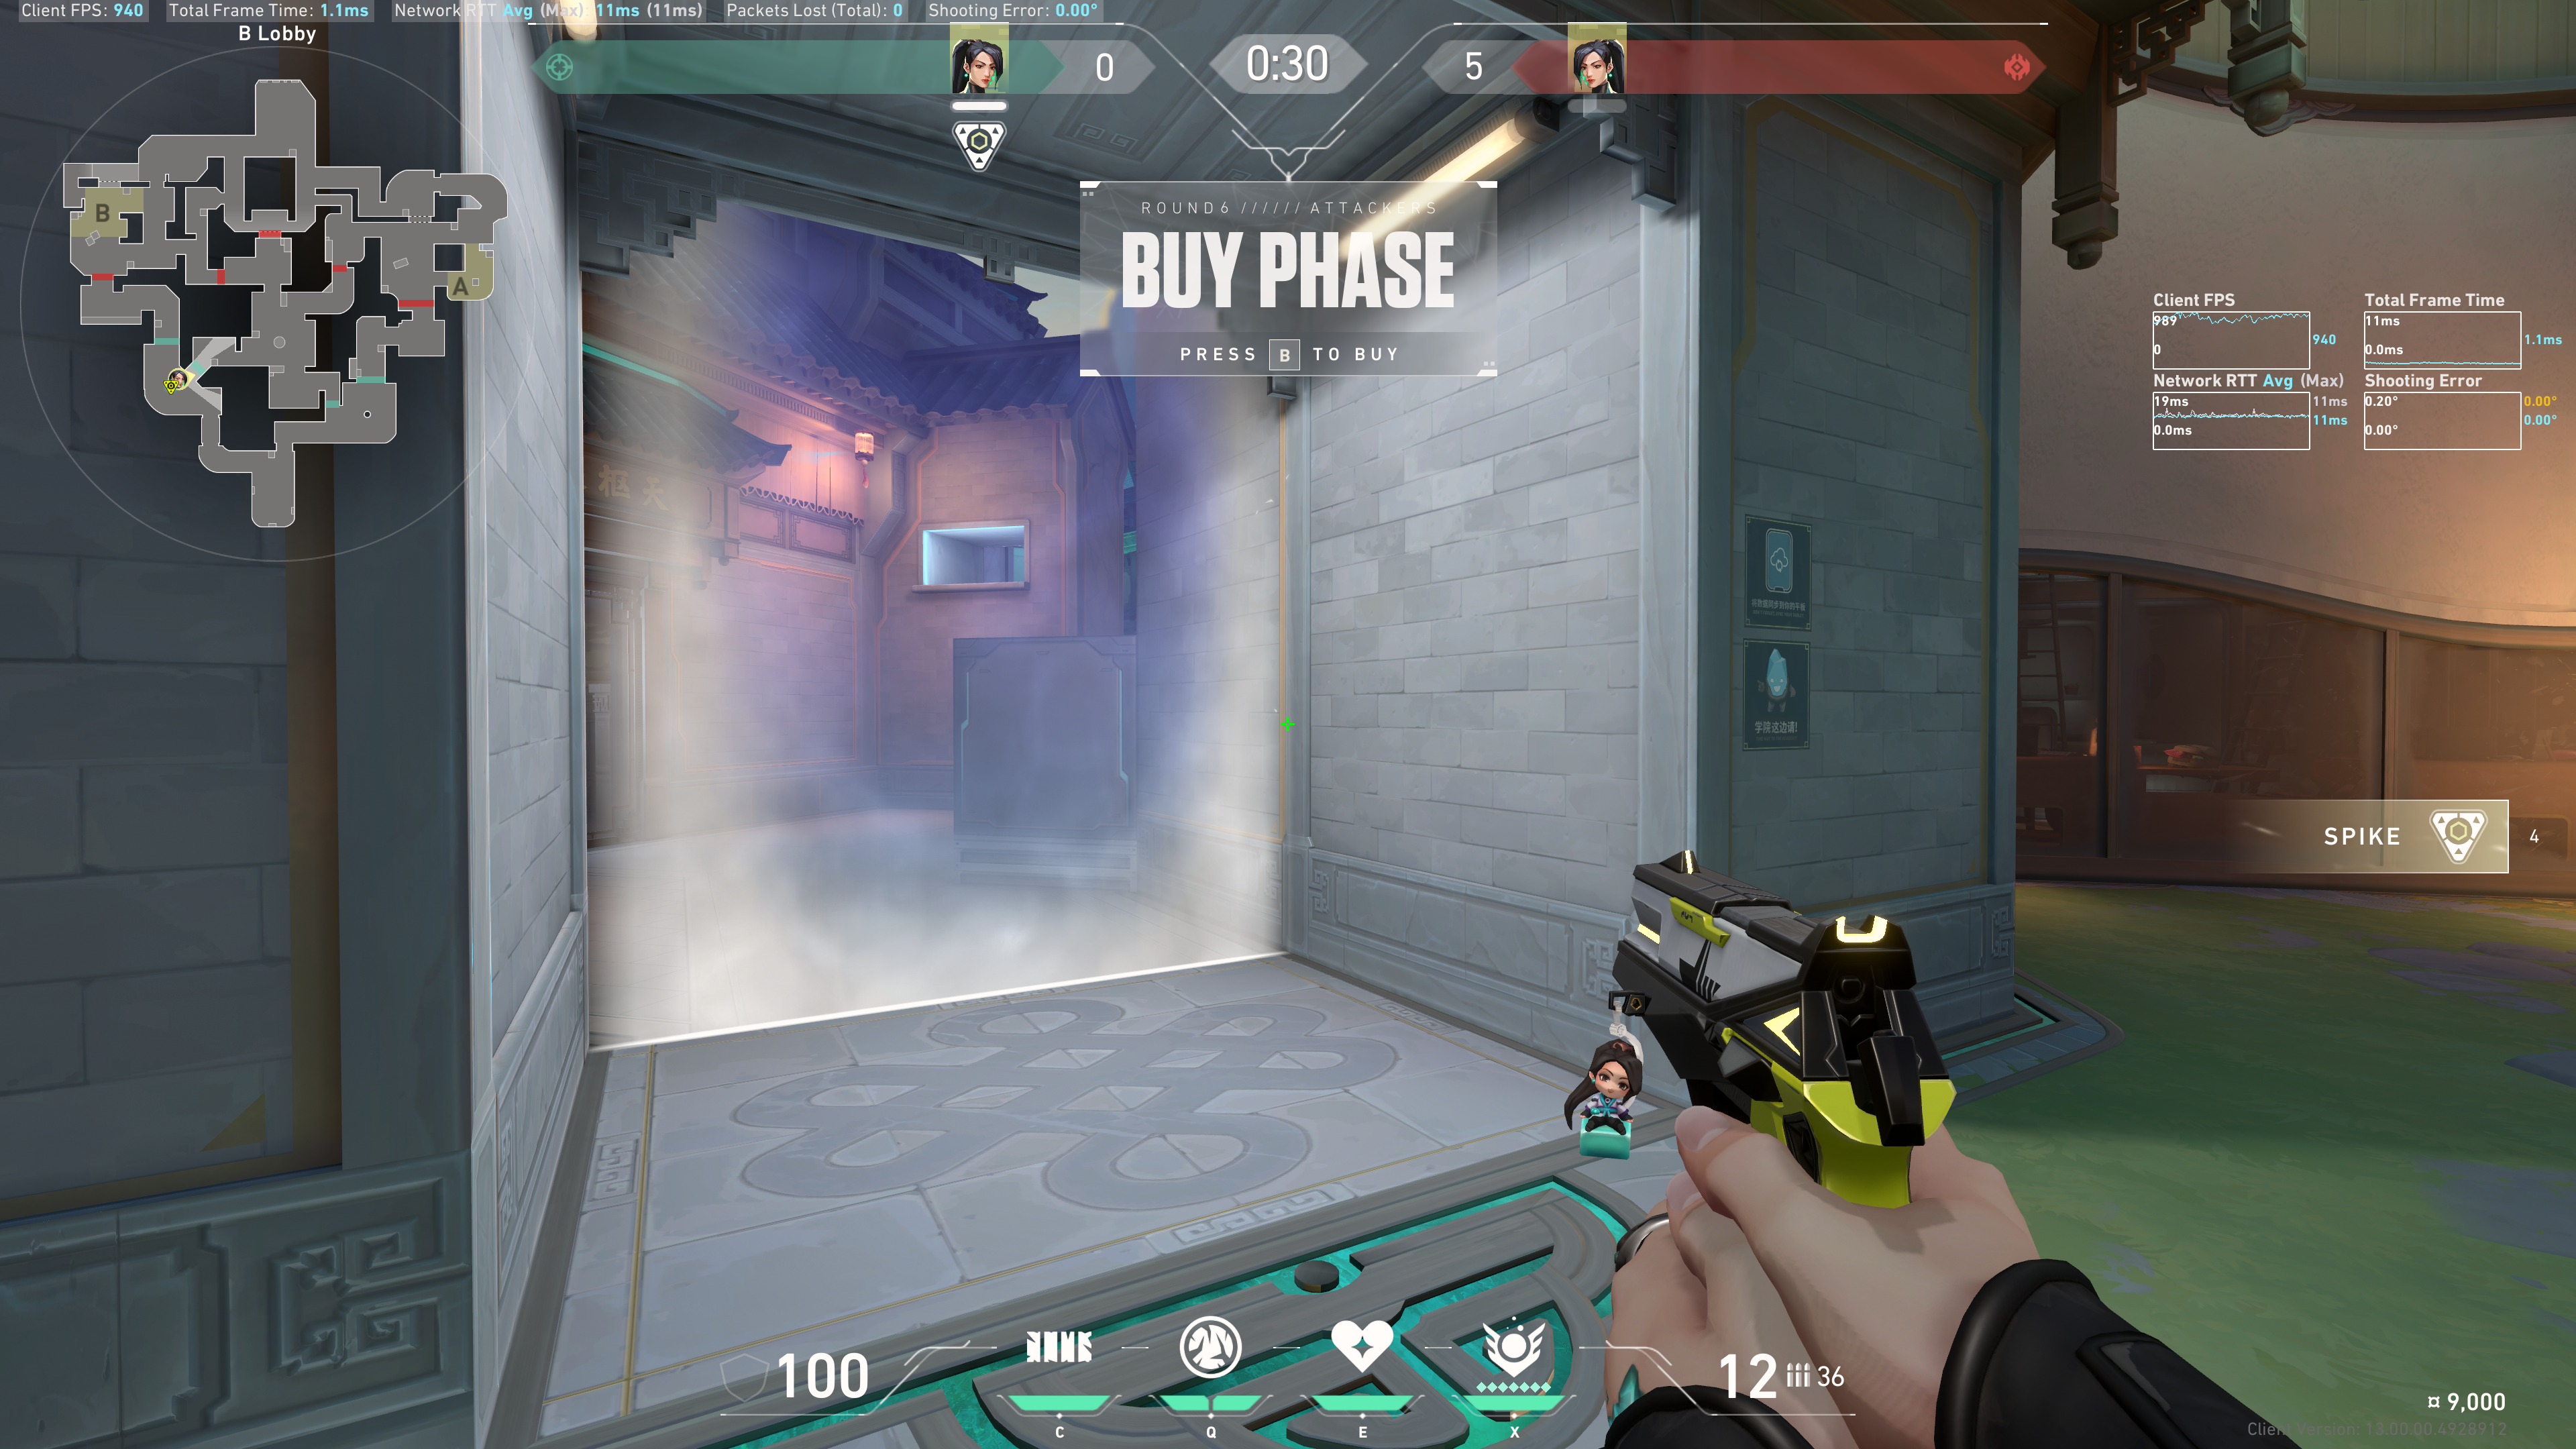
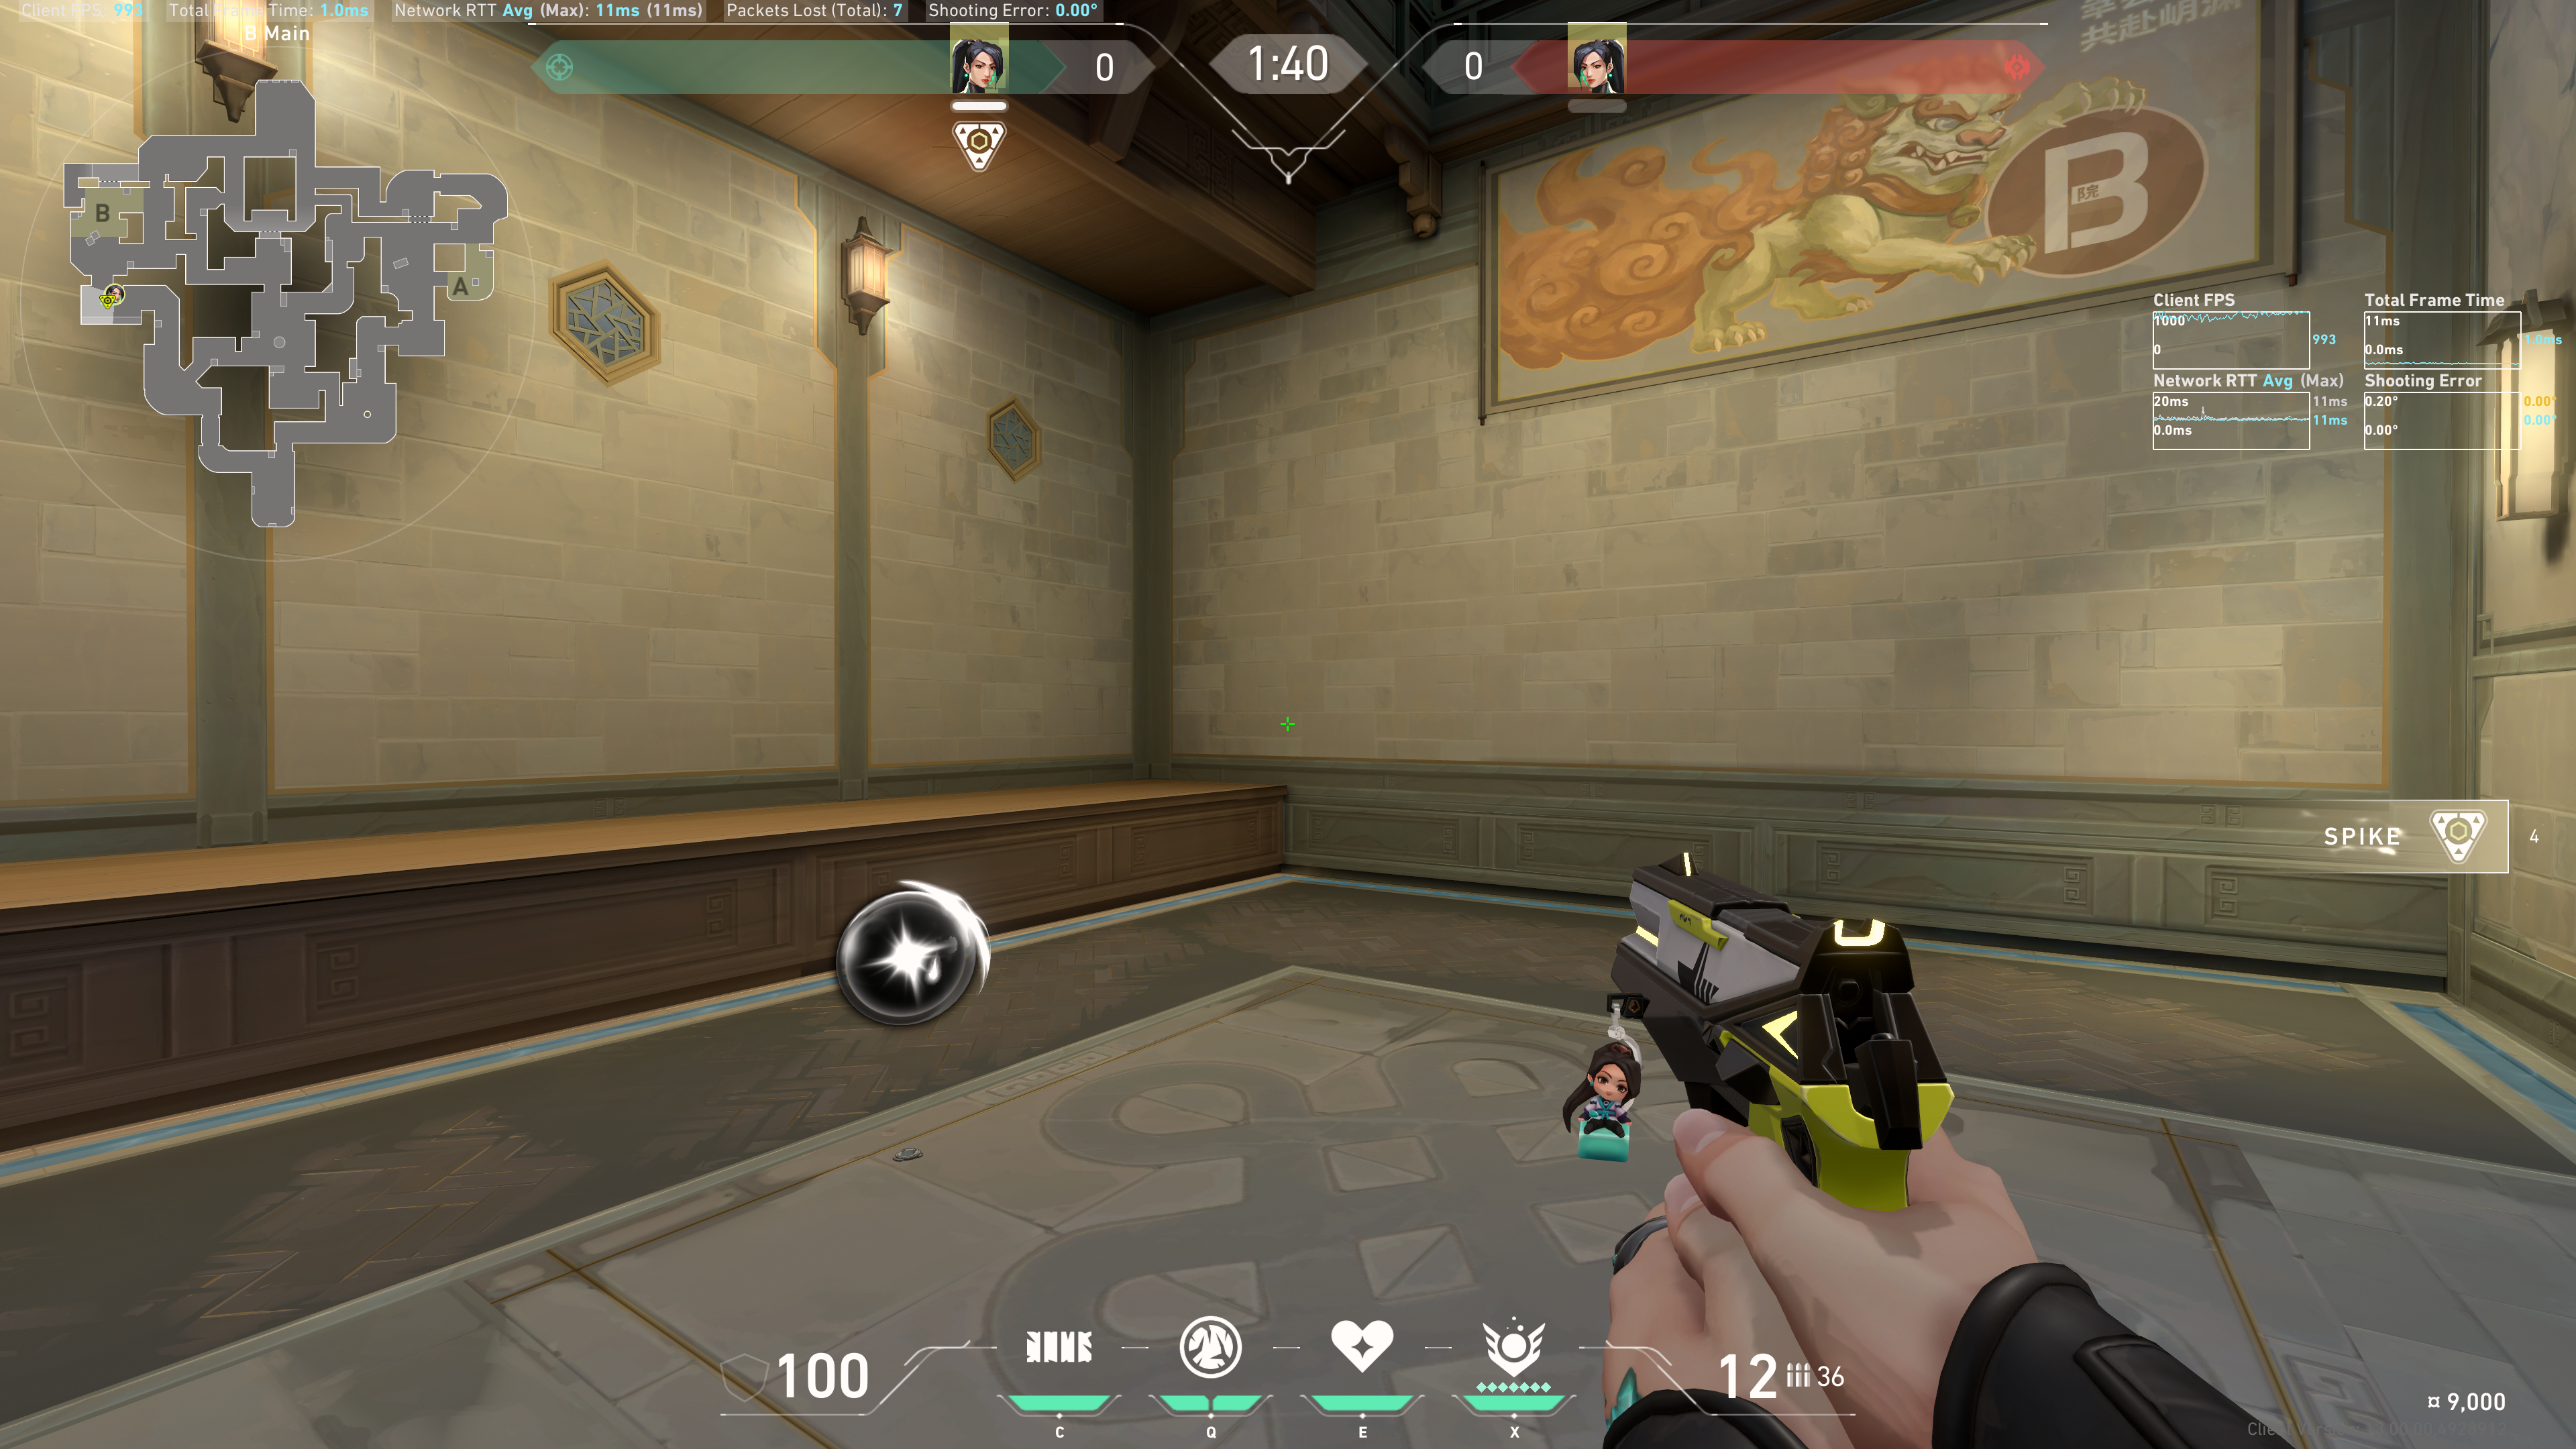
B Site
Tuck between this wall and the barrier:
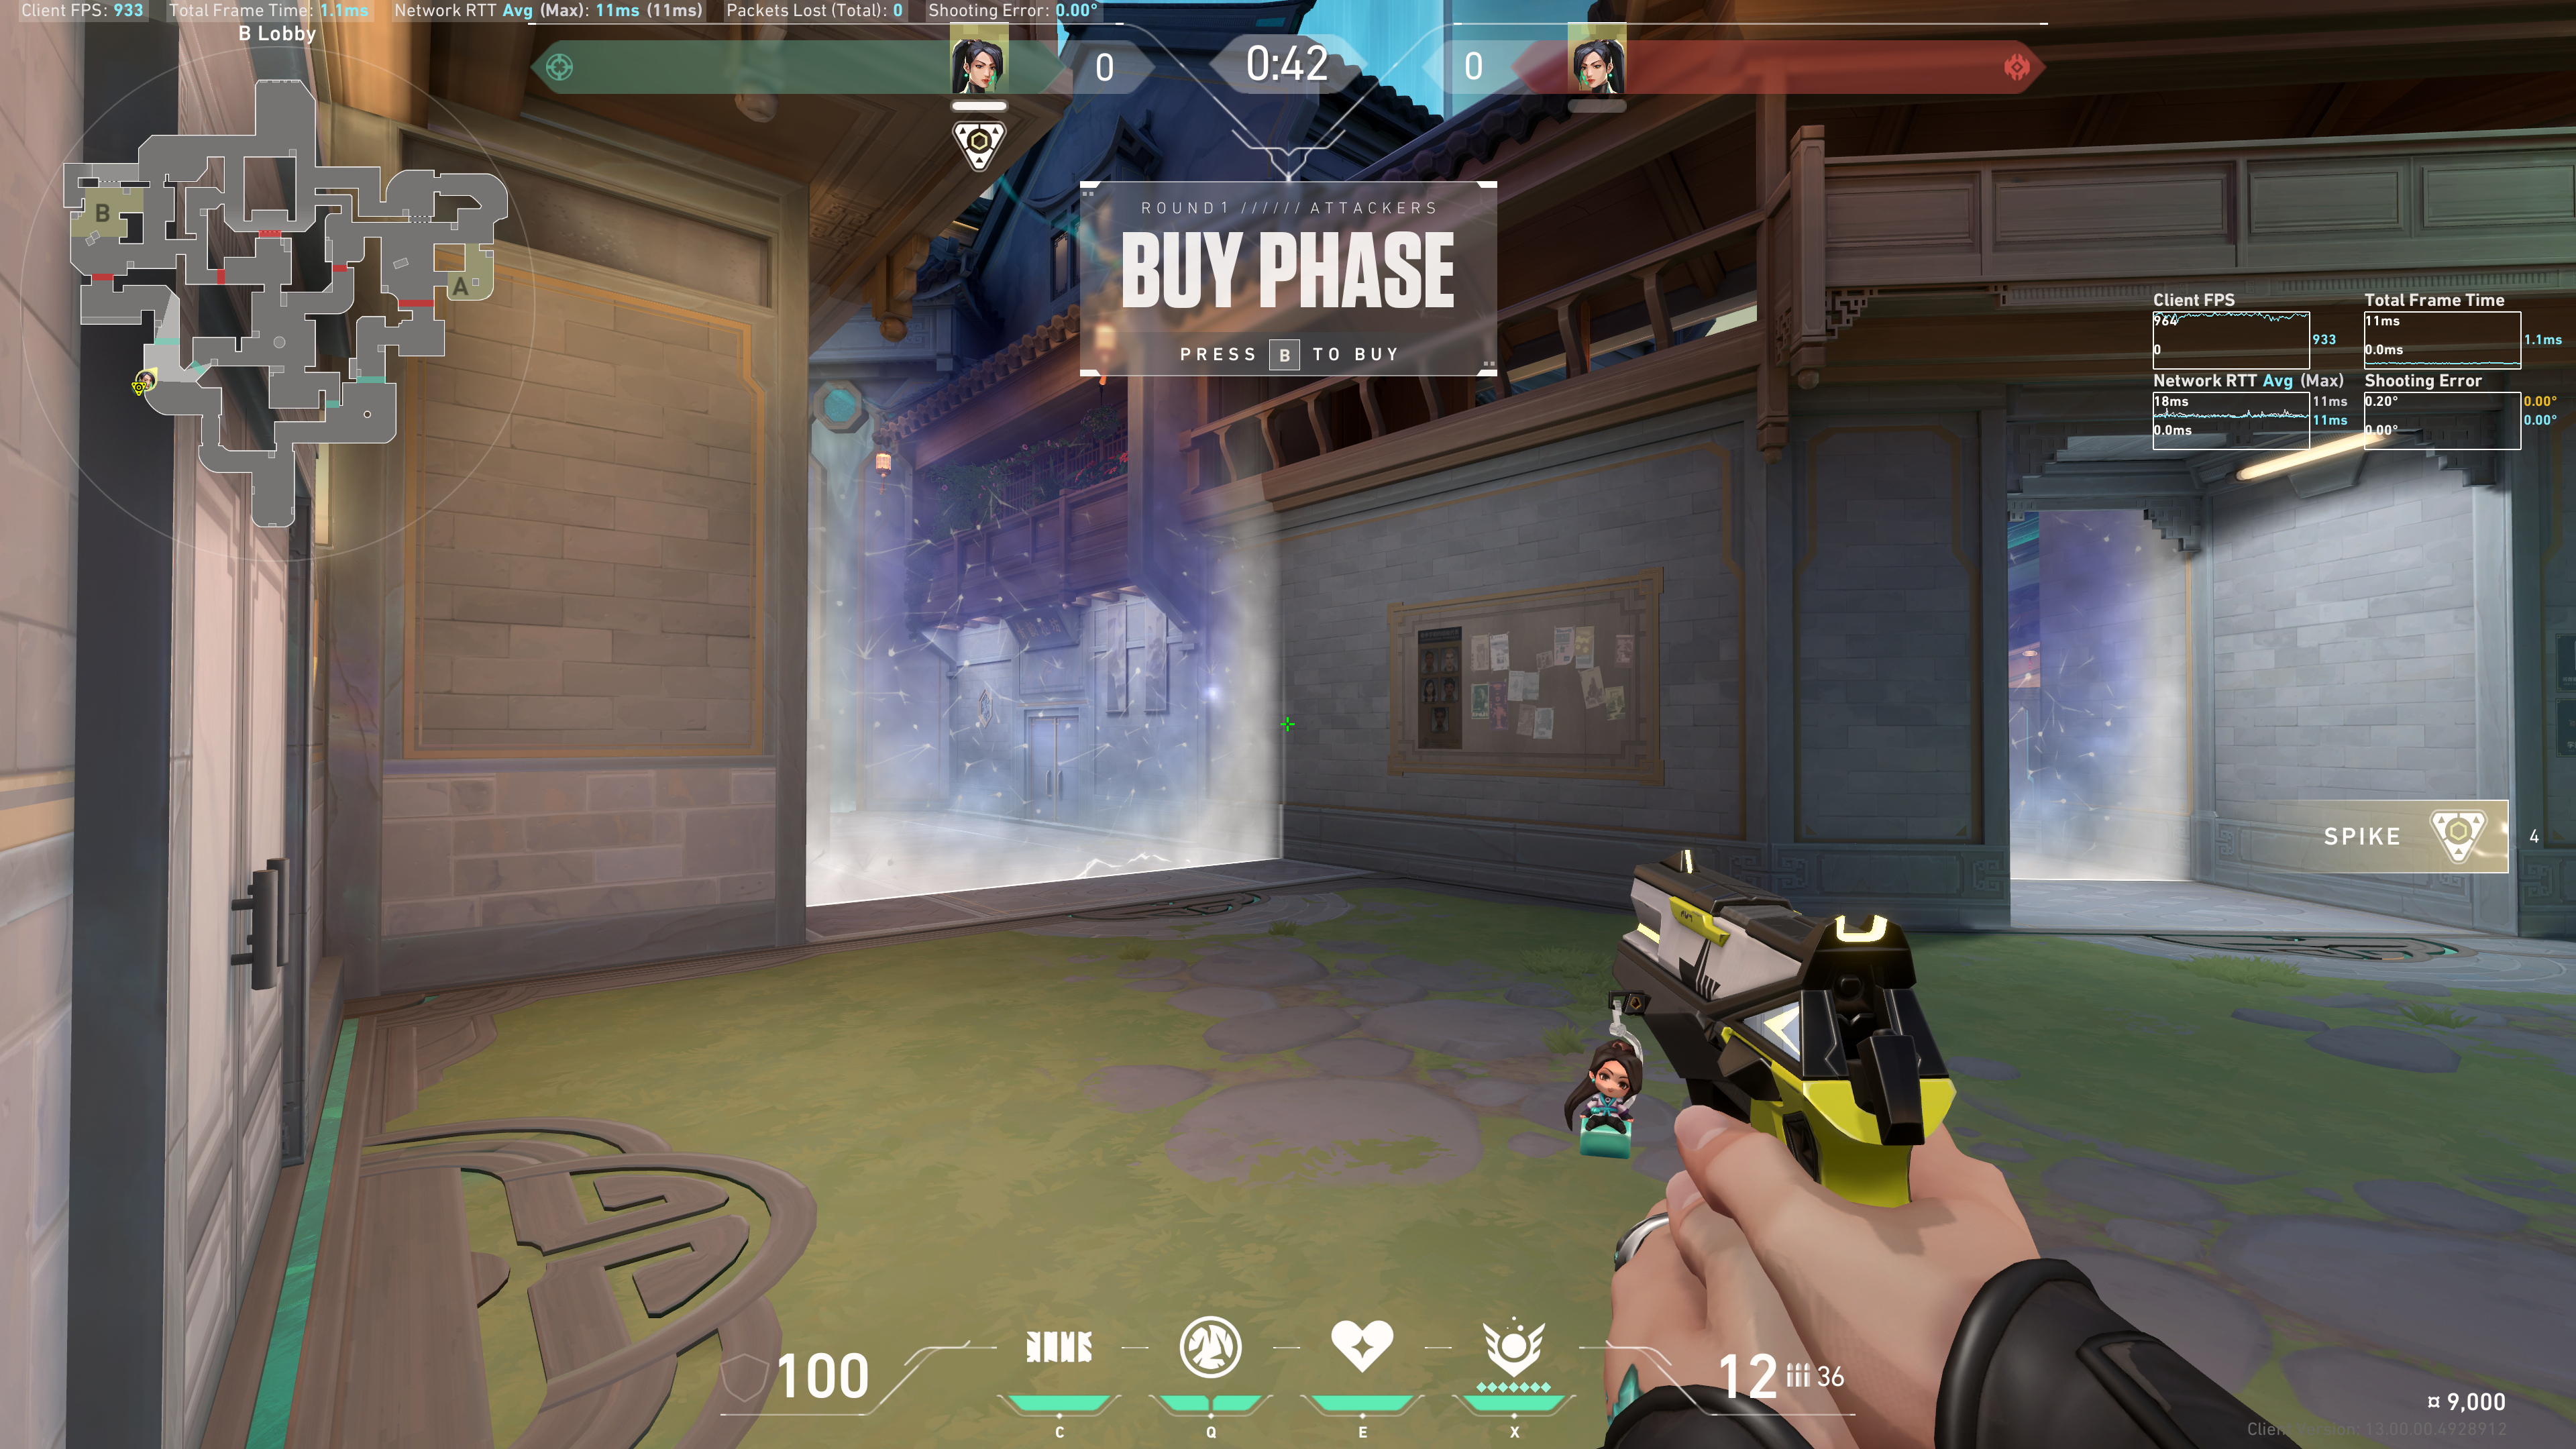
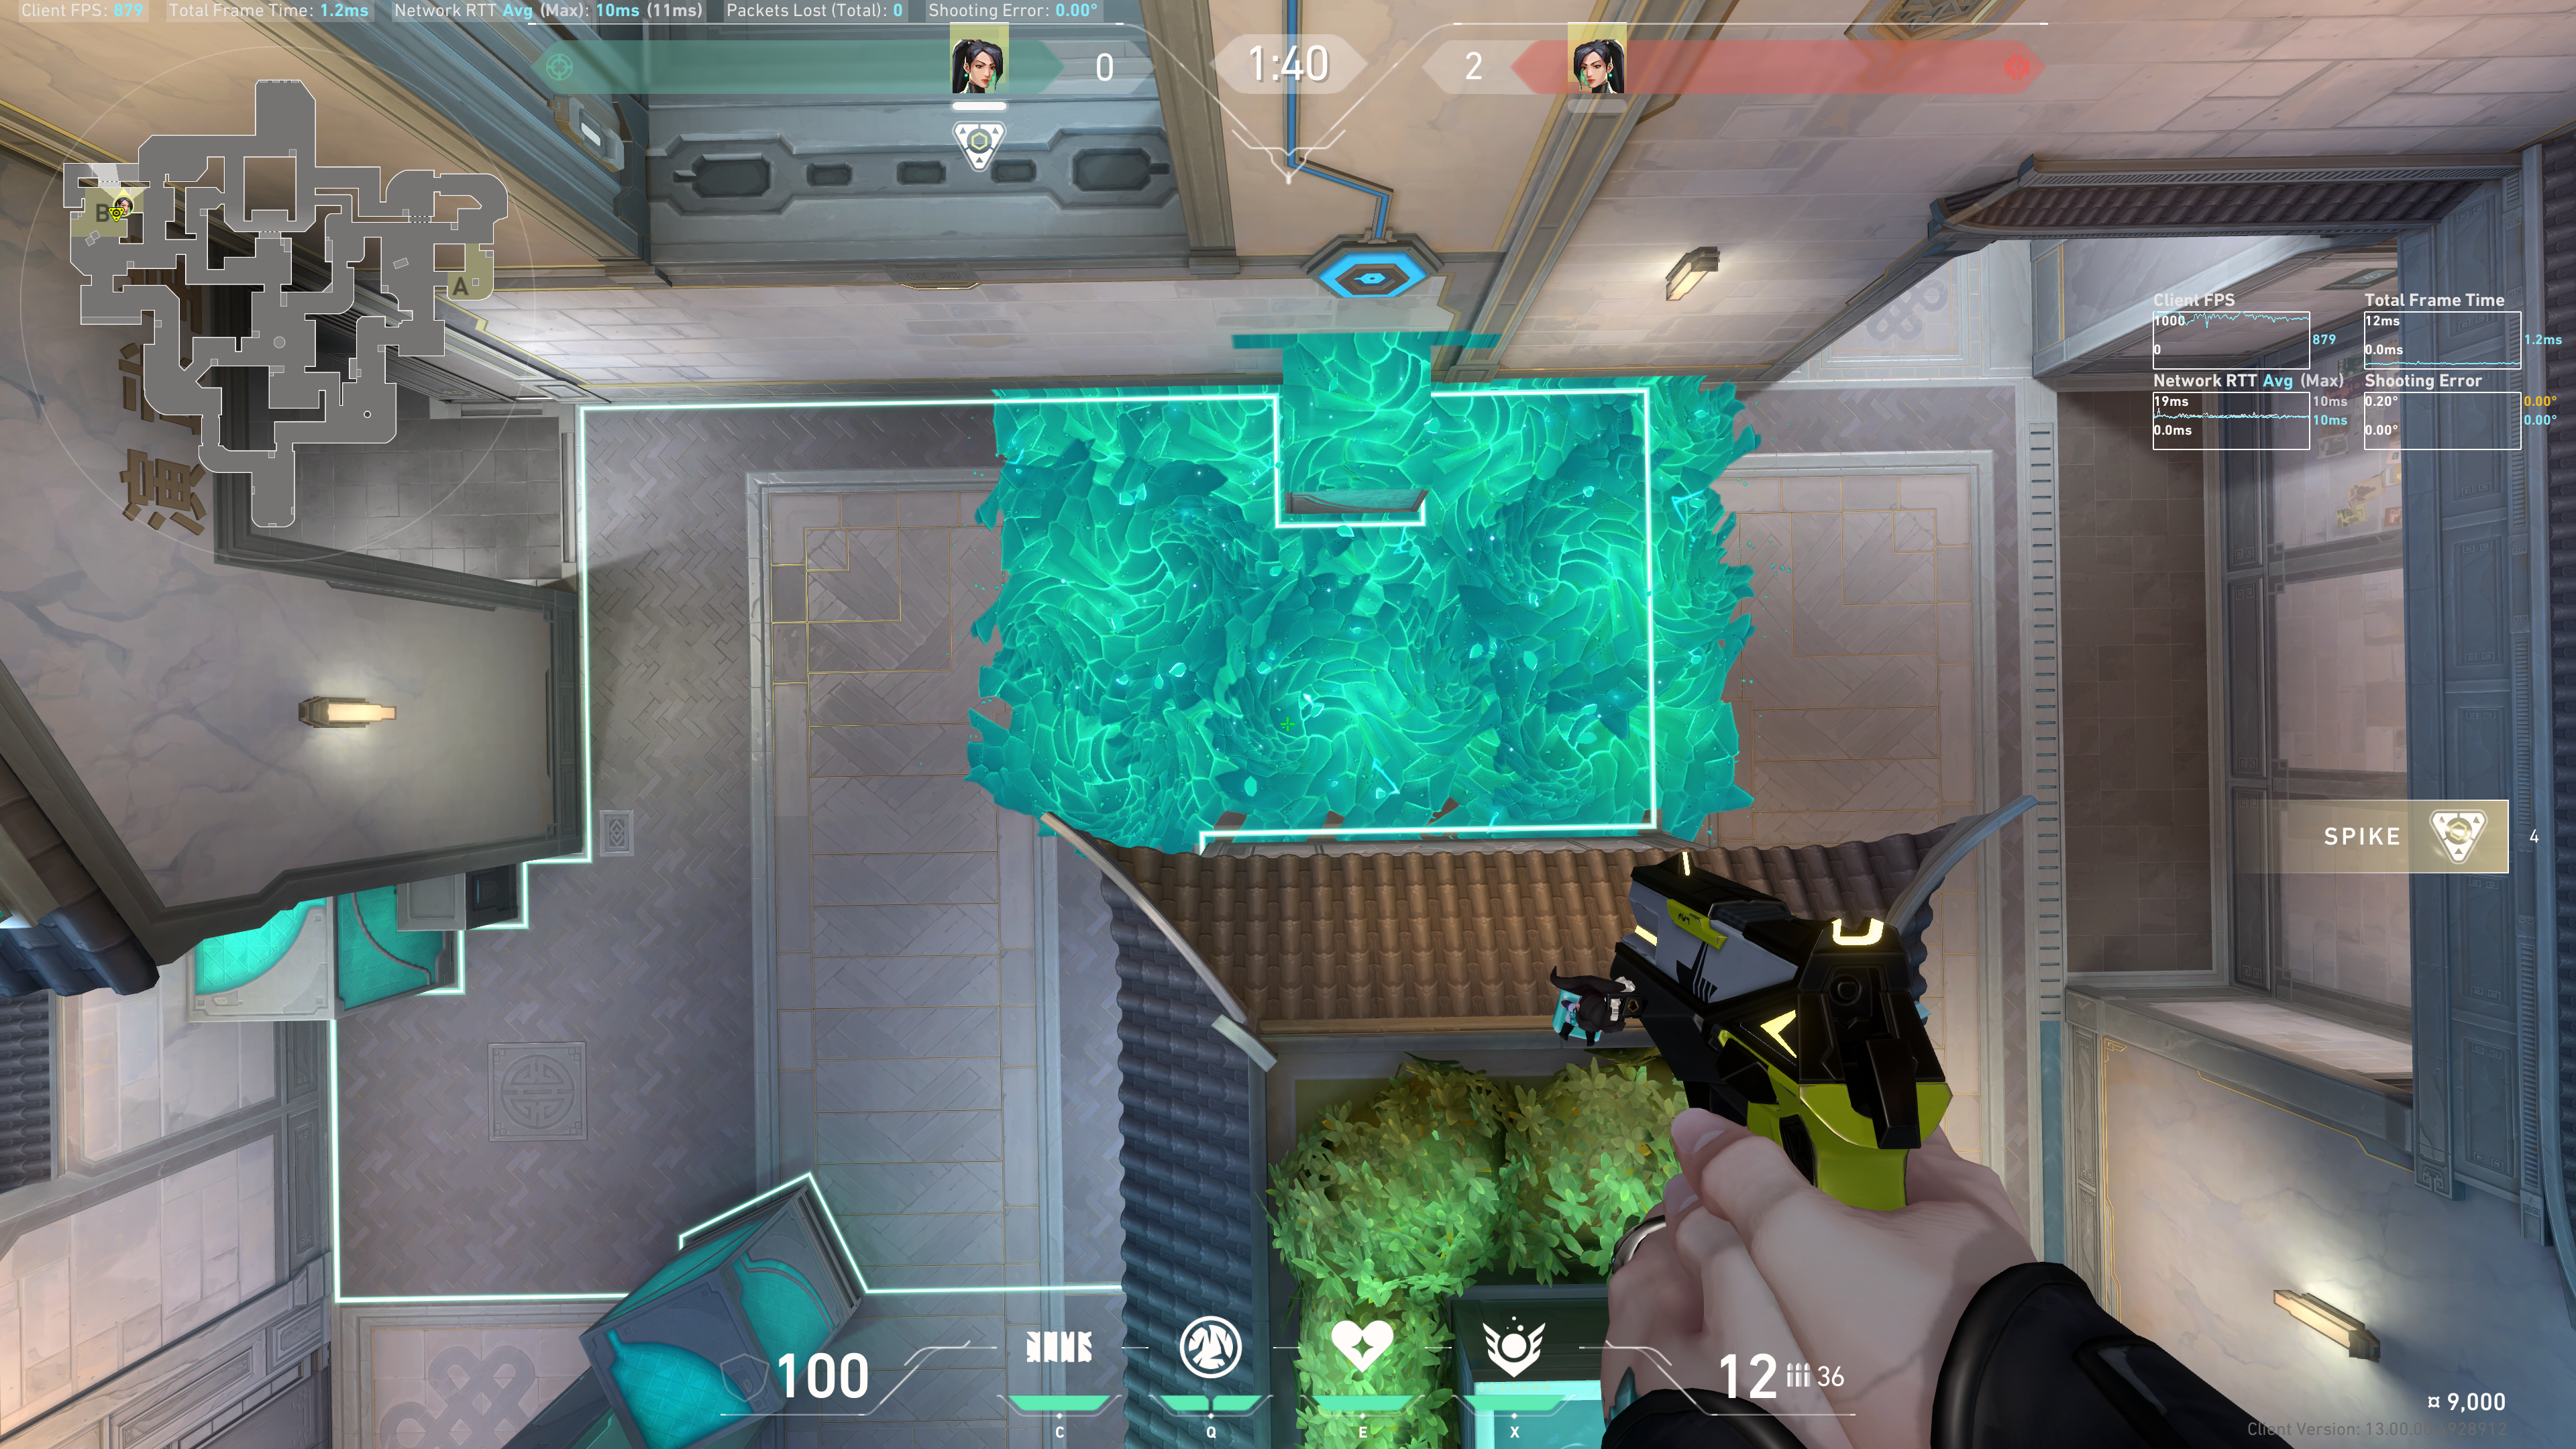
B Site Dice
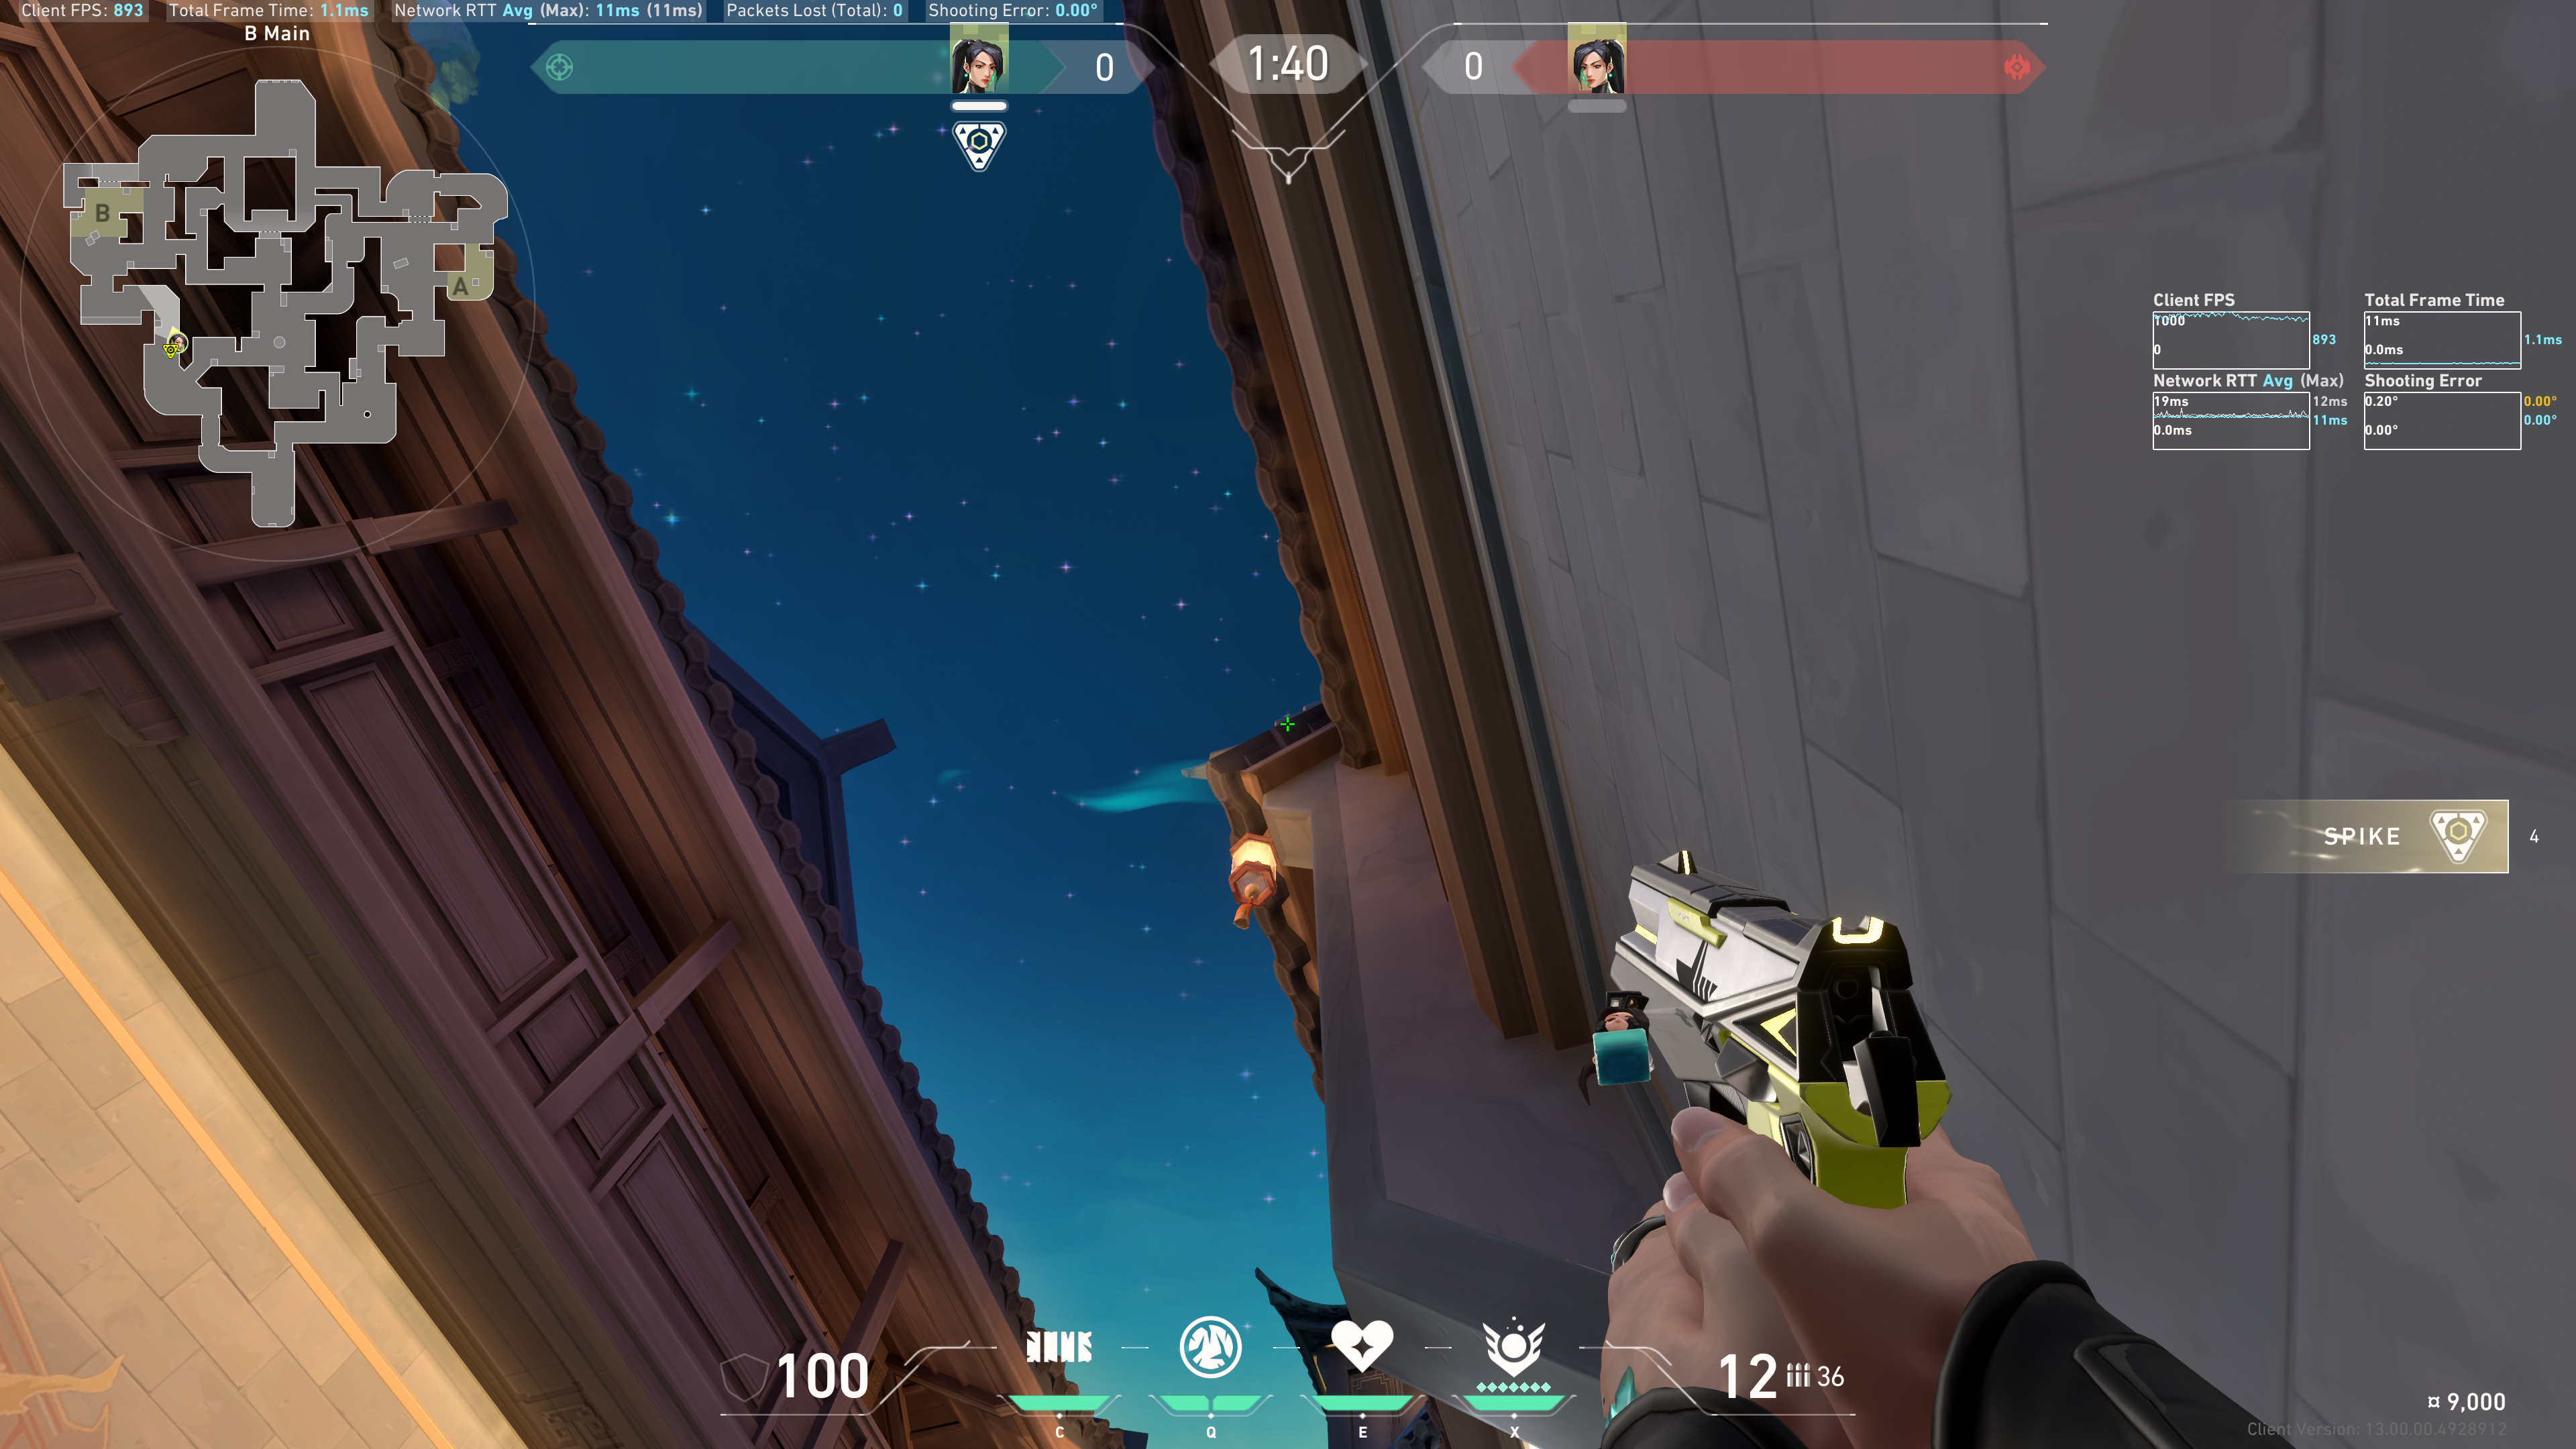
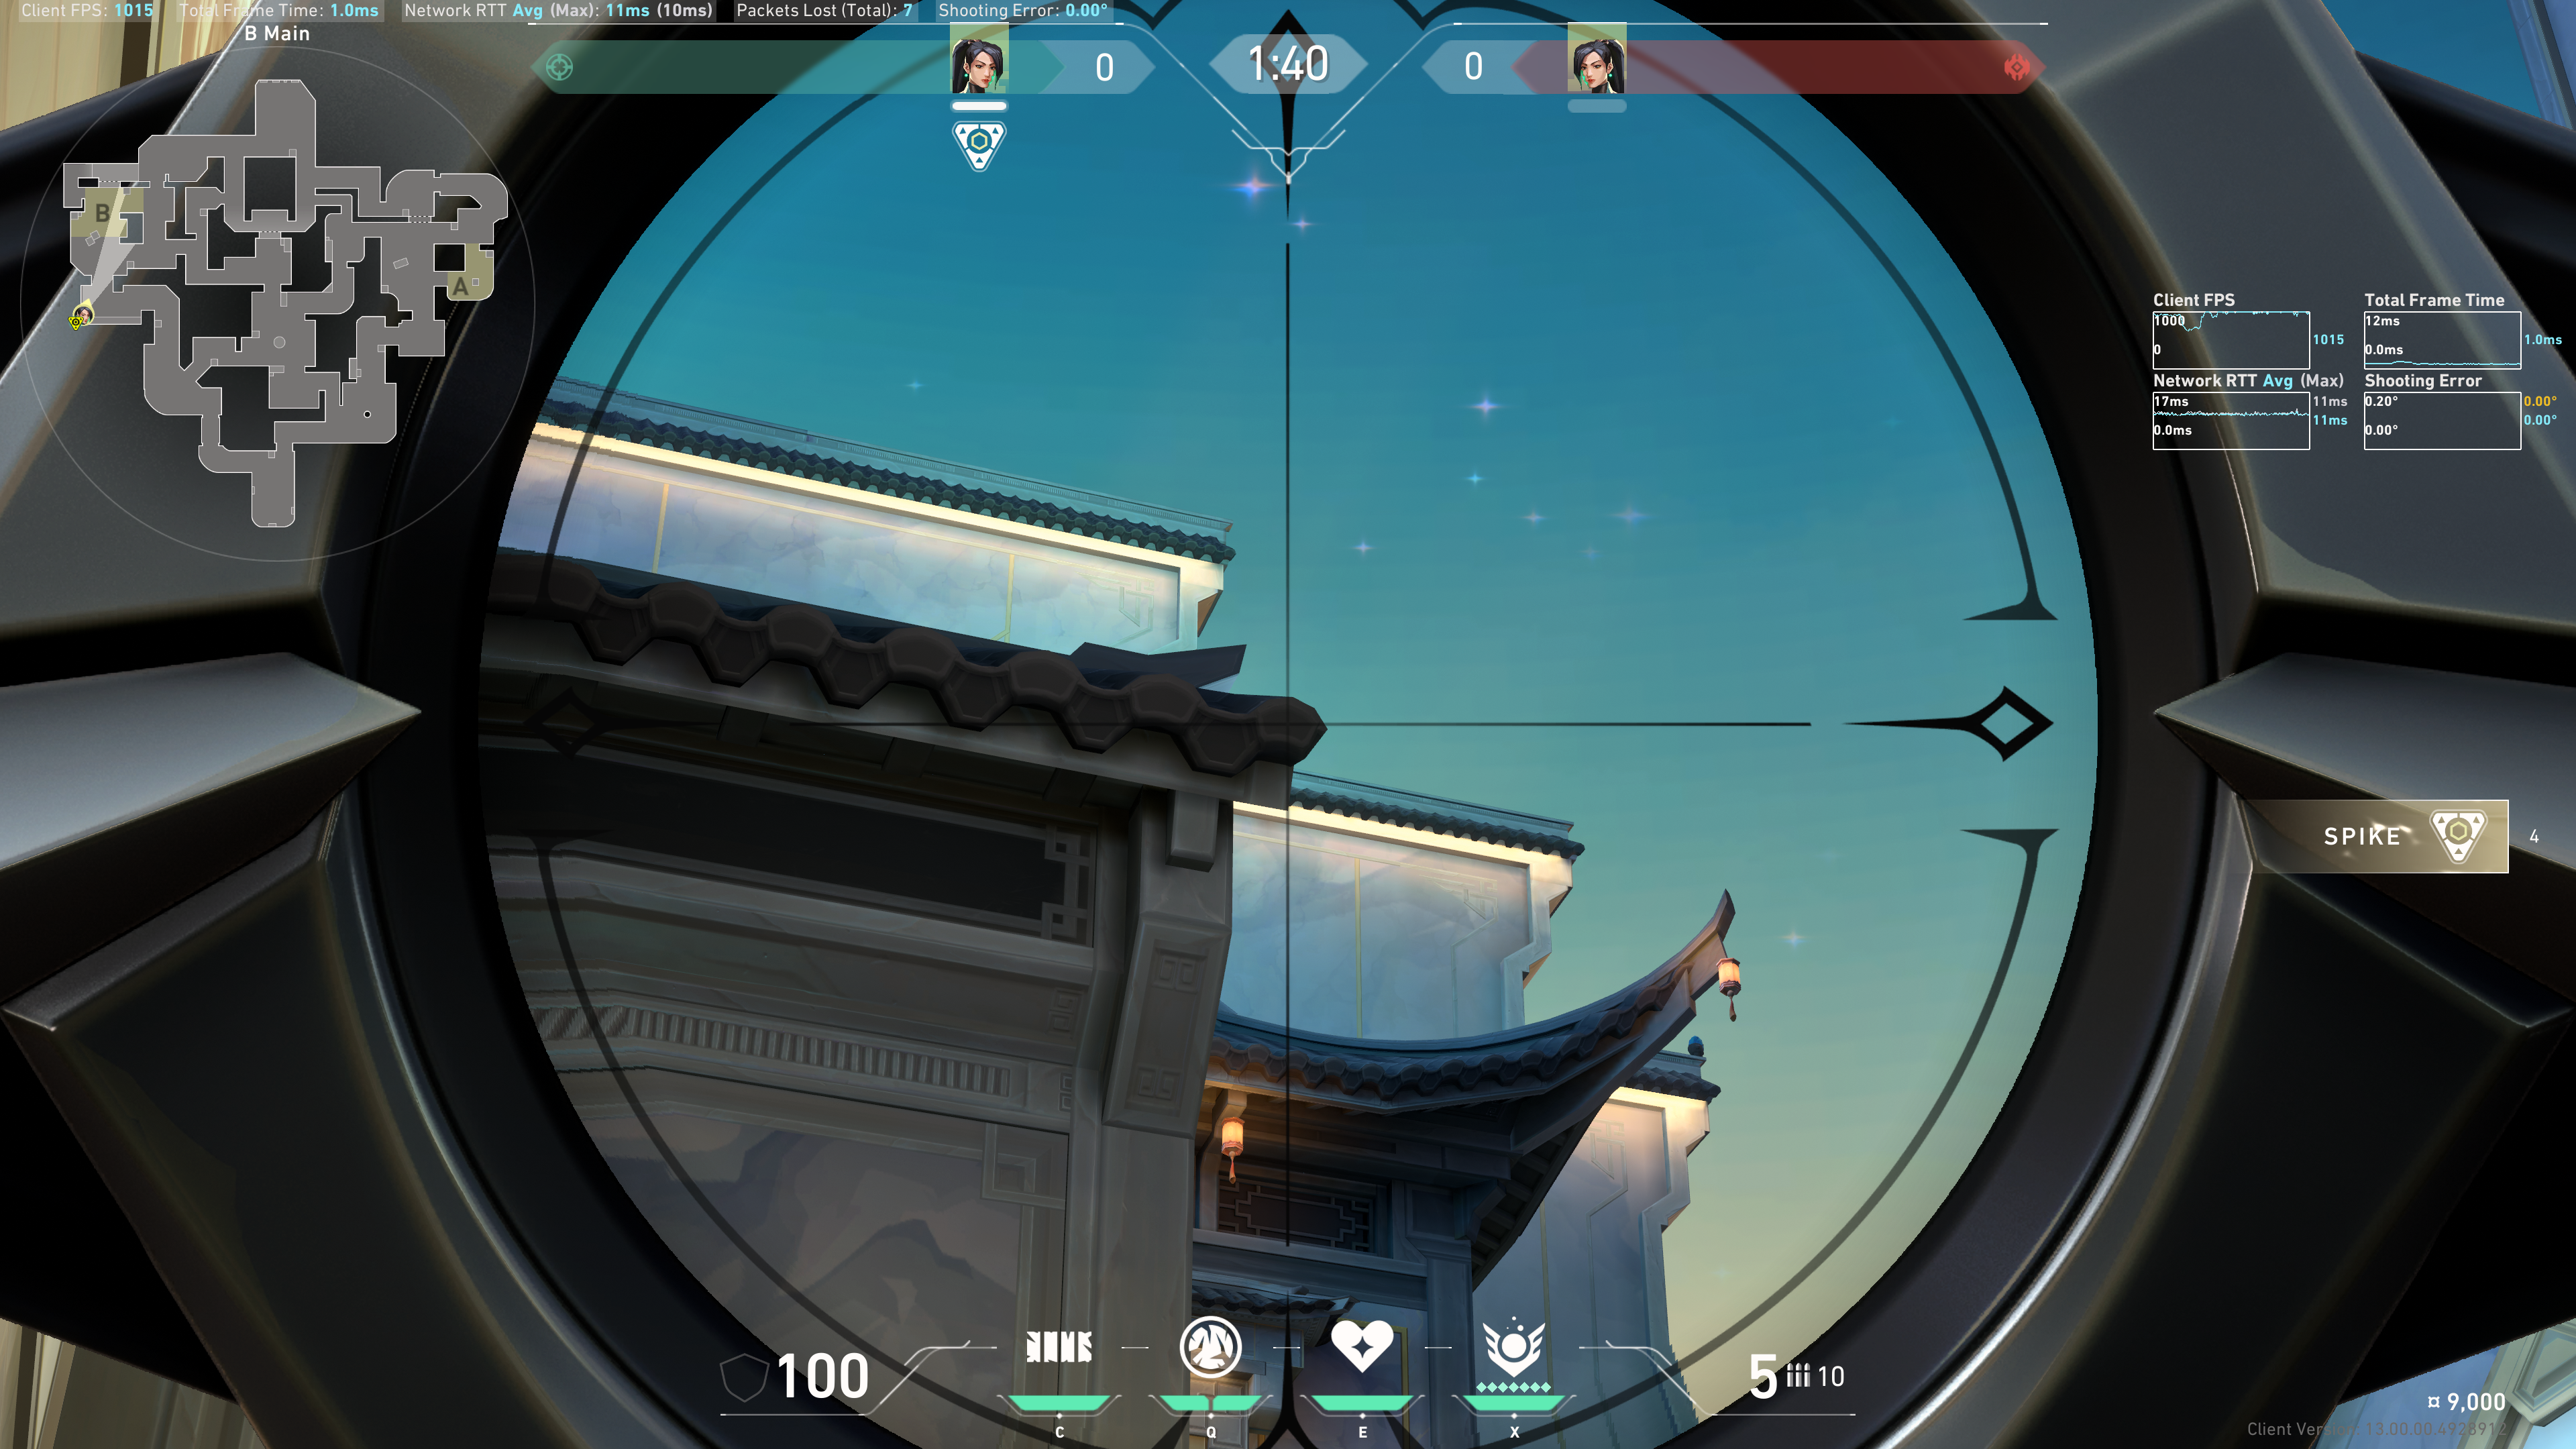
Notice this star closest to the blue smoke:
Aim about 2 crosshair lengths above that star:

Note: breakdown of crosshair lengths and results. Ideally aim for 1-2 crosshair lengths.
| Crosshair Lengths | Recommendation | Result |
|---|---|---|
| 0 | Not recommended | Ice Slow might end up on the roof. |
| 1 | Acceptable | Same result as 2, but the boxes visually show the Ice. |
| 2 | Optimal | The half box hides the Ice visual, possibly giving a false sense of security to the enemy. |
| 3 | Not recommended | The full sized box does not get Slowed. |
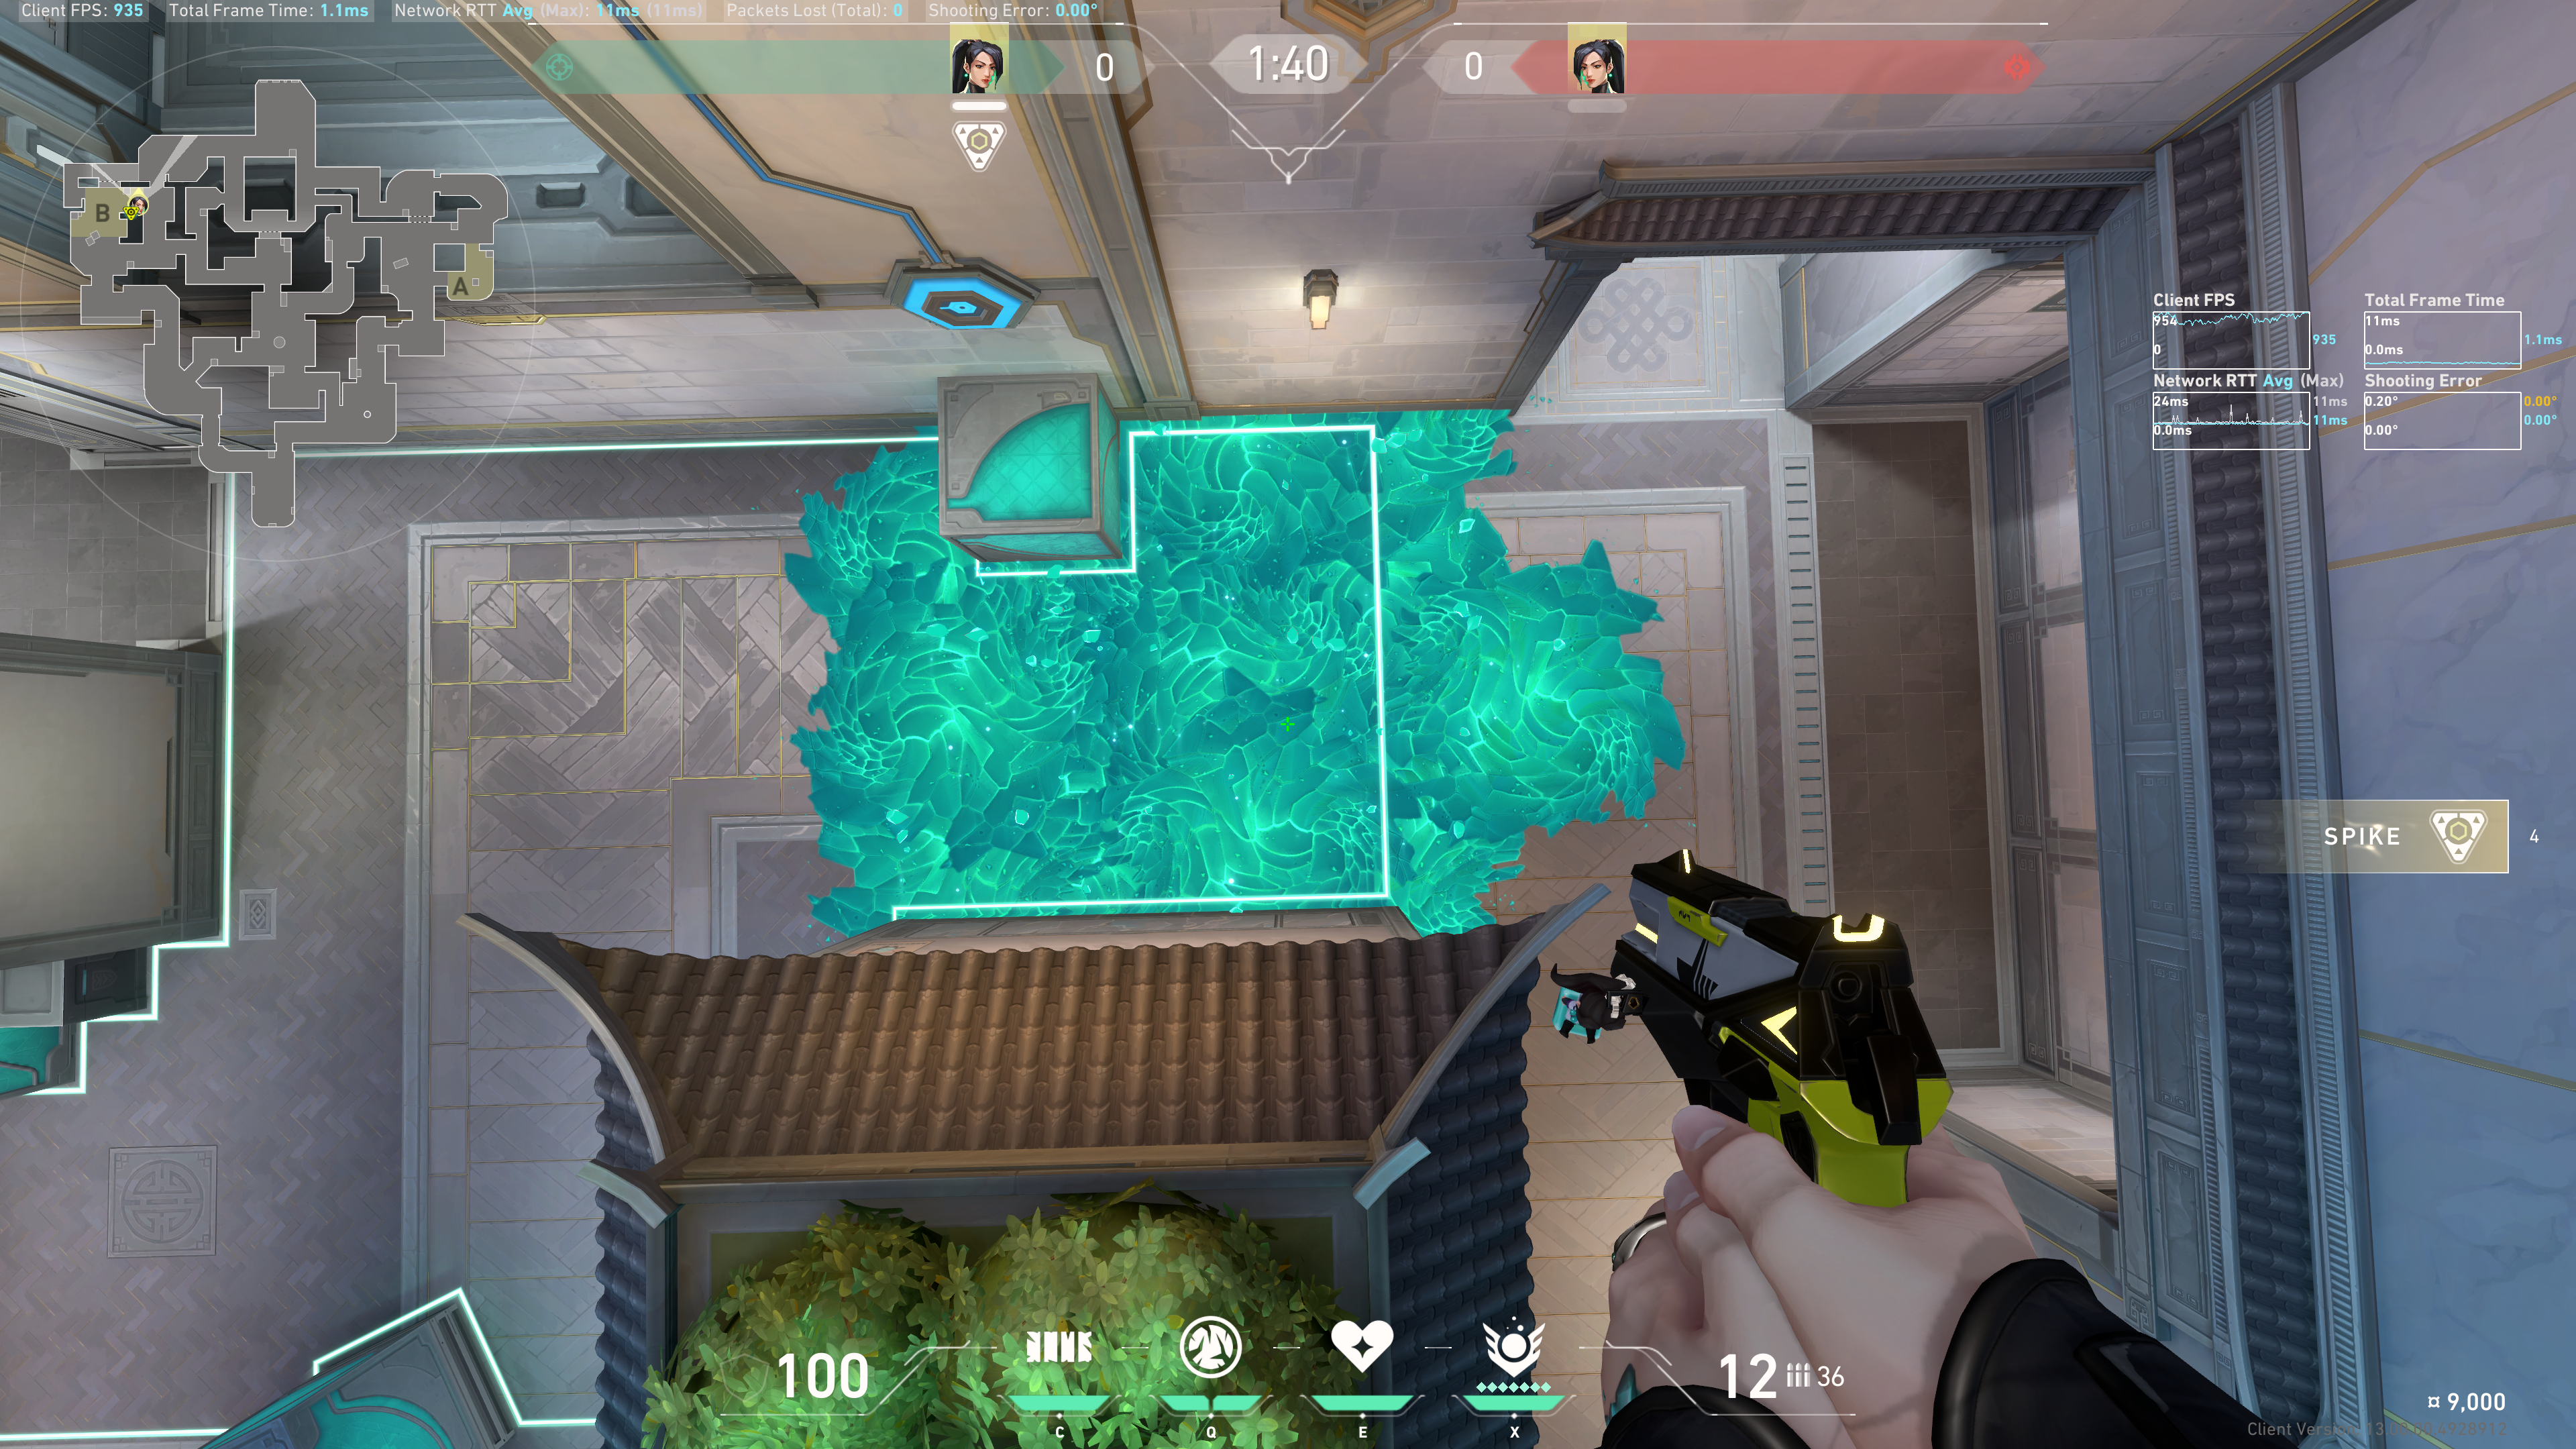
Example result (2 crosshair lengths):
Right Side
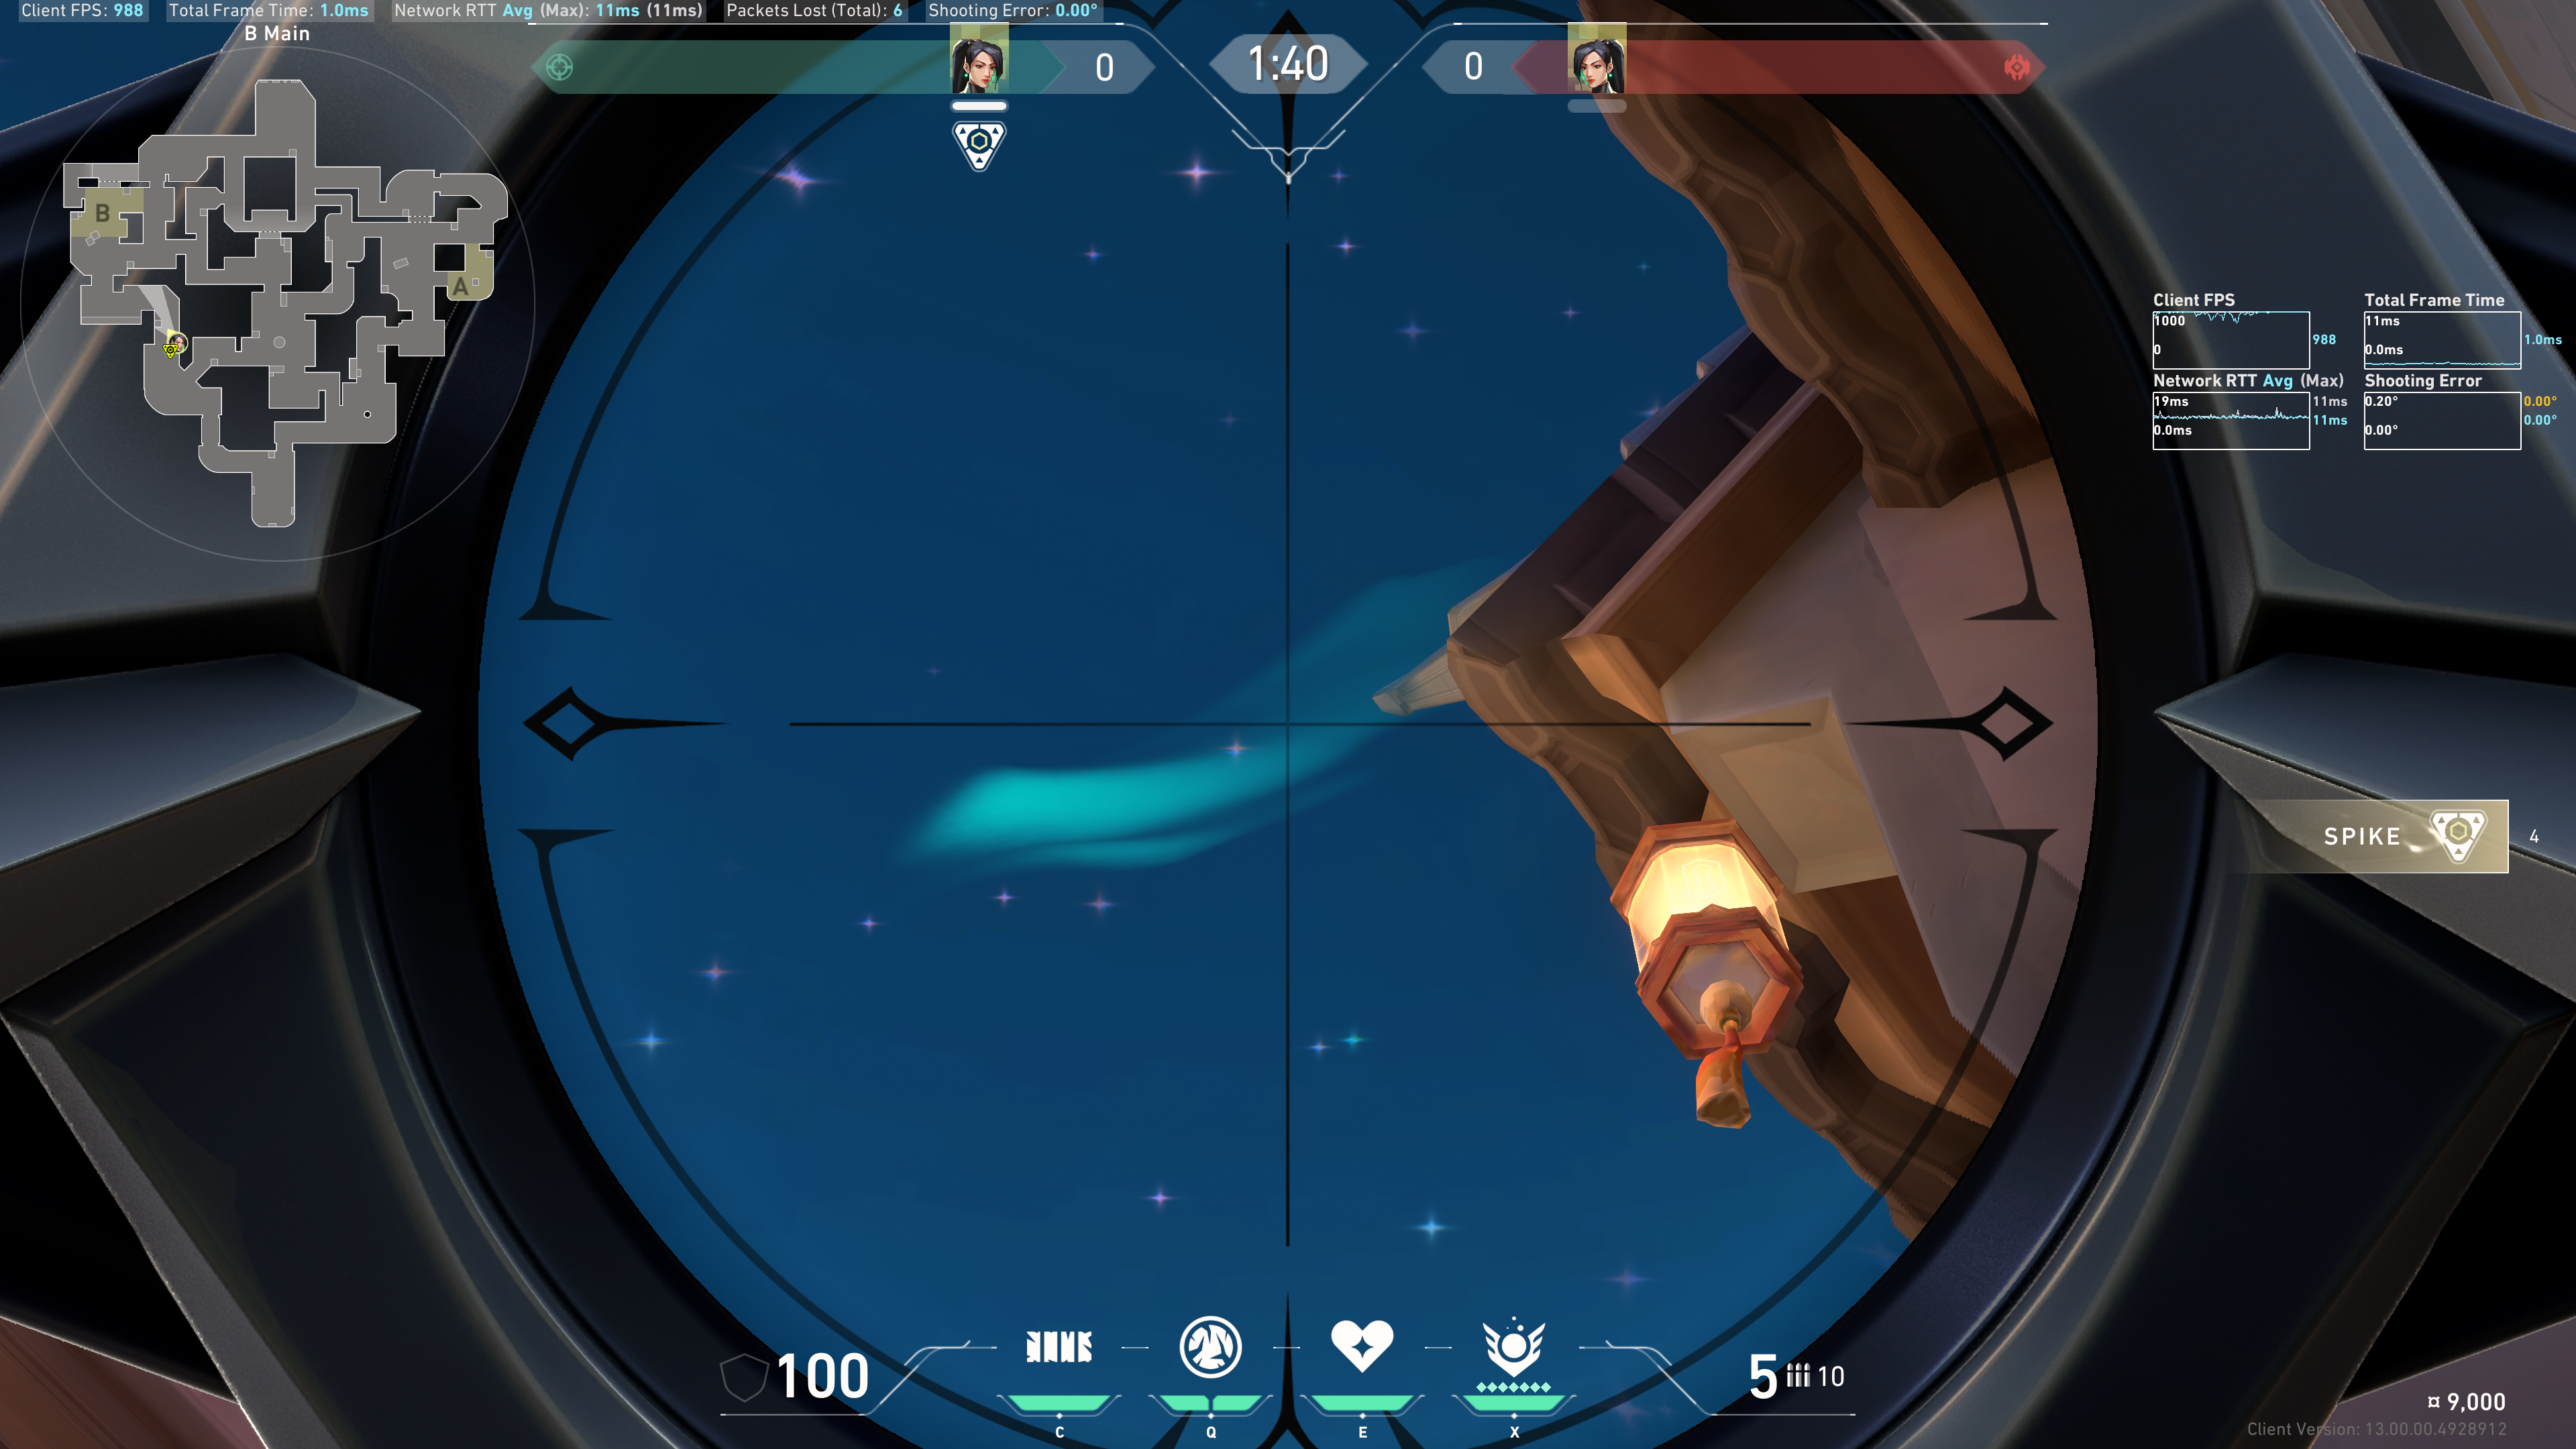
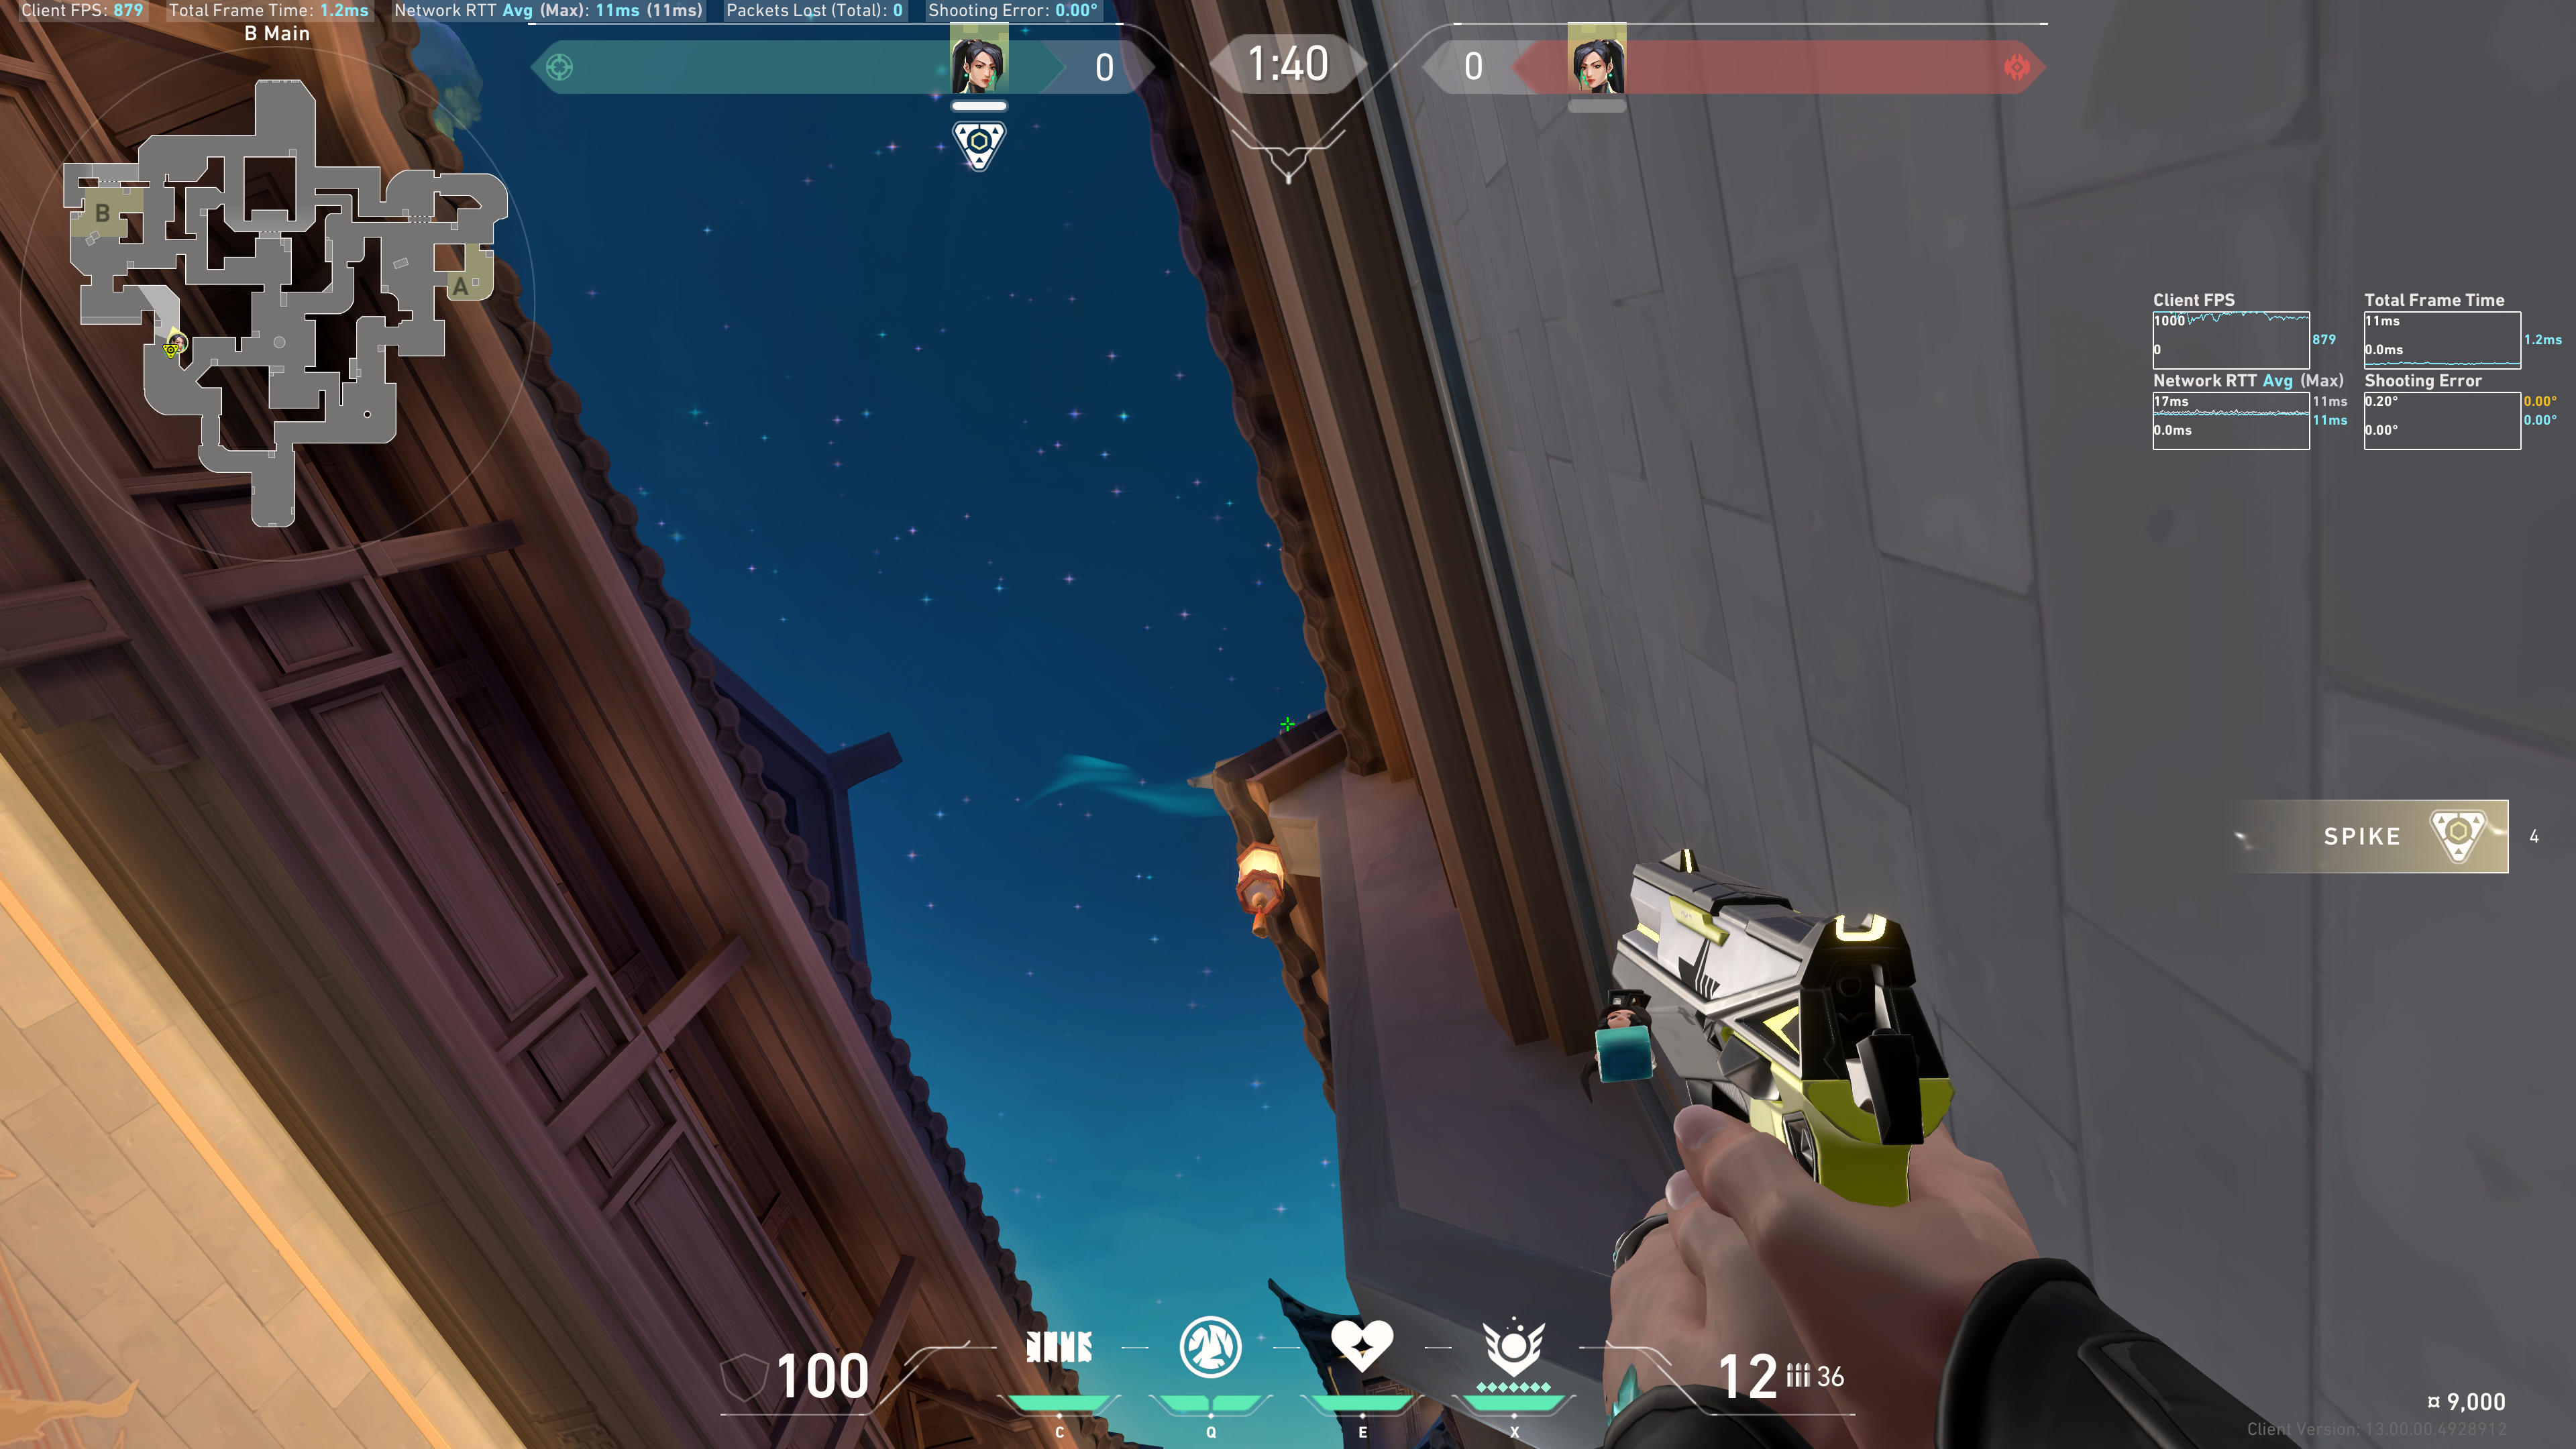
Notice this shining star behind the roof:

Aim 1 crosshair length below that shining star, slightly into the roof:
Example result:
Note: aiming directly at the star is okay too, but sometimes the Ice Orb might bounce off the roof, resulting in slightly suboptimal Ice spread.
Optional: if you also want to target the box:
Aim slightly left of that shining star. Jump and immediately throw:
Example result:
Tradeoffs:
- Jumping makes noise in B Main.
- There is slightly more Ice spread in the space that your team wants to push onto.
Mid
From Tiles
Tuck between this wall and the barrier:
To Bend / A Link
Notice this corner of the building:

The bottom left HUD line to the left of the Wall icon, line up the end of the right line with that corner:
Result:
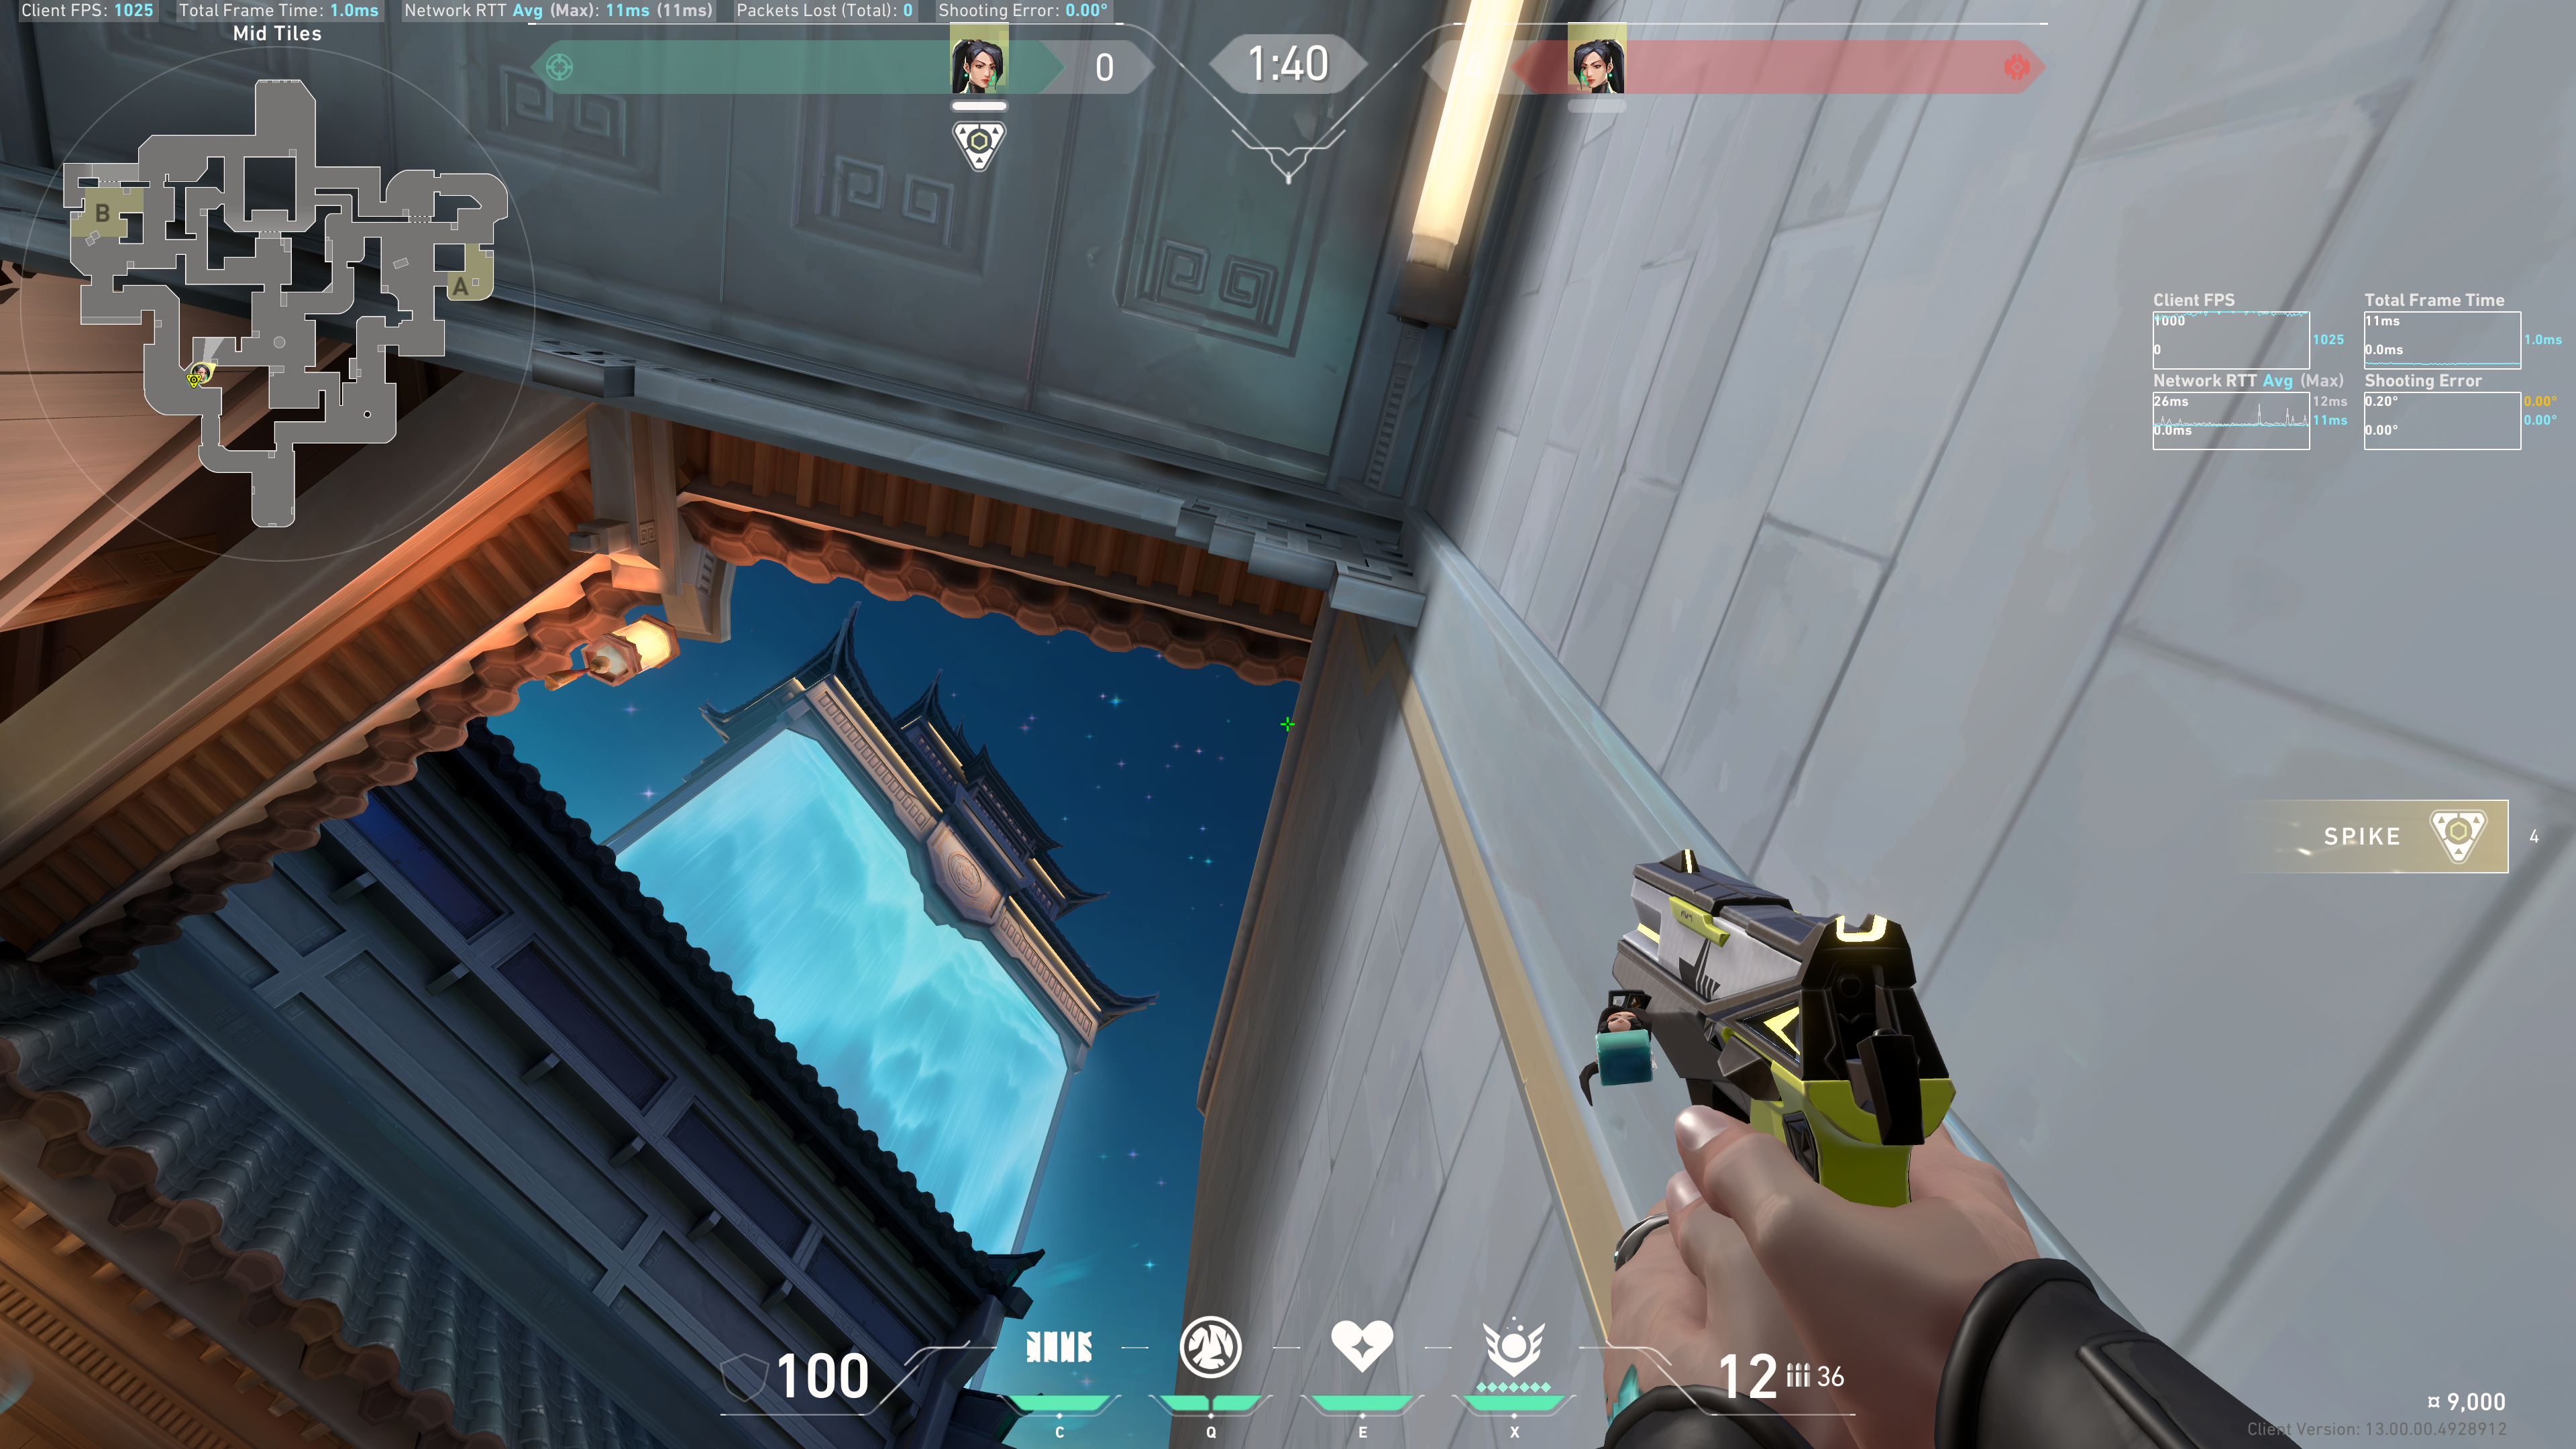
To Bottom Mid
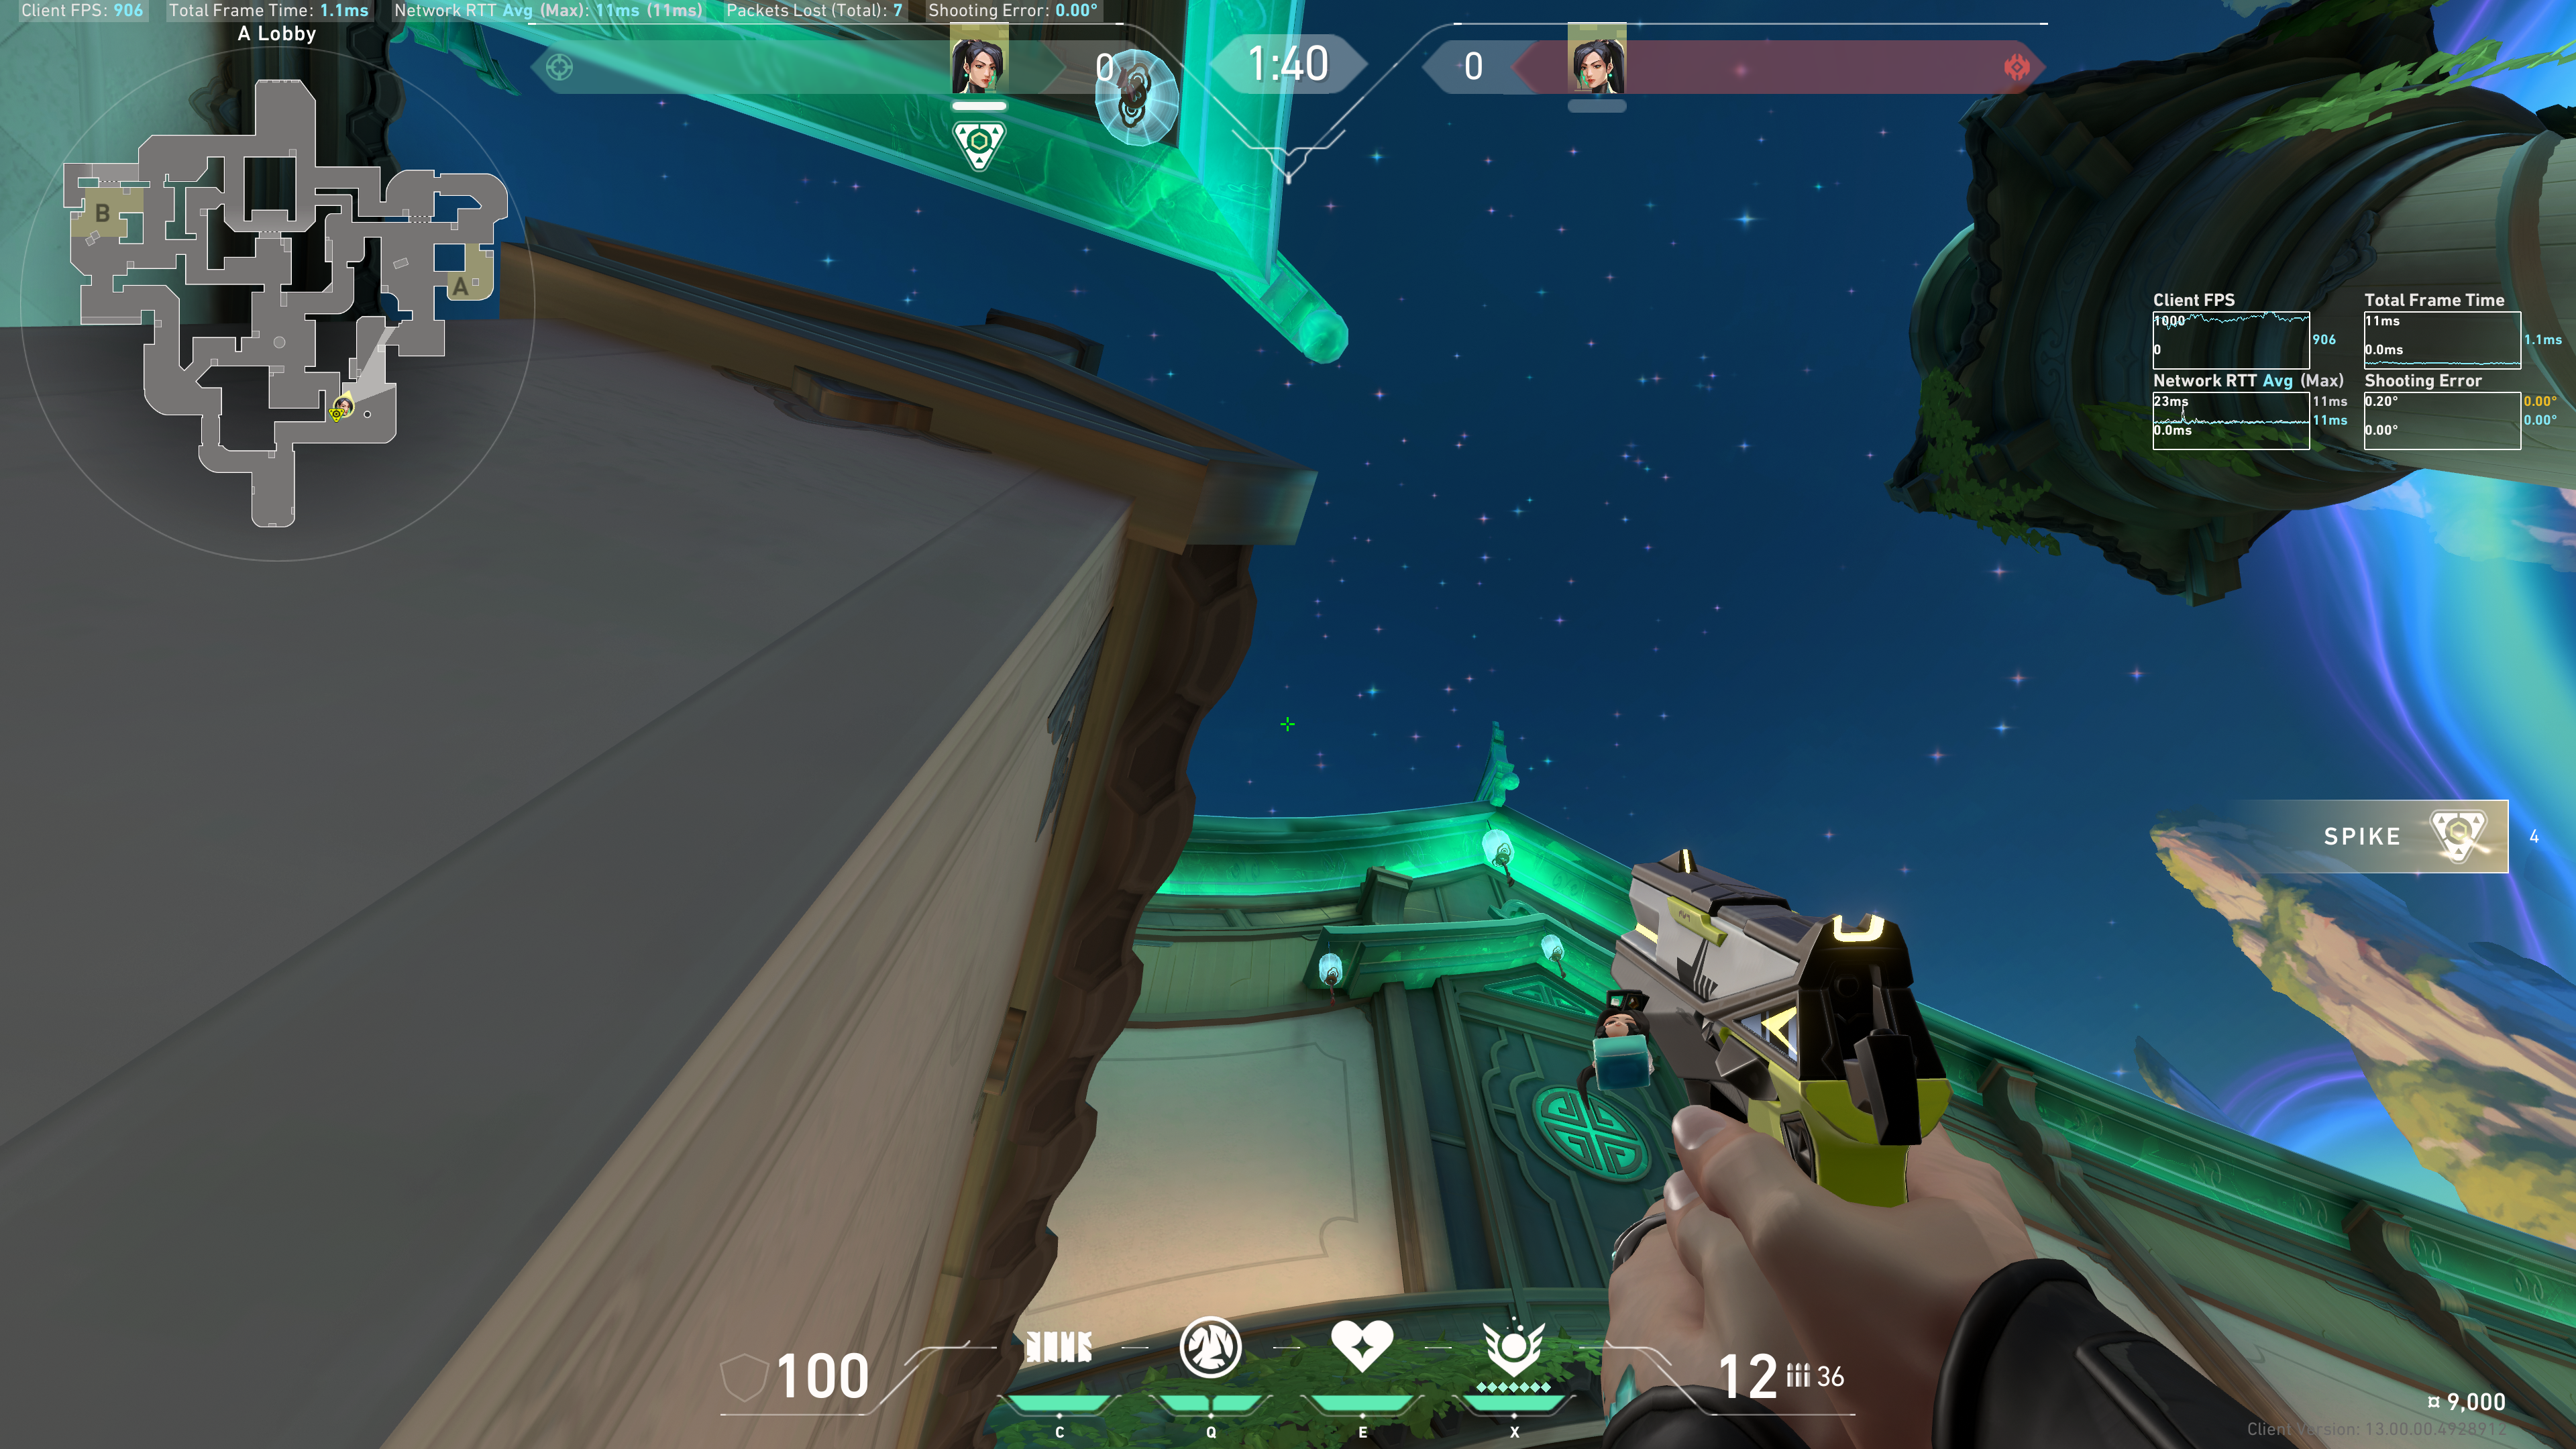
Notice this star in the sky:
Aim below that star until your crosshair is slightly above the building's roof:
Example result:
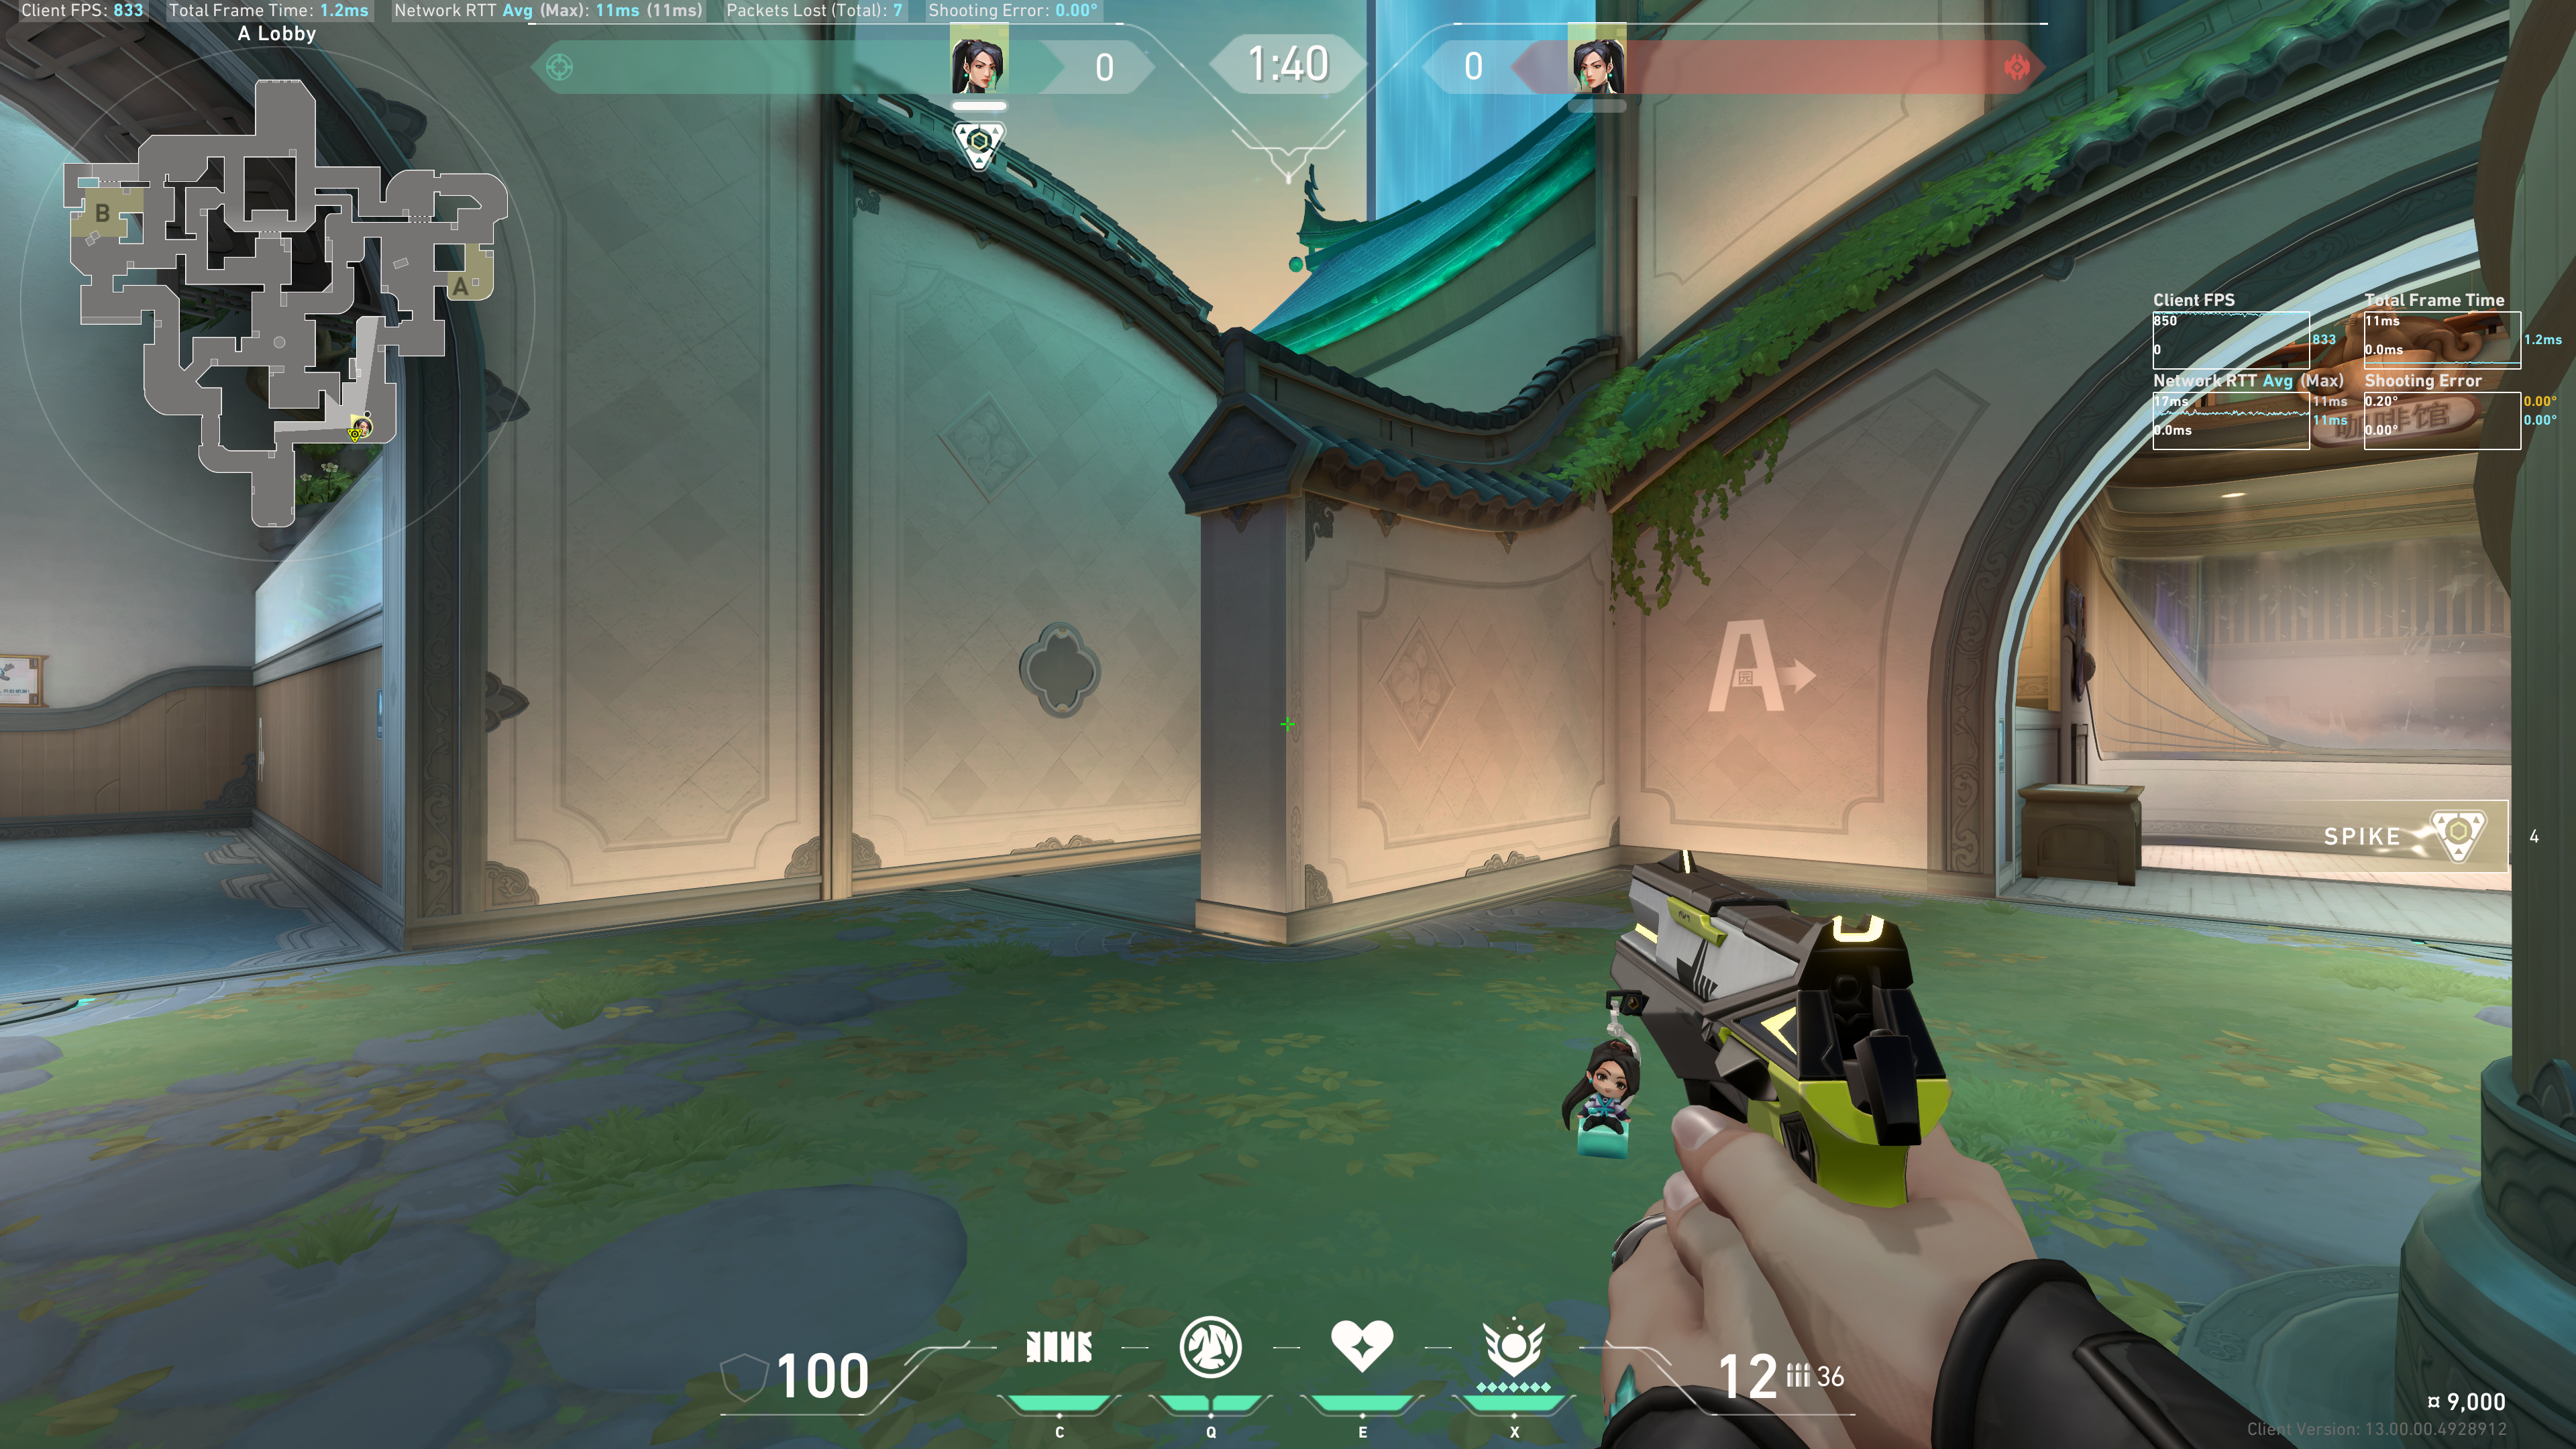
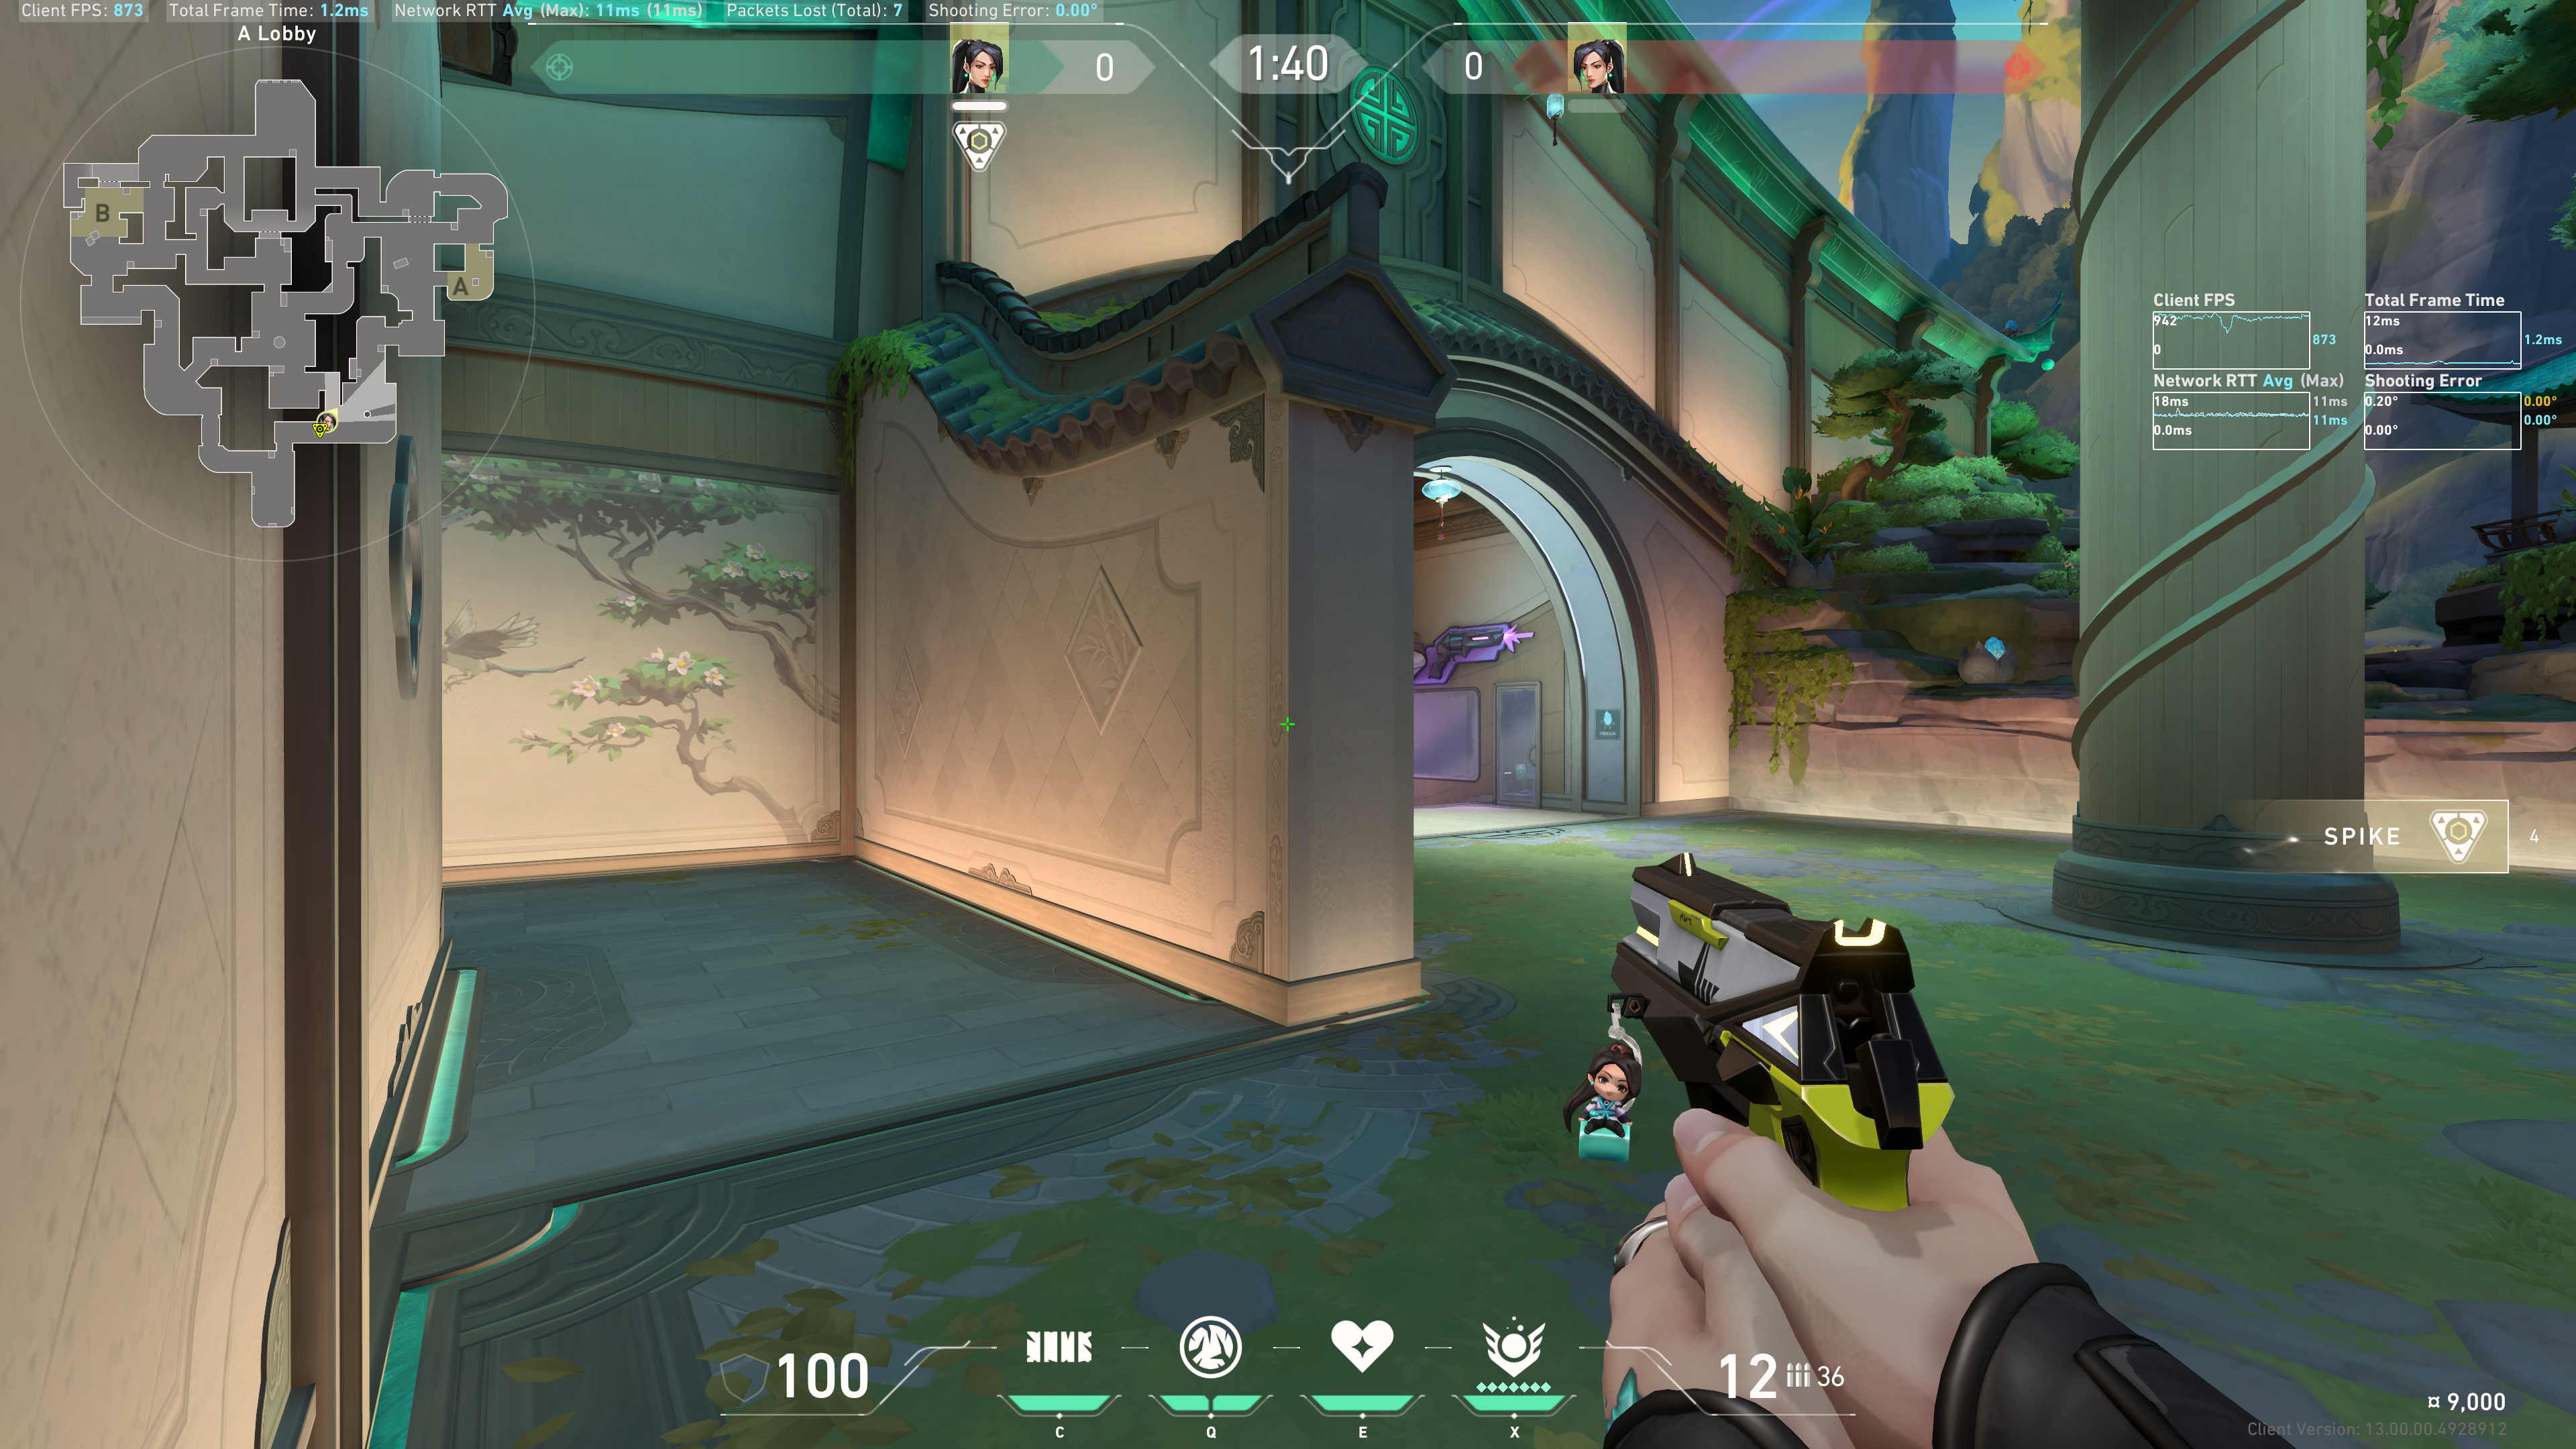
From A Lobby
Tuck into the corner of this wall:
To Bend / A Link
Aim in the middle of this roof shingle, and on the edge (so it doesn't bounce back at you):
Example result:
To Bottom Mid
Aim in between these two stars, about 1 crosshair length above:
Example result:
Attack Door Lineups
A Site
Tuck into this corner:
Notice the tip of this building:

Line up the enemy round count with the tip of that building:
B Site
Tuck into this corner (below the platform):
Notice the edge of the roof shingle, the last pentagon in the weave:
The bottom semi-colon of the round timer, line it up with the top left corner of that pentagon: